

2020 年如何编写 React 测试 - 第一部分
使用 React 推荐库编写 React 测试 — Jest和React 测试库,适合完全初学者。
来自https://reactjs.org/docs/test-utils.html#overview
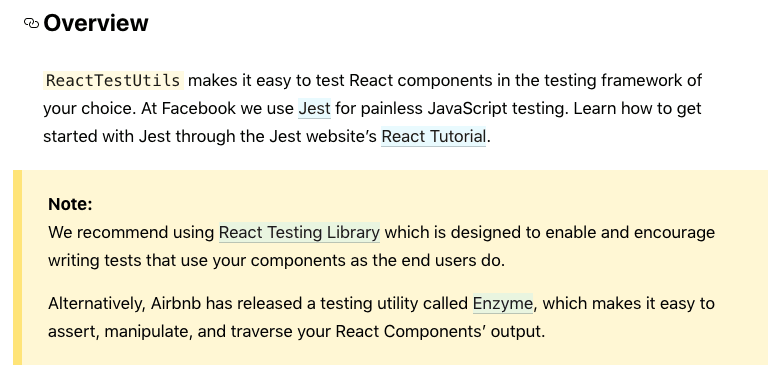
本文旨在帮助那些刚开始学习 React 并想知道如何为 React 应用编写简单测试的人。就像大多数人开始使用 .js 开发 React 应用一样create-react-app,我也会从这里入手。
首先,让我们从默认示例开始。
默认依赖项create-react-app(2020/05/22)
"dependencies": {
    "@testing-library/jest-dom": "^4.2.4",
    "@testing-library/react": "^9.3.2",
    "@testing-library/user-event": "^7.1.2",
    "react": "^16.13.1",
    "react-dom": "^16.13.1",
    "react-scripts": "3.4.1"
  }
我们已经编写了一个测试题来帮助你入门。
// src/App.test.js
import React from 'react';
import { render } from '@testing-library/react';
import App from './App';

test('renders learn react link', () => {
  const { getByText } = render(<App />); //render is from @testing-library/react
  const linkElement = getByText(/learn react/i);
  expect(linkElement).toBeInTheDocument(); //expect assertion is from Jest
});
运行该命令后$ yarn test App,您将看到类似如下的结果:

默认create-react-app设置下,无需安装或配置任何内容即可开始编写测试。
从上面的例子我们可以学到——
-
我应该把测试文件放在哪里?如何放置? ——正如你所看到的,
App.test.js文件放在App.js同一个文件夹的相邻位置,文件名在组件名称.test.js后加上了后缀。这是团队建议的默认约定(链接在此)。Appcreate-react-app -
Jest和React Testing Library是测试背后的工具链。它们默认都包含在 create-react-app 中。
// setupTests.js
// Jest is importing from a global setup file if you wonder
import '@testing-library/jest-dom/extend-expect';
其次,为 NavBar 组件编写测试。
我正在创建一个NavBar包含链接和徽标的组件。
首先,我会先编写测试,而不编写实际的组件(测试驱动开发)。
// navBar.test.js
import React from 'react';
// use "screen" - a newer way to utilize query in 2020
import { render, screen } from '@testing-library/react';
import NavBar from './navBar'; // component to test

test('render about link', () => {
  render(<NavBar />);
  expect(screen.getByText(/about/)).toBeInTheDocument();
})
navBar.js由于我还没有在组件中编写任何代码,因此测试会首先失败。
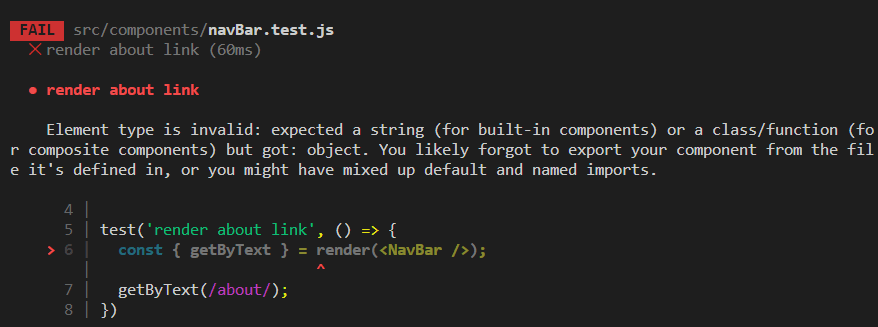
使用以下代码后navBar.js,测试应该可以通过了。
// navBar.js
import React from 'react';

const NavBar = () => (
  <div className="navbar">
    <a href="#">
      about
    </a>
  </div>
);

export default NavBar;
现在,你应该学习:
expect( ... ).toBeInTheDocument()断言来自 Jest。render(<NavBar />);它screen.getByText(/about/)来自测试库。- Jest 和 React Testing Library 协同工作,使在 React 中编写测试变得容易。
-
screen.getByText(/about/)使用“getByText”而不是按类名选择,是因为 React Testing Library 秉持着以用户体验而非实现细节为中心的理念。 -
如需了解更多扩展和修改测试的内容,您可以查看以下资源:
现在让我们扩展测试和组件,使其更贴近实际应用——
// navBar.test.js
import React from 'react';
import { render, screen } from '@testing-library/react';
import NavBar from './navBar';

// include as many test cases as you want here
const links = [
  { text: 'Home', location: "/" },
  { text: 'Contact', location: "/contact" },
  { text: 'About', location: "/about" },
  { text: 'Search', location: "/search" },
];

// I use test.each to iterate the test cases above
test.each(links)(
  "Check if Nav Bar have %s link.",
  (link) => {
    render(<NavBar />);
//Ensure the text is in the dom, will throw error it can't find
    const linkDom = screen.getByText(link.text);

//use jest assertion to verify the link property
    expect(linkDom).toHaveAttribute("href", link.location);
  }
);

test('Check if have logo and link to home page', () => {
  render(<NavBar />);
        // get by TestId define in the navBar
    const logoDom = screen.getByTestId(/company-logo/);
        // check the link location
    expect(logoDom).toHaveAttribute("href", "/");
    //check the logo image
  expect(screen.getByAltText(/Company Logo/)).toBeInTheDocument();
});
这就是导航栏组件通常的样子(可能需要添加一些样式)。
// navBar.js
import React from 'react';

const NavBar = () => (
  <div className="navbar">
    <a href="/" data-testid="company-logo">
      <img src="/logo.png" alt="Company Logo" />
    </a>

    <ul>
      <li>
        <a href="/"> Home </a>
      </li>
      <li>
        <a href="/about"> About </a>
      </li>
      <li>
        <a href="/contact"> Contact </a>
      </li>
      <li>
        <a href="/search"> Search </a>
      </li>
    </ul>
  </div>
);

export default NavBar;
第三,编写注册表单组件测试。
写完静态内容的测试之后,让我们来写一个动态内容(例如注册表单)的测试。
首先,让我们用测试驱动开发(TDD)的方式思考——这个注册表单需要包含哪些内容(无论它看起来如何):
- 姓名输入框,只允许输入长度为 3 到 30 个字符的字符串。
- 一个用于输入电子邮件地址的字段,可以检查该电子邮件地址是否有效。
- 密码输入框,可以检查密码的复杂性(至少包含 1 个数字、1 个小写字母、1 个大写字母和 1 个特殊字符)。
- 提交按钮。
- 以上3个输入项均为必填项,不能为空。
现在,我们来编写测试。
/*  Prepare some test cases, ensure 90% edge cases are covered.
    You can always change your test cases to fit your standard
*/
const entries = [
  { name: 'John', email: 'john_doe@yahoo', password: 'helloworld' },
  { name: 'Jo', email: 'jo.msn.com', password: 'pa$$W0rd' },
  { name: '', email: 'marry123@test.com', password: '123WX&abcd' },
  { name: 'kent'.repeat(10), email: 'kent@testing.com', password: 'w%oRD123yes' },
  { name: 'Robert', email: 'robert_bell@example.com', password: 'r&bsEc234E' },
]
接下来,构建测试的框架。
// signupForm.test.js
// this mostly a input validate test
describe('Input validate', () => {
  /*
   I use test.each to iterate every case again
   I need use 'async' here because wait for
   validation is await function
  */
  test.each(entries)('test with %s entry', async (entry) => {
    ...

    })
})
现在,让我们在测试中构建模块。
// signupForm.test.js
...
test.each(entries)('test with %s entry', async (entry) => {
//render the component first (it will clean up for every iteration
    render(<SignupForm />);

/*  grab all the input elements.
I use 2 queries here because sometimes you can choose
how your UI look (with or without Label text) without
breaking the tests
*/
    const nameInput = screen.queryByLabelText(/name/i)
      || screen.queryByPlaceholderText(/name/i);
    const emailInput = screen.getByLabelText(/email/i)
      || screen.queryByPlaceholderText(/email/i);
    const passwordInput = screen.getByLabelText(/password/i)
      || screen.queryByPlaceholderText(/password/i);

/* use fireEvent.change and fireEvent.blur to change name input value
and trigger the validation
*/
    fireEvent.change(nameInput, { target: { value: entry.name } });
    fireEvent.blur(nameInput);

/* first if-statement to check whether the name is input.
second if-statement to check whether the name is valid.
'checkName' is a utility function you can define by yourself.
I use console.log here to show what is being checked.
*/
if (entry.name.length === 0) {
      expect(await screen.findByText(/name is required/i)).not.toBeNull();
      console.log('name is required.');
    }
    else if (!checkName(entry.name)) {
      // if the name is invalid, error msg will showup somewhere in the form
      expect(await screen.findByText(/invalid name/i)).not.toBeNull();
      console.log(entry.name + ' is invalid name.');
    };

// With a similar structure, you can continue building the rest of the test.
        ...

/*  Remember to add this line at the end of your test to
avoid act wrapping warning.
More detail please checkout Kent C.Dodds's post:
(He is the creator of Testing Library)
https://kentcdodds.com/blog/fix-the-not-wrapped-in-act-warning
*/
     await act(() => Promise.resolve());
})
...
完整的测试代码请点击此处查看。
好了,现在测试完成了(也许我们会回来做一些调整,但现在让我们继续),让我们编写组件。
// signupForm.js
import React from 'react';
/*
I borrow the sample code from formik library with some adjustments
https://jaredpalmer.com/formik/docs/overview#the-gist
*/
import { Formik } from 'formik';
/*
For validation check, I wrote 3 custom functions.
(I use the same functions in test)
*/
import {
  checkName,
  checkEmail,
  checkPassword,
} from '../utilities/check';

const SignupForm = () => (
  <div>
    <h1>Anywhere in your app!</h1>
    <Formik
      initialValues={{ name: '', email: '', password: '' }}
      validate={values => {
        const errors = {};
        if (!values.name) {
          errors.name = 'Name is Required'
        } else if (!checkName(values.name)) {
          errors.name = `invalid name`;
        }

        if (!values.email) {
          errors.email = 'Email is Required';
        }
        else if (!checkEmail(values.email)) {
          errors.email = 'Invalid email address';
        }

        if (!values.password) {
          errors.password = 'Password is Required';
        } else if (!checkPassword(values.password)) {
          errors.password = 'Password is too simple';
        }

        return errors;
      }}
      onSubmit={(values, { setSubmitting }) => {
        setTimeout(() => {
          alert(JSON.stringify(values, null, 2));
          setSubmitting(false);
        }, 400);
      }}
    >
      {({
        values,
        errors,
        touched,
        handleChange,
        handleBlur,
        handleSubmit,
        isSubmitting,
        /* and other goodies */
      }) => (
          <form onSubmit={handleSubmit}>
            <label>
              Name:
            <input
                type="text"
                name="name"
                placeholder="Enter your name here"
                onChange={handleChange}
                onBlur={handleBlur}
                value={values.name}
              />
            </label>

            <p style={{ 'color': 'red' }}>
              {errors.name && touched.name && errors.name}
            </p>

            <label>
              Email:
            <input
                type="email"
                name="email"
                placeholder="Your Email Address"
                onChange={handleChange}
                onBlur={handleBlur}
                value={values.email}
              />
            </label>
            <p style={{ 'color': 'red' }}>
              {errors.email && touched.email && errors.email}
            </p>

            <label>
              Password:
            <input
                type="password"
                name="password"
                placeholder="password here"
                onChange={handleChange}
                onBlur={handleBlur}
                value={values.password}
              />
            </label>

            <p style={{ 'color': 'red' }}>
              {errors.password && touched.password && errors.password}
            </p>

            <button type="submit" disabled={isSubmitting}>
              Submit
          </button>
          </form>
        )}
    </Formik>
  </div>
);

export default SignupForm;
表单看起来会和下面类似(样式不多,但足以满足我们的需求),如果输入错误,错误信息会显示在输入框下方:

如果你完成了上面的测试,现在所有测试都应该通过了。yarn test --verbose在命令行中运行,你应该会看到类似这样的输出。使用详细模式和 console.log 信息,你可以看到每个测试用例是如何被测试的,以及哪个用例是正确的,哪个用例是错误的。
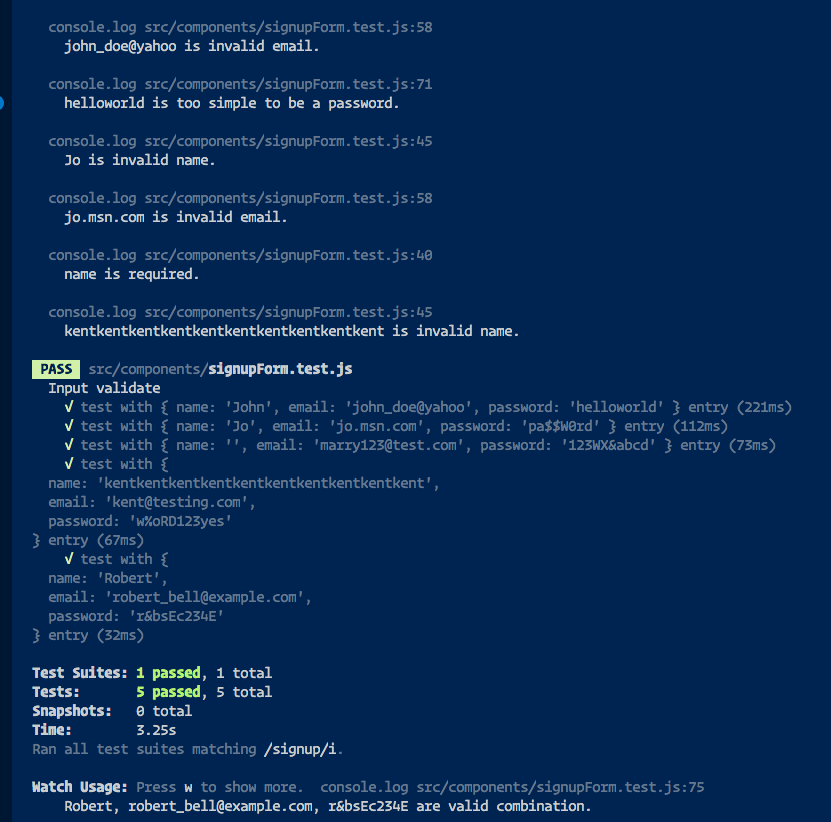
如需更多测试代码示例和不同案例,请查看我的仓库(链接在此)。

结语。
对于初学者来说,一下子掌握所有内容是很难的,所以如果觉得压力太大,就放慢速度。我花了至少一周的时间才学会基础知识,而这仅仅是编写 React 应用测试的开始。
这是一个很难掌握的话题,但如果你想成为一名专业的前端开发人员,我认为值得花些时间学习它。
好消息是,你已经有了一个良好的开端,现在你应该知道如何利用Jest和React Testing Library为你的 React 组件编写测试,并且有了这个良好的基础,你可以开始探索其他库和解决方案。
如果这篇文章反响不错,我计划再写一篇文章,介绍一些更高级的例子。再次感谢您抽出时间阅读。
本文参考的资源:
- Kent C. Dodds撰写的《React 测试中的常见错误》
- 修复Kent C.Dodds提出的未包装 Act 警告
- 我从 Enzyme 迁移到 React Testing Library 的经验(关于 React Testing 应该使用哪个库的看法)
- 测试库使用指南(更多资源请了解 React 测试库)
- 开发者的内心世界——重构和调试 React 测试作者:Johannes Kettmann(我就是从这篇文章开始学习 React 测试的,但它要深入得多,我以后会写更多相关内容)
特别感谢ooloo.io和Johannes Kettmann:
文章来源:https://dev.to/kelvin9877/how-to-write-tests-for-react-in-2020-4oai对于想要成为一名合格的前端开发人员的人来说,我推荐ooloo.io的课程。它介绍了一些概念,例如:创建像素级完美设计、规划和实现复杂的 UI 组件、在 IDE 中调试以及编写集成测试,这些内容在大多数在线教程或课程中并不常见。是的,我从这门课程中获得了许多灵感,最终帮助我完成了这篇文章。