


穿越宇宙
一次三分钟的宇宙网络体验。
https://www.across-universe.com/
执照
署名-非商业性使用-相同方式共享 3.0 未本地化版本 (CC BY-NC-SA 3.0)
参见:https ://creativecommons.org/licenses/by-nc-sa/3.0/
安装
npm install
发射
开发
npm run-script start-dev
产品
npm start
这篇文章最初发布在我的个人博客上。
我制作了一个3D体验,让你能够通过浏览器——真的——遨游宇宙。它既壮观又美丽!它只使用了网页技术:HTML、CSS和Javascript。做这个副项目真的太有趣了!
在继续阅读本文之前,请停止一切操作,打开 Chrome 浏览器,全屏显示,准备一些爆米花,体验穿越宇宙的奇妙之旅!
完成了吗?你喜欢吗?如果你想知道我为什么以及如何做到这一点,那么你将在本文的其余部分找到答案!
这件事是我上周开始的。像往常一样,我在网上闲逛。然后我偶然发现了一个著名电子游戏的视频。
在这个视频里,你可以看到一个全屏显示的虫洞。我本来想写一篇关于用 JavaScript 实现 3D 效果的文章,然后突然灵光一闪!这篇文章的示例代码就是在浏览器中创建一个虫洞。

请记住,当时我对 ThreeJS 或 3D 对象管理一窍不通。但这恰恰是好事!来吧,是时候建造一个虫洞了。
我原本想写一篇“五分钟搞定”的ThreeJS入门指南。不过,我最后只打算给你一个30秒的简要介绍。
ThreeJS 是一个由Mr.doob创建的 JavaScript 库,它允许你直接在浏览器中操作 3D 对象。实际上,你需要理解的是,ThreeJS通过 JavaScript让你可以在HTML5 Canvas中使用WebGL。
WebGL 让 3D 渲染成为可能!ThreeJS 通过 JavaScript 驱动 WebGL,从而实现 3D 渲染。更神奇的是,它无需任何安装或插件。
为了让您更具体地理解,ThreeJS 中显示 3D 需要三个基本元素。
让我们来看一张来自网络的图画,以便更好地理解。

ThreeJS 中的“Hello World”程序看起来是这样的!
// instantiate scene, camera and renderer
const scene = new THREE.Scene()
const camera = new THREE.PerspectiveCamera(75, window.innerWidth / window.innerHeight, 0.1, 1000)
const renderer = new THREE.WebGLRenderer()

// build a red cube mesh with default box geometry and basic material
const geometry = new THREE.BoxGeometry()
const material = new THREE.MeshBasicMaterial({ color: 0xff0000 })
const cube = new THREE.Mesh(geometry, material)

// add the mesh in the scene
scene.add(cube)

// set the camera in front of the cube
camera.position.z = 5

// set the size of the renderer in fullscreen
renderer.setSize(window.innerWidth, window.innerHeight)

// put the renderer in the HTML page (canvas)
document.body.appendChild(renderer.domElement)

// game loop rendering each frame
function animate() {
    requestAnimationFrame(animate)

    // rotating the cube at each frame
    cube.rotation.x += 0.01;
    cube.rotation.y += 0.01;

   // render a frame from the pov of the camera
    renderer.render(scene, camera)
}

animate()

如果你对这个主题充满热情,并且想了解网格、材质、纹理以及其他所有相关知识,我会专门写一篇文章来讲解。今天我们聚焦太空!
既然我们已经了解了基地的运作方式,现在是时候解决虫洞的问题了。
我的第一个实现方案非常简单,也很直观。在场景中央创建一个圆柱形物体,然后让摄像机穿过它。从摄像机的角度来看,我认为这种错觉效果会非常完美。简单、快速、有效。
好的,那我们把它写下来。
const scene = new THREE.Scene()
const camera = new THREE.PerspectiveCamera(75, window.innerWidth / window.innerHeight, 0.1, 1000)
const renderer = new THREE.WebGLRenderer({ antialias: true, alpha: true })

const geometry = new THREE.CylinderGeometry(5, 5, 20, 32)
const material = new THREE.MeshBasicMaterial({ wireframe: true })
const cylinder = new THREE.Mesh(geometry, material)
const light = new THREE.PointLight(0xFFFF00)
light.position.set(0, 0, 0)

scene.add(light)
scene.add(cylinder)

camera.position.z = 0
camera.position.x = 0
camera.position.y = 15
camera.lookAt(0, 0, 0)

cylinder.flipSided = true
renderer.setSize(window.innerWidth, window.innerHeight)

document.body.appendChild(renderer.domElement)

function animate() {
    requestAnimationFrame(animate)
    cylinder.rotation.y += 0.01;
    controls.update();
    renderer.render(scene, camera)
}

animate()

还不错!我只需要添加一些太空纹理进去,然后砰的一声,就大功告成了。至少我是这么想的。
在进行纹理测试并将相机移入内部时,我很快发现了一些问题。
我当时几乎要放弃了,然后我突然想到一个主意。大脑会试图理解它所看到的一切。正因为如此,我们才有办法欺骗大脑。
这个想法很简单。把摄像机固定在圆柱体入口处,然后移动纹理!纹理的移动会让人感觉像是摄像机在移动。如果大脑看到星星在移动,就会误以为自身也在移动。
由于用户脸部前方的物体呈球形,这种错觉效果应该会特别好。为了确保效果完美,对整个物体进行轻微旋转可以进一步增强错觉。
令我惊讶的是,从技术上讲,改变立方体的纹理非常简单。欺骗大脑甚至比我想象的还要容易。

所以我们只需要添加一个纹理,将其应用到我们的网格上,并让它在游戏循环的每一帧都移动。我们把它记下来。
// dark space full of stars
const darkCylinderTexture = new THREE.TextureLoader().load('/images/dark_space_texture.jpg')
// repeat the texture in different ways to make sure the effect is infinite
darkCylinderTexture.wrapS = THREE.RepeatWrapping
darkCylinderTexture.wrapT = THREE.MirroredRepeatWrapping
darkCylinderTexture.repeat.set(1, 1)
// building the material with the texture
// we only need the inside of the cylinder to be textured
const darkCylinderMaterial = new THREE.MeshLambertMaterial({
    side: THREE.BackSide,
    map: darkCylinderTexture
})
// building and adding mesh to the scene
const darkCylinder = new THREE.Mesh(
    new THREE.CylinderBufferGeometry(1, 1, 20, 12, 0, true),
    darkCylinderMaterial
)
scene.add(darkCylinder)
function animate() {
    requestAnimationFrame(animate)

    // move forward the texture
    darkCylinderTexture.offset.y -= 0.0010;
    // rotation of the texture
    darkCylinderTexture.offset.x -= 0.0005;
    renderer.render(scene, camera)
}
animate()
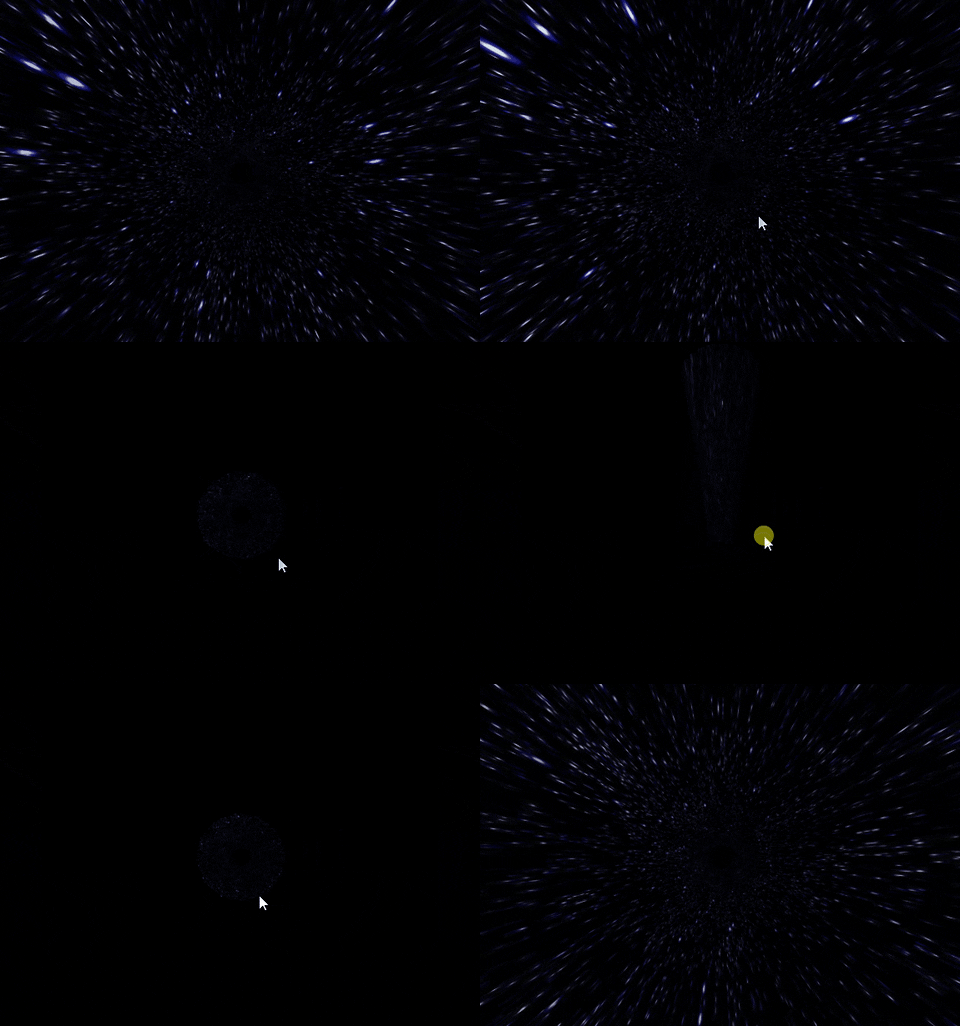
因为GIF压缩,看起来有点糟糕,但网页上的动态效果是真实的!在项目的后期,我才意识到这种(移动纹理)的方法其实很普遍,很多人都在用。我还以为自己发明了什么呢(哈哈),不过那是以后的事了!
于是,我像个反社会人格者一样,长时间盯着这个隧道效应。这时,原本只打算写一篇文章举一个例子的计划也随之瓦解了。我的脑海里瞬间涌现出上千个想法。
我们要去做一个副业项目。
现在我的想法是穿越A宇宙,通过一个会产生诸多效应的虫洞,然后降落在B宇宙。是的,我已经在进行一个多元宇宙项目了。
我还想让这一切更具电影感,所以这意味着要有一个迷你故事(文字)和音乐!这将是一场演出!
首先,我需要色彩!星云、气体、超新星、生命!所以我开始寻找合适的星云纹理。然后我找到了。
为了进行测试,我创建了第二个圆柱体,并将其放置在与第一个圆柱体完全相同的位置,心想它会遮挡住第一个圆柱体。
但还发生了另一件事!

这两个圆柱体恰好位于同一位置,因此它们重叠在一起了!所以它不仅美观,而且还赋予了整个作品深度!
各种可能性再次在我眼前成倍增加。

现在只需要发挥创意了!
既然穿越第一个宇宙的旅程即将完成,现在是时候跃入超空间了!
我的想法是在隧道尽头设置一个闪亮的传送门。然后,大幅加快传送门的移动速度。让闪亮的传送门缓慢靠近,从而营造出我们正在穿越一段真实距离的感觉。
在研究这部分内容的过程中,我接触到了后期处理的概念。这个概念很简单:图像正常渲染后,在显示之前,会经过一个或多个滤镜和特效的处理。
这样就能实现胶片颗粒、故障效果、光晕效果,甚至光照效果。真有意思!那是不是意味着我可以制作一个带有光照效果的球体了?
我们把它记下来!
// building the basic white material for the horizon
const horizonMaterial = new THREE.MeshBasicMaterial({color: 0xffffff})
// building the sphere geometry for the horizon
const horizonGeometry = new THREE.SphereBufferGeometry(0.25, 32, 32)
// baking the mesh with material and geometry
const horizon = new THREE.Mesh(sunGeometry, sunMaterial)
//applying the postprocessing god rays effect to the horizon
const godRaysEffect = new POSTPROCESSING.GodRaysEffect(camera, horizon , {
    height: 480,
    kernelSize: POSTPROCESSING.KernelSize.SMALL,
    density: 1.2,
    decay: 0.92,
    weight: 1,
    exposure: 5,
    samples: 60,
    clampMax: 1.0
})
// postprocessing effect pass instance
const effectPass = new POSTPROCESSING.EffectPass(
    camera,
    godRaysEffect
)
// enable effect pass
effectPass.renderToScreen = true
// we make the effect composer with the renderer itself !
const composer = new POSTPROCESSING.EffectComposer(renderer)
// postprocessing mandatory first render pass
composer.addPass(new POSTPROCESSING.RenderPass(scene, camera))
// postprocessing effect render pass
composer.addPass(effectPass);
// game loop
function animate() {
    requestAnimationFrame(animate)
    // rendering via the composer !
    composer.render()
}
animate()
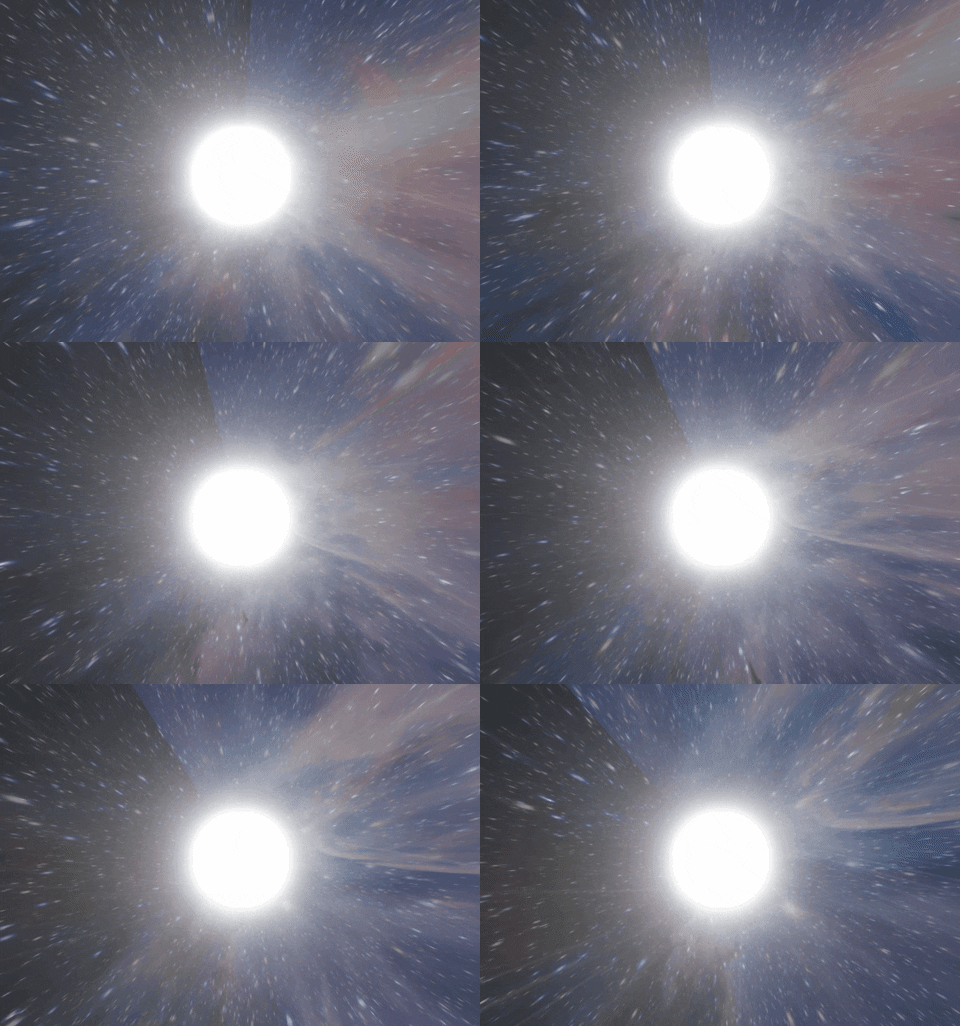
嗯,这看起来真的不错。后期处理技术确实让这部星际旅行作品更加出色。
浏览后期处理文档时,我发现效果器种类繁多。然后,我也不知道怎么回事,就有点儿疯了。我开始把它们全都同时用上。
我想要它们全部!全部!还要更多!

const godRaysEffect = new POSTPROCESSING.GodRaysEffect(camera, horizon, {
    height: 480,
    kernelSize: POSTPROCESSING.KernelSize.SMALL,
    density: 1.2,
    decay: 0.92,
    weight: 1,
    exposure: 5,
    samples: 60,
    clampMax: 1.0
});
const vignetteEffect = new POSTPROCESSING.VignetteEffect({
    darkness: 0.5
})
const depthEffect = new POSTPROCESSING.RealisticBokehEffect({
    blendFunction: POSTPROCESSING.BlendFunction.ADD,
    focus: 2,
    maxBlur: 5
})
const bloomEffect = new POSTPROCESSING.BloomEffect({
    blendFunction: POSTPROCESSING.BlendFunction.ADD,
    kernelSize: POSTPROCESSING.KernelSize.SMALL
});
// postprocessing effect pass instance
const effectPass = new POSTPROCESSING.EffectPass(
    camera,
    bloomEffect,
    vignetteEffect,
    depthEffect,
    godRaysEffect
);

所以,我决定尽快修改方案,只为剩下的项目选择两种特效。首先,因为一次性用太多特效会显得杂乱无章。其次,因为那样看起来就像一个嗑了药的精神分裂症患者放的烟花。
但最重要的是,在不久的将来,我很快就会意识到,这一切都是以性能为代价的。在我的高性能电脑上,一切正常。但当我开始在我的笔记本电脑上进行测试时,我简直要崩溃了。
项目后期,我发现自己不得不删减所有内容来优化场景。即便我已经尽力优化舞台效果,仍然有一些观众遇到了性能问题。作品还在制作中,我得尽快发布!
总之,最后一站:我是如何制作超空间跳跃动画的?这很有意思。答案很简单:Tween.JS!
Tween.JS库的功能虽然单一,但做得非常出色。它接收一个对象中的值,并将其逐渐移动到另一个对象中。
你会告诉我用原生 JavaScript 就能轻松实现,你说得没错。但 Tween.js 的功能远不止这些。
首先,用于实现数值之间转换(无论复杂与否)的计算在内部都经过了极其优化。
此外,Tween.JS 还提供了“onUpdate”或“onComplete”等许多非常有用的方法,使我们能够在动画的关键时刻创建事件。
最后,Tween.JS 还自带缓动系统。它不再是枯燥乏味、不真实的线性动画,而是呈现出丰富的细节变化。
当我打开页面查看可以做什么时,发现圣诞节提前到了。

以不透明度、纹理运动和圆柱体位置为参数,结合 Tween.JS 缓动动画:我无所不能。我简直成了 JavaScript 版的 3D 特效指挥家。
跃入超空间?简单。我们来写下来。
/**
 * Entrypoint of the horizon event
 * Will be trigger by the click on the horizon
 *
 * @param {Object} event event of the click
 */
function prepareLaunchHorizonEvent(event) {
    event.preventDefault()

    document.getElementById('callToAction').remove()

    somniumAudio.fade(1, 0, 1500)
    oceansAudio.volume(0)
    oceansAudio.play()
    oceansAudio.fade(0, 1, 5000)

    const timeToLaunch = 12500
    const easingHideAndSpeed = TWEEN.Easing.Quintic.In
    const easingRotation = TWEEN.Easing.Quintic.Out

    const slowingTextureRotationDark = new TWEEN.Tween(darkTextureRotation)
        .to({ value: 0.0001 }, timeToLaunch)
        .easing(easingRotation)

    const slowingTextureRotationColorFull = new TWEEN.Tween(colorFullTextureRotation)
        .to({ value: 0.0001 }, timeToLaunch)
        .easing(easingRotation)

    const slowingGlobalRotation = new TWEEN.Tween(globalRotation)
        .to({ value: 0 }, timeToLaunch)
        .easing(easingRotation)

    const reduceBloomEffect = new TWEEN.Tween(bloomEffect.blendMode.opacity)
        .to({ value: 1 }, timeToLaunch)
        .easing(TWEEN.Easing.Elastic.Out)

    const reduceDark = new TWEEN.Tween(darkCylinderMaterial)
        .to({ opacity: 0.1 }, timeToLaunch)
        .easing(easingHideAndSpeed)

    const hideColorFull = new TWEEN.Tween(colorFullCylinderMaterial)
        .to({ opacity: 0 }, timeToLaunch)
        .easing(easingHideAndSpeed)

    const slowingSpeedDark = new TWEEN.Tween(darkMoveForward)
        .to({ value: 0.0001 }, timeToLaunch)
        .easing(easingHideAndSpeed)

    const slowingSpeedColorFull = new TWEEN.Tween(colorFullMoveForward)
        .to({ value: 0.0001 }, timeToLaunch)
        .easing(easingHideAndSpeed)

    // leaving normal space
    reduceBloomEffect.start()
    reduceDark.start()
    hideColorFull.start().onComplete(() => scene.remove(colorFullCylinder))

    // slowing general rotation
    slowingTextureRotationDark.start()
    slowingTextureRotationColorFull.start()
    slowingGlobalRotation.start()

    // slowing general speed
    slowingSpeedDark.start()
    slowingSpeedColorFull.start().onComplete(() => launchHorizonEvent())
}

/**
 * Horizon event
 * Water + Dark cylinder
 */
function launchHorizonEvent() {
    darkTextureRotation.value = 0.0040

    const showDark = new TWEEN.Tween(darkCylinderMaterial)
        .to({ opacity: 1 }, 500)
        .easing(TWEEN.Easing.Circular.Out)

    const showWater = new TWEEN.Tween(waterCylinderMaterial)
        .to({ opacity: 0.3 }, 500)
        .easing(TWEEN.Easing.Circular.Out)

    const speedUpDark = new TWEEN.Tween(darkMoveForward)
        .to({ value: 0.0086 }, 2000)
        .easing(TWEEN.Easing.Elastic.Out)

    const speedUpWater = new TWEEN.Tween(waterMoveForward)
        .to({ value: 0.0156 }, 2000)
        .easing(TWEEN.Easing.Elastic.Out)

    const horizonExposure = new TWEEN.Tween(effectPass.effects[0].godRaysMaterial.uniforms.exposure)
        .to({ value: 45 }, 35000)
        .easing(TWEEN.Easing.Circular.In)

    // huge speed at launch
    speedUpDark.start()
    speedUpWater.start()

    // show hyperspace
    scene.add(waterCylinder)
    showWater.start()
    showDark.start().onComplete(() => secondPhaseHorizonEvent())

    // launch long exposure from horizon
    // because of the huge timeout this will be trigger after all the horizon phase event
    horizonExposure.start().onComplete(() => enterParallelUniverse())
}

瞧!我们穿越了宇宙,也穿越了虫洞的视界,现在正在探索一个平行宇宙。真是太美了!
这篇文章里我没提到的还有很多东西。比如随处可见的各种动画,还有我朋友Arnaud设计的 logo 和 UI/UX ,以及音乐!我联系了 Melodysheep,他们授权我在我的项目中使用他们创作的精彩音乐!
关于如何将音乐与动画同步以及许多其他问题,可以通过查看项目源代码来解答。
这是一个开源项目,你想参与吗?如果你发现 bug、性能问题或任何改进建议,请提交 PR。我很容易就能批准。
一次三分钟的宇宙网络体验。
https://www.across-universe.com/
署名-非商业性使用-相同方式共享 3.0 未本地化版本 (CC BY-NC-SA 3.0)
参见:https ://creativecommons.org/licenses/by-nc-sa/3.0/
npm install
开发
npm run-script start-dev
产品
npm start
我已经很久没有在副业项目上这么开心过了。如果网站访问量很大,我就写第二章。就算没人看,我也打算写第二章。因为实在太好玩了,我根本停不下来!
文章来源:https://dev.to/jesuisundev/across-the-universe-in-javascript-58c8