

Passport JS 终极指南
由 Mux 主办的 DEV 全球展示挑战赛:展示你的项目!
本文也可以点击此处以 YouTube 系列视频的形式观看。
在这篇文章中,我将详细介绍为什么这种Passport-JWT身份验证策略对于正在实施 Node/Express + Angular Web 应用程序的小团队和初创公司来说是一个简单、安全的解决方案。
为了理解为什么 JWT 身份验证流程是这种情况的最佳选择,我将带您了解可用的身份验证选项、它们的工作原理以及如何实现它们(不包括 OAuth,因为这超出了本文的范围)。
由于本文篇幅较长且内容详尽,如果您已经熟悉文中讨论的某个主题,可以直接跳过。同样,如果您只想了解如何实现特定的身份验证方法,可以直接跳转到以下相应章节:
此外,我在以下存储库中创建了使用这两种身份验证方法的示例应用程序:
身份验证选项

以上概述了目前开发者可用的主要身份验证选项。以下是每种选项的简要介绍:
- 基于会话的身份验证 - 利用浏览器 Cookie 和后端“会话”来管理已登录和已注销的用户。
- JWT 身份验证——一种无状态身份验证方法,它将 JSON Web 令牌 (JWT) 存储在浏览器(通常是 Web 浏览器
localStorage)中。此 JWT 包含有关用户的断言,并且只能使用存储在服务器上的密钥进行解码。 - OAuth 和 OpenID Connect 身份验证——一种现代身份验证方法,应用程序使用从其他应用程序生成的“声明”来验证自身用户的身份。换句话说,这是一种联合身份验证,其中现有服务(例如 Google)负责用户的身份验证和存储,而您的应用程序则利用此流程来验证用户身份。
需要说明的是,OAuth 很容易让人感到困惑,因此本文不会对其进行全面探讨。对于刚起步的小团队/初创公司来说,OAuth 不仅没有必要,而且其具体实现方式也会因所使用的服务(例如 Google、Facebook、GitHub 等)而异。
最后,您可能会注意到 OAuth 被列为“作为一项服务”和“内部部署”。特此说明,是为了强调确实存在一家名为“OAuth”的公司,该公司以服务的形式实现了 OAuth 协议。您无需使用 OAuth 公司的服务即可实现 OAuth 协议!
什么是基于会话的身份验证?
如果要为这些身份验证方法建立一个谱系,基于会话的身份验证将是其中最古老的,但它绝非过时。这种身份验证方法是“服务器端”的,这意味着我们的 Express 应用程序和数据库协同工作,以维护每个访问我们应用程序的用户的当前身份验证状态。
要理解基于会话的身份验证的基本原理,您需要了解以下几个概念:
- 基本HTTP头部协议
- 什么是饼干?
- 什么是会话
- 会话(服务器)和 Cookie(浏览器)如何交互以验证用户身份
HTTP 标头
在浏览器中发出 HTTP 请求的方式有很多种。HTTP 客户端可以是 Web 应用程序、物联网设备、命令行(例如 curl)或其他多种方式。所有这些客户端都会连接到互联网并发出 HTTP 请求,这些请求要么用于获取数据(GET),要么用于修改数据(POST、PUT、DELETE 等)。
为了便于解释,我们假设:
服务器 = www.google.com
客户端 = 咖啡馆里用笔记本电脑工作的陌生人
当咖啡店里的陌生人www.google.com用谷歌浏览器输入内容时,这个请求会附带“HTTP 标头”发送出去。这些 HTTP 标头是键值对,它们向浏览器提供额外的数据,以帮助完成请求。这个请求会包含两种类型的标头:
- 总标题
- 请求头
要实现交互式操作,请打开 Google Chrome 浏览器,打开开发者工具(右键单击,选择“检查”),然后点击“网络”选项卡。现在,www.google.com在地址栏中输入网址,观察“网络”选项卡如何从服务器加载多个资源。您应该会看到“名称”、“状态”、“类型”、“发起者”、“大小”、“时间”和“瀑布图”等列。找到“类型”值为“document”的请求并点击它。您应该会看到此请求和响应交互的所有标头。
您(作为客户端)发出的请求将包含类似(但不完全相同)以下内容的 General 和 Request 标头:
General Headers
  Request URL: https://www.google.com/
  Request Method: GET
  Status Code: 200

Request Headers
  Accept: text/html
  Accept-Language: en-US
  Connection: keep-alive
当你www.google.com在地址栏输入地址并按下回车键时,你的 HTTP 请求就随附了这些标头(可能还有一些其他的)。虽然这些标头的含义相对来说比较容易理解,但我还是想讲解几个,以便更好地了解 HTTP 标头的用途。如果你有任何不了解的地方,可以随时在MDN上查找相关信息。
请求General头可以包含请求数据和响应数据。显然,`Request`Request URL和Request Method`RequestSquare` 是请求对象的一部分,它们告诉 Google Chrome 浏览器将请求路由到哪里。`RequestSquare`Status Code显然是响应的一部分,因为它表明您的 GET 请求已成功,并且网页已www.google.com正常加载。
请求对象本身只Request Headers包含请求头。您可以将请求头理解为“给服务器的指令”。在本例中,我的请求告诉 Google 服务器以下内容:
- 嘿,谷歌服务器,请给我发送HTML或文本数据。我现在要么没能力要么没兴趣读取其他类型的数据!
- 嘿,谷歌服务器,请只发送英文单词
- 嘿,谷歌服务器,请求结束后请不要关闭与我的连接。
您可以设置的请求标头还有很多,但这些只是您在所有 HTTP 请求中可能会看到的一些常见标头。
所以,当你搜索时www.google.com,你会将请求和请求头发送到 Google 服务器(为简单起见,我们假设它是一个大型服务器)。Google 服务器接受了你的请求,读取了“指令”(请求头),并生成了一个响应。该响应包含以下内容:
- HTML 数据(您在浏览器中看到的内容)
- HTTP 标头
正如您可能已经猜到的,“响应头”是由 Google 服务器设置的。以下是一些您可能会看到的响应头:
Response Headers
  Content-Length: 41485
  Content-Type: text/html; charset=UTF-8
  Set-Cookie: made_up_cookie_name=some value; expires=Thu, 28-Dec-2020 20:44:50 GMT;
除了Set-Cookie标头之外,这些响应标头都相当简单明了。
我之所以加入Set-Cookie标题,是因为它正是我们需要了解的,以便了解基于会话的身份验证的全部内容(并且将帮助我们理解本文后面介绍的其他身份验证方法)。
Cookie 的工作原理
如果没有浏览器中的 Cookie,我们就遇到问题了。
如果我们有一个需要用户登录才能访问的受保护网页,而没有启用 cookie,那么用户每次刷新页面都必须重新登录!这是因为 HTTP 协议默认是“无状态的”。
Cookie 引入了“持久状态”的概念,使浏览器能够“记住”服务器之前告诉它的一些信息。
Google 服务器可以指示我的 Google Chrome 浏览器允许我访问受保护的页面,但当我刷新页面后,我的浏览器就会“忘记”这一点,并要求我重新进行身份验证。
这就是 Cookie 的作用所在,它解释了请求Set-Cookie头的作用。在上面的请求中,我们www.google.com在浏览器中输入内容并按下回车键,客户端发送了一个包含一些请求头的请求,而 Google 服务器则返回了一个包含一些请求头的响应。其中一个响应头是 `<head>` Set-Cookie: made_up_cookie_name=some value; expires=Thu, 28-Dec-2020 20:44:50 GMT;。以下是这种交互的工作原理:
服务器:“嘿客户端!我希望你设置一个名为 的 cookie made_up_cookie_name,并将其值设置为some value。
客户端:“嘿服务器,我会Cookie在2020年12月28日之前,将此信息添加到我发送到此域名的所有请求的标头中!”
我们可以在 Google Chrome 开发者工具中验证这一点。依次点击“应用程序”->“存储”,然后点击“Cookie”。现在点击您当前访问的网站,您将看到该网站设置的所有 Cookie。在我们提供的示例中,您可能会看到类似这样的内容:
| 姓名 | 价值 | 到期日/最大年龄 |
|---|---|---|
| 虚构的饼干名称 | 一些价值 | 2020-12-28T20:44:50.674Z |
该 cookie 将被设置到所有请求Cookie 的请求头www.google.com中,直到 cookie 设置的过期日期为止。
正如您所料,如果我们设置某种“身份验证”cookie,这将对身份验证非常有用。其工作原理的简化版本如下:
- 咖啡店里一个陌生人
www.example-site.com/login/在浏览器中输入内容 - 咖啡店里随机挑选一个人,让他在这个页面上填写一份包含用户名和密码的表格。
- 随机用户的 Google Chrome 浏览器向正在运行的服务器发送包含登录数据(用户名、密码)的 POST 请求
www.example-site.com。 - 服务器运行后
www.example-site.com,接收登录信息,检查数据库中是否存在该登录信息,验证登录信息,如果验证成功,则创建一个带有标头的响应Set-Cookie: user_is_authenticated=true; expires=Thu, 1-Jan-2020 20:00:00 GMT。 - 随机用户的谷歌Chrome浏览器收到此响应后,会设置一个浏览器cookie:
| 姓名 | 价值 | 到期日/最大年龄 |
|---|---|---|
| 用户已认证 | 真的 | 2020-12-28T20:44:50.674Z |
- 现在,一位随机访客正在访问。
www.example-site.com/protected-route/ - 随机用户的浏览器会创建一个 HTTP 请求,并
Cookie: user_is_authenticated=true; expires=Thu, 1-Jan-2020 20:00:00 GMT在请求中附加该标头。 - 服务器收到此请求,发现请求中包含 cookie,“记住”它几秒钟前已经验证过该用户的身份,并允许用户访问该页面。
这种情况的真相
显然,我刚才描述的用户身份验证方式非常不安全。实际上,服务器会根据用户提供的密码生成某种哈希值,然后使用服务器上的加密库验证该哈希值。
也就是说,这个高层次的概念是有效的,它使我们能够理解在谈论身份验证时 cookie 的价值。
请记住这个例子,我们接下来会继续讨论。
会议
会话和 Cookie 实际上非常相似,而且很容易混淆,因为它们可以无缝地一起使用。两者之间的主要区别在于它们的存储位置。
换句话说,Cookie由服务器设置,但存储在浏览器中。如果服务器想要使用此 Cookie 来存储有关用户“状态”的数据,则必须设计一个复杂的方案来持续跟踪浏览器中 Cookie 的状态。其流程可能如下:
- 服务器:嘿浏览器,我已经验证了这位用户的身份,所以你应该存储一个 cookie 来提醒我(
Set-Cookie: user_auth=true; expires=Thu, 1-Jan-2020 20:00:00 GMT),以便下次你向我请求东西时能够识别你。 - 浏览器:谢谢服务器!我会将此 cookie 添加到我的
Cookie请求头中。 - 浏览器:嘿服务器,我可以查看一下这个地址的内容吗
www.domain.com/protected?这是你上次请求发送给我的 cookie。 - 服务器:当然可以。这是页面数据。我还添加了另一个
Set-Cookie头部信息(Set-Cookie: marketing_page_visit_count=1; user_ip=192.1.234.21),因为我的公司出于市场营销目的,需要追踪有多少人访问过这个页面以及他们使用的电脑。 - 浏览器:好的,我会把这个 cookie 添加到我的
Cookie请求头中。 - 浏览器:嘿服务器,你能把这个地址的内容发给我
www.domain.com/protected/special-offer吗?以下是你目前为止在我设备上设置的所有 cookie。(Cookie: user_auth=true; expires=Thu, 1-Jan-2020 20:00:00 GMT; marketing_page_visit_count=1; user_ip=192.1.234.21)
如您所见,浏览器访问的页面越多,服务器设置的 cookie 就越多,浏览器必须在每个请求标头中附加的 cookie 也就越多。
服务器可能有一个功能,可以解析请求中附加的所有 cookie,并根据特定 cookie 的存在与否执行某些操作。这让我自然而然地产生了一个疑问……为什么服务器不直接将这些信息记录在数据库中,并使用一个单一的“会话 ID”来识别用户正在进行的操作呢?
这正是会话的作用所在。正如我之前提到的,Cookie 和会话的主要区别在于它们的存储位置。会话存储在数据存储区(也就是数据库)中,而 Cookie 则存储在浏览器中。由于会话存储在服务器端,因此它可以存储敏感信息。将敏感信息存储在 Cookie 中是非常不安全的。
现在,当我们谈到同时使用 cookie 和 session 时,事情就会变得有点复杂。
由于 Cookie 是客户端和服务器之间传递元数据(以及其他 HTTP 标头)的方式,因此会话仍然必须使用 Cookie。要了解这种交互,最简单的方法是使用 Node + Express + MongoDB 构建一个简单的身份验证应用程序。我假设您对使用 Express 构建应用程序有一定的了解,但我会尽量在讲解过程中逐步解释每个部分。
设置一个基本应用程序:
mkdir session-auth-app
cd session-auth-app
npm init -y
npm install --save express mongoose dotenv connect-mongo express-session passport passport-local
这里是app.js……请先阅读评论,了解更多详情后再继续阅读。
const express = require("express");
const mongoose = require("mongoose");
const session = require("express-session");

// Package documentation - https://www.npmjs.com/package/connect-mongo
const MongoStore = require("connect-mongo")(session);

/**
 * -------------- GENERAL SETUP ----------------
 */

// Gives us access to variables set in the .env file via `process.env.VARIABLE_NAME` syntax
require("dotenv").config();

// Create the Express application
var app = express();

// Middleware that allows Express to parse through both JSON and x-www-form-urlencoded request bodies
// These are the same as `bodyParser` - you probably would see bodyParser put here in most apps
app.use(express.json());
app.use(express.urlencoded({ extended: true }));

/**
 * -------------- DATABASE ----------------
 */

/**
 * Connect to MongoDB Server using the connection string in the `.env` file.  To implement this, place the following
 * string into the `.env` file
 *
 * DB_STRING=mongodb://<user>:<password>@localhost:27017/database_name
 */

const connection = mongoose.createConnection(process.env.DB_STRING);

// Creates simple schema for a User.  The hash and salt are derived from the user's given password when they register
const UserSchema = new mongoose.Schema({
  username: String,
  hash: String,
  salt: String,
});

// Defines the model that we will use in the app
mongoose.model("User", UserSchema);

/**
 * -------------- SESSION SETUP ----------------
 */

/**
 * The MongoStore is used to store session data.  We will learn more about this in the post.
 *
 * Note that the `connection` used for the MongoStore is the same connection that we are using above
 */
const sessionStore = new MongoStore({
  mongooseConnection: connection,
  collection: "sessions",
});

/**
 * See the documentation for all possible options - https://www.npmjs.com/package/express-session
 *
 * As a brief overview (we will add more later):
 *
 * secret: This is a random string that will be used to "authenticate" the session.  In a production environment,
 * you would want to set this to a long, randomly generated string
 *
 * resave: when set to true, this will force the session to save even if nothing changed.  If you don't set this,
 * the app will still run but you will get a warning in the terminal
 *
 * saveUninitialized: Similar to resave, when set true, this forces the session to be saved even if it is uninitialized
 */
app.use(
  session({
    secret: process.env.SECRET,
    resave: false,
    saveUninitialized: true,
    store: sessionStore,
  })
);

/**
 * -------------- ROUTES ----------------
 */

// When you visit http://localhost:3000/login, you will see "Login Page"
app.get("/login", (req, res, next) => {
  res.send("<h1>Login Page</h1>");
});

app.post("/login", (req, res, next) => {});

// When you visit http://localhost:3000/register, you will see "Register Page"
app.get("/register", (req, res, next) => {
  res.send("<h1>Register Page</h1>");
});

app.post("/register", (req, res, next) => {});

/**
 * -------------- SERVER ----------------
 */

// Server listens on http://localhost:3000
app.listen(3000);
我们首先需要了解这个express-session模块在这个应用程序中是如何工作的。这是一个“中间件”,简单来说,它就是一个修改应用程序中某些内容的函数。
快速回顾 Express 中间件
假设我们有以下代码:
const express = require("express");

var app = express();

// Custom middleware
function myMiddleware1(req, res, next) {
  req.newProperty = "my custom property";
  next();
}

// Another custom middleware
function myMiddleware2(req, res, next) {
  req.newProperty = "updated value";
  next();
}

app.get("/", (req, res, next) => {
  res.send(`<h1>Custom Property Value: ${req.newProperty}`);
});

// Server listens on http://localhost:3000
app.listen(3000);
如您所见,这是一个极其简单的 Express 应用,它定义了两个中间件,并且只有一个路由,您可以通过浏览器访问该路由http://localhost:3000。如果您启动此应用并访问该路由,则会显示“自定义属性值:未定义”,因为仅仅定义中间件函数是不够的。
我们需要告诉 Express 应用实际使用这些中间件。我们可以通过几种方式来实现。首先,我们可以在路由中进行设置。
app.get("/", myMiddleware1, (req, res, next) => {
  res.send(`<h1>Custom Property Value: ${req.newProperty}`);
});
如果将第一个中间件函数作为参数添加到路由中,您将在浏览器中看到“自定义属性值:我的自定义属性”。这里实际发生的情况是:
- 应用程序已初始化。
- 用户
http://localhost:3000/通过浏览器访问了该页面,从而触发了该app.get()功能。 - Express 应用程序首先检查路由器上是否安装了任何“全局”中间件,但没有找到任何此类中间件。
- Express 应用检查了该
app.get()函数,发现回调函数之前安装了一个中间件函数。应用运行了该中间件,并将req对象、res对象和next()回调函数都传递给了它。 - 中间件
myMiddleware1首先设置req.newProperty,然后调用next(),告诉 Express 应用程序“跳转到下一个中间件”。如果中间件没有调用next(),浏览器就会“卡住”,不会返回任何内容。 - Express 应用没有检测到任何中间件,因此继续执行请求并发送结果。
这只是使用中间件的一种方法,而这正是该passport.authenticate()函数(稍后会详细介绍,所以请记住)的工作原理。
我们还可以通过“全局”设置来使用中间件。请看更改后的应用:
const express = require("express");

var app = express();

// Custom middleware
function myMiddleware1(req, res, next) {
  req.newProperty = "my custom property";
  next();
}

// Another custom middleware
function myMiddleware2(req, res, next) {
  req.newProperty = "updated value";
  next();
}

app.use(myMiddleware2);

app.get("/", myMiddleware1, (req, res, next) => {
  // Sends "Custom Property Value: my custom property
  res.send(`<h1>Custom Property Value: ${req.newProperty}`);
});

// Server listens on http://localhost:3000
app.listen(3000);
在这种应用结构下,你会发现浏览http://localhost:3000/器访问该页面仍然返回与之前相同的值。这是因为app.use(myMiddleware2)中间件执行在路由之前app.get('/', myMiddleware1)。如果我们从路由中移除中间件,你就能在浏览器中看到更新后的值。
app.use(myMiddleware2);

app.get("/", (req, res, next) => {
  // Sends "Custom Property Value: updated value
  res.send(`<h1>Custom Property Value: ${req.newProperty}`);
});
我们也可以通过在路由中将第二个中间件放在第一个中间件之后来获得这个结果。
app.get("/", myMiddleware1, myMiddleware2, (req, res, next) => {
  // Sends "Custom Property Value: updated value
  res.send(`<h1>Custom Property Value: ${req.newProperty}`);
});
虽然这只是对 Express 中间件的一个快速而高层次的概述,但它将帮助我们了解中间件的工作原理express-session。
Express Session Middleware 的工作原理
正如我之前提到的,该express-session模块为我们提供了可以在应用程序中使用的中间件。中间件的定义如下:
// Again, here is the documentation for this - https://www.npmjs.com/package/express-session
app.use(
  session({
    secret: process.env.SECRET,
    resave: false,
    saveUninitialized: true,
    store: sessionStore,
  })
);
以下简要概述了 Express 会话中间件的功能:
- 当路由加载时,中间件会检查会话存储(在本例中为 MongoDB 数据库,因为我们使用的是
connect-mongo自定义会话存储)中是否已建立会话。 - 如果存在会话,中间件会对其进行加密验证,然后告知浏览器会话是否有效。如果有效,浏览器会自动将
connect.sidCookie 附加到 HTTP 请求中。 - 如果没有会话,中间件会创建一个新会话,获取该会话的加密哈希值,并将该值存储在名为 的 Cookie 中
connect.sid。然后,它将Set-CookieHTTP 标头附加到res具有哈希值的对象上Set-Cookie: connect.sid=hashed value。
你可能想知道这到底有什么用,以及这一切究竟是如何运作的。
如果你还记得之前快速回顾 Express 中间件的内容,我说过中间件能够修改从一个中间件传递到下一个中间件的req请求res对象,直到 HTTP 请求结束。就像我们可以为对象设置自定义属性一样req,我们也可以设置更复杂的内容,例如session包含属性、方法等的对象。
这正是express-session中间件的作用。当创建一个新会话时,以下属性会被添加到req对象中:
req.sessionID- 一个随机生成的 UUID。您可以通过设置该genid选项来定义一个自定义函数来生成此 ID。如果您不设置此选项,则默认使用该uid-safe模块。
app.use(
  session({
    genid: function (req) {
      // Put your UUID implementation here
    },
  })
);
req.session- Session 对象。它包含有关会话的信息,并可用于设置自定义属性。例如,您可能想要跟踪特定页面在单个会话中的加载次数:
app.get("/tracking-route", (req, res, next) => {
  if (req.session.viewCount) {
    req.session.viewCount = req.session.viewCount + 1;
  } else {
    req.session.viewCount = 1;
  }

  res.send("<p>View count is: " + req.session.viewCount + "</p>");
});
req.session.cookie- Cookie 对象。它定义了浏览器中存储哈希会话 ID 的 Cookie 的行为。请记住,Cookie 一旦设置,浏览器就会自动将其附加到每个 HTTP 请求中,直到 Cookie 过期为止。
Passport JS 本地策略的工作原理
要完全理解基于会话的身份验证,我们还需要学习最后一点——Passport JS。
Passport JS 拥有超过 500 种身份验证“策略”,可在 Node/Express 应用中使用。其中许多策略具有高度针对性(例如,passport-amazon允许您使用 Amazon 凭证对应用进行身份验证),但它们在 Express 应用中的工作方式都类似。
我认为 Passport 模块的文档还有待改进。Passport 不仅包含两个模块(Passport 基础模块 + 特定策略模块),它本身也是一个中间件,正如我们所见,这本身就有点令人困惑。更令人困惑的是,我们接下来要讲解的策略模块(passport-local)本身也是一个中间件,它会修改由另一个中间件()创建的对象express-session。由于 Passport 的文档对这一切的工作原理着墨不多,我将在这篇文章中尽我所能地进行解释。
我们先来了解一下模块的设置。
如果您一直按照本教程操作,那么您应该已经拥有所需的模块。如果没有,您需要在项目中安装 Passport 和策略。
npm install --save passport passport-local
完成上述步骤后,您需要在应用程序中实现 Passport。下面,我添加了该passport-local策略所需的所有组件。为了简化说明,我省略了注释。请快速浏览一遍代码,然后我们将逐一讲解// NEW。
const express = require("express");
const mongoose = require("mongoose");
const session = require("express-session");

// NEW
const passport = require("passport");
const LocalStrategy = require("passport-local").Strategy;
var crypto = require("crypto");
// ---

const MongoStore = require("connect-mongo")(session);

require("dotenv").config();

var app = express();

const connection = mongoose.createConnection(process.env.DB_STRING);

const UserSchema = new mongoose.Schema({
  username: String,
  hash: String,
  salt: String,
});

mongoose.model("User", UserSchema);

const sessionStore = new MongoStore({
  mongooseConnection: connection,
  collection: "sessions",
});

app.use(
  session({
    secret: process.env.SECRET,
    resave: false,
    saveUninitialized: true,
    store: sessionStore,
  })
);

// NEW
// START PASSPORT

function validPassword(password, hash, salt) {
  var hashVerify = crypto
    .pbkdf2Sync(password, salt, 10000, 64, "sha512")
    .toString("hex");
  return hash === hashVerify;
}

function genPassword(password) {
  var salt = crypto.randomBytes(32).toString("hex");
  var genHash = crypto
    .pbkdf2Sync(password, salt, 10000, 64, "sha512")
    .toString("hex");

  return {
    salt: salt,
    hash: genHash,
  };
}

passport.use(
  new LocalStrategy(function (username, password, cb) {
    User.findOne({ username: username })
      .then((user) => {
        if (!user) {
          return cb(null, false);
        }

        // Function defined at bottom of app.js
        const isValid = validPassword(password, user.hash, user.salt);

        if (isValid) {
          return cb(null, user);
        } else {
          return cb(null, false);
        }
      })
      .catch((err) => {
        cb(err);
      });
  })
);

passport.serializeUser(function (user, cb) {
  cb(null, user.id);
});

passport.deserializeUser(function (id, cb) {
  User.findById(id, function (err, user) {
    if (err) {
      return cb(err);
    }
    cb(null, user);
  });
});

app.use(passport.initialize());
app.use(passport.session());

// ---
// END PASSPORT

app.get("/login", (req, res, next) => {
  res.send("<h1>Login Page</h1>");
});

app.post("/login", (req, res, next) => {});

app.get("/register", (req, res, next) => {
  res.send("<h1>Register Page</h1>");
});

app.post("/register", (req, res, next) => {});

app.listen(3000);
我知道这里的信息量很大。我们先从简单的部分——辅助函数开始。上面的代码中,我有两个辅助函数,它们可以帮助创建和验证密码。
/**
 *
 * @param {*} password - The plain text password
 * @param {*} hash - The hash stored in the database
 * @param {*} salt - The salt stored in the database
 *
 * This function uses the crypto library to decrypt the hash using the salt and then compares
 * the decrypted hash/salt with the password that the user provided at login
 */
function validPassword(password, hash, salt) {
  var hashVerify = crypto
    .pbkdf2Sync(password, salt, 10000, 64, "sha512")
    .toString("hex");
  return hash === hashVerify;
}

/**
 *
 * @param {*} password - The password string that the user inputs to the password field in the register form
 *
 * This function takes a plain text password and creates a salt and hash out of it.  Instead of storing the plaintext
 * password in the database, the salt and hash are stored for security
 *
 * ALTERNATIVE: It would also be acceptable to just use a hashing algorithm to make a hash of the plain text password.
 * You would then store the hashed password in the database and then re-hash it to verify later (similar to what we do here)
 */
function genPassword(password) {
  var salt = crypto.randomBytes(32).toString("hex");
  var genHash = crypto
    .pbkdf2Sync(password, salt, 10000, 64, "sha512")
    .toString("hex");

  return {
    salt: salt,
    hash: genHash,
  };
}
除了以上说明,我还想指出这些函数需要 NodeJS 内置crypto库。有些人可能会认为有更好的加密库,但除非你的应用程序需要极高的安全性,否则这个库已经足够用了!
接下来,我们来看看这个passport.use()方法。
/**
 * This function is called when the `passport.authenticate()` method is called.
 *
 * If a user is found an validated, a callback is called (`cb(null, user)`) with the user
 * object.  The user object is then serialized with `passport.serializeUser()` and added to the
 * `req.session.passport` object.
 */
passport.use(
  new LocalStrategy(function (username, password, cb) {
    User.findOne({ username: username })
      .then((user) => {
        if (!user) {
          return cb(null, false);
        }

        // Function defined at bottom of app.js
        const isValid = validPassword(password, user.hash, user.salt);

        if (isValid) {
          return cb(null, user);
        } else {
          return cb(null, false);
        }
      })
      .catch((err) => {
        cb(err);
      });
  })
);
我知道上面的函数内容很多,所以我们来探讨一下它的一些关键组成部分。首先,我要说明的是,所有Passport JS 身份验证策略(不仅仅是我们使用的本地策略)都需要提供一个回调函数,该回调函数会在调用该passport.authenticate()方法时执行。例如,你的应用中可能有一个登录路由:
app.post(
  "/login",
  passport.authenticate("local", { failureRedirect: "/login" }),
  (err, req, res, next) => {
    if (err) next(err);
    console.log("You are logged in!");
  }
);
用户将通过登录表单输入用户名和密码,这将向目标/login路由发送一个 HTTP POST 请求。假设您的 POST 请求包含以下数据:
{
  "email": "sample@email.com",
  "pw": "sample password"
}
这样做行不通。原因在于,该passport.use()方法要求您的 POST 请求包含以下字段:
{
  "username": "sample@email.com",
  "password": "sample password"
}
它会查找username字段password。如果您希望第一个 JSON 请求体生效,则需要向该passport.use()函数提供字段定义:
passport.use(
  {
    usernameField: "email",
    passwordField: "pw",
  },
  function (email, password, callback) {
    // Implement your callback function here
  }
);
通过定义 `and`usernameField和 ` passwordField,您可以指定自定义 POST 请求体对象。
先不说这个,让我们回到/login路由上的 POST 请求:
app.post(
  "/login",
  passport.authenticate("local", { failureRedirect: "/login" }),
  (err, req, res, next) => {
    if (err) next(err);
    console.log("You are logged in!");
  }
);
当用户提交登录凭据时,该passport.authenticate()方法(此处用作中间件)将执行您定义的回调函数,并向其提供usernamePOSTpassword请求正文中的参数。该passport.authenticate()方法接受两个参数:策略名称和选项。此处的默认策略名称为 `<strategy_name>` local,但您可以按如下方式更改:
// Supply a name string as the first argument to the passport.use() function
passport.use("custom-name", new Strategy());

// Use the same name as above
app.post(
  "/login",
  passport.authenticate("custom-name", { failureRedirect: "/login" }),
  (err, req, res, next) => {
    if (err) next(err);
    console.log("You are logged in!");
  }
);
我使用的策略是,passport.authenticate()首先执行我们在内部定义的回调函数new LocalStrategy(),如果身份验证成功,则调用该next()函数,然后进入目标路由。如果身份验证失败(用户名或密码无效),应用程序将/login再次重定向到该路由。
现在我们已经了解了它的用法,让我们回到之前定义并passport.authenticate()正在使用的回调函数。
// Tells Passport to use this strategy for the passport.authenticate() method
passport.use(
  new LocalStrategy(
    // Here is the function that is supplied with the username and password field from the login POST request
    function (username, password, cb) {
      // Search the MongoDB database for the user with the supplied username
      User.findOne({ username: username })
        .then((user) => {
          /**
           * The callback function expects two values:
           *
           * 1. Err
           * 2. User
           *
           * If we don't find a user in the database, that doesn't mean there is an application error,
           * so we use `null` for the error value, and `false` for the user value
           */
          if (!user) {
            return cb(null, false);
          }

          /**
           * Since the function hasn't returned, we know that we have a valid `user` object.  We then
           * validate the `user` object `hash` and `salt` fields with the supplied password using our
           * utility function.  If they match, the `isValid` variable equals True.
           */
          const isValid = validPassword(password, user.hash, user.salt);

          if (isValid) {
            // Since we have a valid user, we want to return no err and the user object
            return cb(null, user);
          } else {
            // Since we have an invalid user, we want to return no err and no user
            return cb(null, false);
          }
        })
        .catch((err) => {
          // This is an application error, so we need to populate the callback `err` field with it
          cb(err);
        });
    }
  )
);
以上内容我已经详细阐述过了,所以请务必在继续阅读之前仔细阅读。
您可能已经注意到,回调函数与数据库和验证方式无关。换句话说,我们不需要使用 MongoDB,也不需要以相同的方式验证密码。PassportJS 将这些都留给了我们自己处理!这可能会让人感到困惑,但也非常强大,这也是 PassportJS 被广泛采用的原因。
接下来,您将看到两个相关函数:
passport.serializeUser(function (user, cb) {
  cb(null, user.id);
});

passport.deserializeUser(function (id, cb) {
  User.findById(id, function (err, user) {
    if (err) {
      return cb(err);
    }
    cb(null, user);
  });
});
就我个人而言,我觉得这两个函数最令人困惑,因为相关的文档很少。我们会在讨论 PassportJS 和 Express Session 中间件如何交互时进一步探讨这两个函数的作用,但简而言之,这两个函数负责将用户“序列化”和“反序列化”到当前会话对象,以及从当前会话对象反序列化用户。
我们无需将整个user对象存储在会话中,只需存储用户的数据库 ID 即可。当我们需要获取当前会话中用户的更多信息时,可以使用反序列化函数,根据存储在会话中的 ID 在数据库中查找该用户。稍后我们会对此进行更详细的解释。
最后,在 Passport 实现中,您会看到另外两行代码:
app.use(passport.initialize());
app.use(passport.session());
如果你还记得之前文章中关于中间件工作原理的内容,通过调用app.use(),我们告诉 Express在每个请求中按顺序执行括号内的函数。
换句话说,对于我们的 Express 应用发出的每个 HTTP 请求,它都会passport.initialize()执行passport.session()。
这里好像有什么不对劲?
如果app.use() 执行其中包含的函数,则上述语法相当于说:
passport.initialize()();
passport.session()();
之所以能实现这一点,是因为这两个函数实际上都返回了另一个函数!就像这样:
Passport.prototype.initialize = function () {
  // Does something

  return function () {
    // This is what is called by `app.use()`
  };
};
使用 Passport 并不一定需要了解这一点,但如果您对这种语法感到疑惑,这肯定能消除一些困惑。
总之……
这两个中间件函数对于将 PassportJS 与中间件集成至关重要express-session。因此,这两个函数必须放在中间件之后!app.use(session({}))就像 `PassportJS.addInterface` 和 `PassportJS.addInterface` 一样passport.serializeUser(),passport.deserializeUser()这些中间件的作用很快就会变得显而易见。
基于会话的身份验证的概念概述
现在我们已经了解了 HTTP 标头、Cookie、中间件、Express Session 中间件和 Passport JS 中间件,终于到了学习如何使用它们来验证用户身份的时候了。我首先想用本节回顾和解释一下概念流程,然后在下一节深入探讨具体实现。
以下是我们应用程序的基本流程:
- Express 应用启动并监听
http://www.expressapp.com(为了示例起见,假设这是真的)。 - 用户
http://www.expressapp.com/login通过浏览器访问 - 中间件
express-session检测到有用户连接到 Express 服务器。它检查对象的CookieHTTP 标头req。由于该用户是首次访问,因此Cookie标头中没有值。由于没有Cookie值,Express 服务器返回/loginHTML 并调用Set-CookieHTTP 标头。该Set-Cookie值是中间件根据开发者设置的选项生成的 cookie 字符串express-session(假设本例中 maxAge 的值为 10 天)。 - 用户意识到自己现在不想登录,而是想出去散散步。于是他关闭了浏览器。
- 用户散步回来,打开浏览器,然后
http://www.expressapp.com/login再次返回。 - 中间件再次
express-session在 GET 请求时运行,检查CookieHTTP 标头,但这次找到了值!这是因为用户当天早些时候创建过会话。由于maxAge中间件中设置的选项为 10 天express-session,因此关闭浏览器不会销毁 cookie。 - 中间件
express-session现在connect.sid从CookieHTTP 标头中获取值,并在数据库中查找MongoStore(实际上就是查找集合中的 IDsessions),然后找到它。由于会话已存在,express-session中间件不会执行任何操作,CookieHTTP 标头值和集合MongoStore中的数据库条目都sessions保持不变。 - 现在,用户输入用户名和密码,然后按下“登录”按钮。
- 用户按下“登录”按钮后,会向路由发送 POST 请求
/login,该路由会使用passport.authenticate()中间件。 - 到目前为止,每次请求中,`
passport.initialize()and`passport.session()中间件都在运行。每次请求时,这些中间件都会检查req.session由express-session中间件创建的对象是否存在名为 `<property>` 的属性passport.user(即 ` <property>req.session.passport.user`)。由于 `<method> `passport.authenticate()方法尚未被调用,因此该req.session对象没有 `passport<property>` 属性。现在,passport.authenticate()通过 POST 请求调用了 `<method>` 方法/login,Passport 将使用用户输入并提交的用户名和密码执行我们自定义的身份验证回调。 - 我们假设用户已在数据库中注册并输入了正确的凭据。Passport 回调函数成功验证了用户身份。
- 该
passport.authenticate()方法现在返回user已验证的对象。此外,它将req.session.passport属性附加到该req.session对象,通过序列化用户passport.serializeUser(),并将序列化后的用户(即用户的 ID)附加到req.session.passport.user属性。最后,它将完整的用户对象附加到req.user。 - 用户因为我们的应用很无聊,所以关掉电脑出去散步了。
- 第二天,用户打开电脑,访问我们应用程序上的一个受保护的路由。
- 中间件
express-session检查CookieHTTP 标头req,找到昨天的会话(由于我们的maxAge会话有效期设置为 10 天,因此仍然有效),在会话管理器中查找MongoStore并找到该会话,由于会话仍然有效,因此不对会话管理器执行任何操作Cookie。中间件重新初始化会话管理器req.session对象,并将会话管理器的值设置为会话管理器返回的值MongoStore。 - 中间件
passport.initialize()检查该req.session.passport属性,发现它仍然存在user值。passport.session()中间件使用该user属性通过函数req.session.passport.user重新初始化req.user对象,使其等于与会话关联的用户passport.deserializeUser()。 - 受保护的路由会检查其是否
req.session.passport.user存在。由于 Passport 中间件刚刚重新初始化了它,因此路由存在,并允许用户访问。 - 用户离开电脑两个月。
- 用户再次访问同一受保护的路由(提示:会话已过期!)
- 中间件
express-session运行后,发现 HTTP 标头的值Cookie包含过期的cookie 值,并通过附加到对象的 HTTP 标头将该Cookie值替换为新的 Session 。Set-Cookieres - 中间件运行
passport.initialize()正常passport.session(),但这次由于express-session中间件必须创建一个新的会话,因此不再存在req.session.passport对象! - 由于用户未登录且试图访问受保护的路由,该路由将检查其是否
req.session.passport.user存在。由于不存在,因此访问被拒绝! - 用户再次登录并触发
passport.authenticate()中间件后,req.session.passport对象将被重新建立,用户将能够再次访问受保护的路由。
呼……
都明白了吗?
基于会话的身份验证实现
最难的部分已经过去了。
综上所述,以下是您功能齐全的基于会话的身份验证 Express 应用。以下是包含在单个文件中的应用,但我也在此代码库中对其进行了重构,使其更接近您在实际应用中的版本。
const express = require("express");
const mongoose = require("mongoose");
const session = require("express-session");
var passport = require("passport");
var crypto = require("crypto");
var LocalStrategy = require("passport-local").Strategy;

// Package documentation - https://www.npmjs.com/package/connect-mongo
const MongoStore = require("connect-mongo")(session);

/**
 * -------------- GENERAL SETUP ----------------
 */

// Gives us access to variables set in the .env file via `process.env.VARIABLE_NAME` syntax
require("dotenv").config();

// Create the Express application
var app = express();

app.use(express.json());
app.use(express.urlencoded({ extended: true }));

/**
 * -------------- DATABASE ----------------
 */

/**
 * Connect to MongoDB Server using the connection string in the `.env` file.  To implement this, place the following
 * string into the `.env` file
 *
 * DB_STRING=mongodb://<user>:<password>@localhost:27017/database_name
 */

const conn = "mongodb://devuser:123@localhost:27017/general_dev";
//process.env.DB_STRING
const connection = mongoose.createConnection(conn, {
  useNewUrlParser: true,
  useUnifiedTopology: true,
});

// Creates simple schema for a User.  The hash and salt are derived from the user's given password when they register
const UserSchema = new mongoose.Schema({
  username: String,
  hash: String,
  salt: String,
});

const User = connection.model("User", UserSchema);

/**
 * This function is called when the `passport.authenticate()` method is called.
 *
 * If a user is found an validated, a callback is called (`cb(null, user)`) with the user
 * object.  The user object is then serialized with `passport.serializeUser()` and added to the
 * `req.session.passport` object.
 */
passport.use(
  new LocalStrategy(function (username, password, cb) {
    User.findOne({ username: username })
      .then((user) => {
        if (!user) {
          return cb(null, false);
        }

        // Function defined at bottom of app.js
        const isValid = validPassword(password, user.hash, user.salt);

        if (isValid) {
          return cb(null, user);
        } else {
          return cb(null, false);
        }
      })
      .catch((err) => {
        cb(err);
      });
  })
);

/**
 * This function is used in conjunction with the `passport.authenticate()` method.  See comments in
 * `passport.use()` above ^^ for explanation
 */
passport.serializeUser(function (user, cb) {
  cb(null, user.id);
});

/**
 * This function is used in conjunction with the `app.use(passport.session())` middleware defined below.
 * Scroll down and read the comments in the PASSPORT AUTHENTICATION section to learn how this works.
 *
 * In summary, this method is "set" on the passport object and is passed the user ID stored in the `req.session.passport`
 * object later on.
 */
passport.deserializeUser(function (id, cb) {
  User.findById(id, function (err, user) {
    if (err) {
      return cb(err);
    }
    cb(null, user);
  });
});

/**
 * -------------- SESSION SETUP ----------------
 */

/**
 * The MongoStore is used to store session data.  We will learn more about this in the post.
 *
 * Note that the `connection` used for the MongoStore is the same connection that we are using above
 */
const sessionStore = new MongoStore({
  mongooseConnection: connection,
  collection: "sessions",
});

/**
 * See the documentation for all possible options - https://www.npmjs.com/package/express-session
 *
 * As a brief overview (we will add more later):
 *
 * secret: This is a random string that will be used to "authenticate" the session.  In a production environment,
 * you would want to set this to a long, randomly generated string
 *
 * resave: when set to true, this will force the session to save even if nothing changed.  If you don't set this,
 * the app will still run but you will get a warning in the terminal
 *
 * saveUninitialized: Similar to resave, when set true, this forces the session to be saved even if it is uninitialized
 *
 * store: Sets the MemoryStore to the MongoStore setup earlier in the code.  This makes it so every new session will be
 * saved in a MongoDB database in a "sessions" table and used to lookup sessions
 *
 * cookie: The cookie object has several options, but the most important is the `maxAge` property.  If this is not set,
 * the cookie will expire when you close the browser.  Note that different browsers behave slightly differently with this
 * behavior (for example, closing Chrome doesn't always wipe out the cookie since Chrome can be configured to run in the
 * background and "remember" your last browsing session)
 */
app.use(
  session({
    //secret: process.env.SECRET,
    secret: "some secret",
    resave: false,
    saveUninitialized: true,
    store: sessionStore,
    cookie: {
      maxAge: 1000 * 30,
    },
  })
);

/**
 * -------------- PASSPORT AUTHENTICATION ----------------
 */

/**
 * Notice that these middlewares are initialized after the `express-session` middleware.  This is because
 * Passport relies on the `express-session` middleware and must have access to the `req.session` object.
 *
 * passport.initialize() - This creates middleware that runs before every HTTP request.  It works in two steps:
 *      1. Checks to see if the current session has a `req.session.passport` object on it.  This object will be
 *
 *          { user: '<Mongo DB user ID>' }
 *
 *      2.  If it finds a session with a `req.session.passport` property, it grabs the User ID and saves it to an
 *          internal Passport method for later.
 *
 * passport.session() - This calls the Passport Authenticator using the "Session Strategy".  Here are the basic
 * steps that this method takes:
 *      1.  Takes the MongoDB user ID obtained from the `passport.initialize()` method (run directly before) and passes
 *          it to the `passport.deserializeUser()` function (defined above in this module).  The `passport.deserializeUser()`
 *          function will look up the User by the given ID in the database and return it.
 *      2.  If the `passport.deserializeUser()` returns a user object, this user object is assigned to the `req.user` property
 *          and can be accessed within the route.  If no user is returned, nothing happens and `next()` is called.
 */
app.use(passport.initialize());
app.use(passport.session());

/**
 * -------------- ROUTES ----------------
 */

app.get("/", (req, res, next) => {
  res.send("<h1>Home</h1>");
});

// When you visit http://localhost:3000/login, you will see "Login Page"
app.get("/login", (req, res, next) => {
  const form = '<h1>Login Page</h1><form method="POST" action="/login">\
    Enter Username:<br><input type="text" name="username">\
    <br>Enter Password:<br><input type="password" name="password">\
    <br><br><input type="submit" value="Submit"></form>';

  res.send(form);
});

// Since we are using the passport.authenticate() method, we should be redirected no matter what
app.post(
  "/login",
  passport.authenticate("local", {
    failureRedirect: "/login-failure",
    successRedirect: "login-success",
  }),
  (err, req, res, next) => {
    if (err) next(err);
  }
);

// When you visit http://localhost:3000/register, you will see "Register Page"
app.get("/register", (req, res, next) => {
  const form = '<h1>Register Page</h1><form method="post" action="register">\
                    Enter Username:<br><input type="text" name="username">\
                    <br>Enter Password:<br><input type="password" name="password">\
                    <br><br><input type="submit" value="Submit"></form>';

  res.send(form);
});

app.post("/register", (req, res, next) => {
  const saltHash = genPassword(req.body.password);

  const salt = saltHash.salt;
  const hash = saltHash.hash;

  const newUser = new User({
    username: req.body.username,
    hash: hash,
    salt: salt,
  });

  newUser.save().then((user) => {
    console.log(user);
  });

  res.redirect("/login");
});

/**
 * Lookup how to authenticate users on routes with Local Strategy
 * Google Search: "How to use Express Passport Local Strategy"
 *
 * Also, look up what behavior express session has without a max age set
 */
app.get("/protected-route", (req, res, next) => {
  console.log(req.session);
  if (req.isAuthenticated()) {
    res.send("<h1>You are authenticated</h1>");
  } else {
    res.send("<h1>You are not authenticated</h1>");
  }
});

// Visiting this route logs the user out
app.get("/logout", (req, res, next) => {
  req.logout();
  res.redirect("/login");
});

app.get("/login-success", (req, res, next) => {
  console.log(req.session);
  res.send("You successfully logged in.");
});

app.get("/login-failure", (req, res, next) => {
  res.send("You entered the wrong password.");
});

/**
 * -------------- SERVER ----------------
 */

// Server listens on http://localhost:3000
app.listen(3000);

/**
 * -------------- HELPER FUNCTIONS ----------------
 */

/**
 *
 * @param {*} password - The plain text password
 * @param {*} hash - The hash stored in the database
 * @param {*} salt - The salt stored in the database
 *
 * This function uses the crypto library to decrypt the hash using the salt and then compares
 * the decrypted hash/salt with the password that the user provided at login
 */
function validPassword(password, hash, salt) {
  var hashVerify = crypto
    .pbkdf2Sync(password, salt, 10000, 64, "sha512")
    .toString("hex");
  return hash === hashVerify;
}

/**
 *
 * @param {*} password - The password string that the user inputs to the password field in the register form
 *
 * This function takes a plain text password and creates a salt and hash out of it.  Instead of storing the plaintext
 * password in the database, the salt and hash are stored for security
 *
 * ALTERNATIVE: It would also be acceptable to just use a hashing algorithm to make a hash of the plain text password.
 * You would then store the hashed password in the database and then re-hash it to verify later (similar to what we do here)
 */
function genPassword(password) {
  var salt = crypto.randomBytes(32).toString("hex");
  var genHash = crypto
    .pbkdf2Sync(password, salt, 10000, 64, "sha512")
    .toString("hex");

  return {
    salt: salt,
    hash: genHash,
  };
}
什么是基于JWT的身份验证?
在深入细节之前,我必须说明,如果您阅读了前面的所有章节,那么本节内容将会容易得多!我们已经涵盖了许多理解如何使用passport-jwt身份验证策略所需的知识点。
此外,随着我们逐步了解 JWT 身份验证的基础知识,我们将开始理解为什么 JWT 身份验证更适合 Angular 前端应用程序(提示:无状态身份验证!)。
评测与预览
当我们从讨论基于会话的身份验证过渡到讨论基于 JWT 的身份验证时,保持身份验证流程清晰至关重要。简单回顾一下,基于会话的身份验证应用程序的基本身份验证流程如下:
- 用户访问您的 Express 应用程序并使用其用户名和密码登录。
- 用户名和密码通过 POST 请求发送到
/loginExpress 应用服务器上的路由。 - Express 应用服务器将从数据库中检索用户(用户配置文件中存储了哈希值和盐值),使用附加到数据库用户对象的盐值对用户几秒钟前提供的密码进行哈希运算,并验证得到的哈希值是否与存储在数据库用户对象中的哈希值匹配。
- 如果哈希值匹配,则表明用户提供了正确的凭据,我们的
passport-local中间件会将用户附加到当前会话中。 - 用户在前端发出的每个新请求都会附加一个会话 Cookie,该 Cookie 随后将由 Passport 中间件进行验证。如果 Passport 中间件成功验证了会话 Cookie,服务器将返回请求的路由数据,身份验证流程即完成。
我想让您注意的是,在这个流程中,用户只需输入一次用户名和密码,即可在会话期间访问受保护的路由。会话 cookie 会自动附加到用户的所有请求中,因为这是 Web 浏览器的默认行为,也是 cookie 的工作原理!此外,每次发出请求时,Passport 中间件和 Express Session 中间件都会查询我们的数据库以检索会话信息。换句话说,要验证用户身份,需要访问数据库。
现在我们继续往下看,你会发现使用 JWT 时,每次请求都不需要数据库来验证用户身份。没错,我们确实需要发起一次数据库请求来初始验证用户身份并生成 JWT,但之后,JWT 会附加到AuthorizationHTTP 请求头中(而不是 HTTPCookie头部),不再需要数据库。
如果这让你感到困惑,没关系。我们将在接下来的章节中解释所有逻辑。
JSON Web Token (JWT) 的组成部分
从最基本的层面来说,JSON Web Token (JWT) 只是一小段包含用户信息的数据。它包含三个部分:
- 标题
- 有效载荷
- 签名
每个部分都采用 Base64url 格式进行编码(比 JSON 对象更容易通过 HTTP 协议传输)。
以下是一个 JWT 示例:
eyJhbGciOiJSUzI1NiIsInR5cCI6IkpXVCJ9.eyJzdWIiOiIxMjM0NTY3ODkwIiwibmFtZSI6IkpvaG4gRG9lIiwiYWRtaW4iOnRydWUsImlhdCI6MTUxNjIzOTAyMn0.POstGetfAytaZS82wHcjoTyoqhMyxXiWdR7Nn7A29DNSl0EiXLdwJ6xC6AfgZWF1bOsS_TuYI3OG85AmiExREkrS6tDfTQ2B3WXlrr-wp5AokiRbz3_oB4OxG-W9KcEEbDRcZc0nH3L7LzYptiy1PtAylQGxHTWZXtGz4ht0bAecBgmpdgXMguEIcoqPJ1n3pIWk_dUZegpqx0Lka21H6XxUTxiy8OcaarA8zdnPUnV6AmNP3ecFawIFYdvJB_cm-GvpCSbr8G8y_Mllj8f4x9nBH8pQux89_6gUY618iYv7tuPWBFfEbLxtF2pZS6YC1aSfLQxeNe8djT9YjpvRZA
请注意这段文本中包含句点.。这些句点将头部、有效载荷和签名分隔开来。我们先来看头部:
eyJhbGciOiJSUzI1NiIsInR5cCI6IkpXVCJ9
现在,让我们安装 NodeJSbase64url库并解码它。
npm install --save base64url
# I am running this from Node console

const base64 = require('base64url');

const headerInBase64UrlFormat = 'eyJhbGciOiJSUzI1NiIsInR5cCI6IkpXVCJ9';

const decoded = base64.decode(headerInBase64UrlFormat);

console.log(decoded);
如果我们按照上述方式解码标头,它将给我们以下JSON对象(因此得名“JSON”Web Token):
{
    "alg":"RS256",
    "typ":"JWT"
}
我们稍后会解释这意味着什么,但现在,让我们使用相同的方法解码有效载荷和签名。
# I am running this from Node console

const base64 = require('base64url');

const JWT_BASE64_URL = 'eyJhbGciOiJSUzI1NiIsInR5cCI6IkpXVCJ9.eyJzdWIiOiIxMjM0NTY3ODkwIiwibmFtZSI6IkpvaG4gRG9lIiwiYWRtaW4iOnRydWUsImlhdCI6MTUxNjIzOTAyMn0.POstGetfAytaZS82wHcjoTyoqhMyxXiWdR7Nn7A29DNSl0EiXLdwJ6xC6AfgZWF1bOsS_TuYI3OG85AmiExREkrS6tDfTQ2B3WXlrr-wp5AokiRbz3_oB4OxG-W9KcEEbDRcZc0nH3L7LzYptiy1PtAylQGxHTWZXtGz4ht0bAecBgmpdgXMguEIcoqPJ1n3pIWk_dUZegpqx0Lka21H6XxUTxiy8OcaarA8zdnPUnV6AmNP3ecFawIFYdvJB_cm-GvpCSbr8G8y_Mllj8f4x9nBH8pQux89_6gUY618iYv7tuPWBFfEbLxtF2pZS6YC1aSfLQxeNe8djT9YjpvRZA';

// Returns an array of strings separated by the period
const jwtParts = JWT_BASE64_URL.split('.');

const headerInBase64UrlFormat = jwtParts[0];
const payloadInBase64UrlFormat = jwtParts[1];
const signatureInBase64UrlFormat = jwtParts[2];

const decodedHeader = base64.decode(headerInBase64UrlFormat);
const decodedPayload = base64.decode(payloadInBase64UrlFormat);
const decodedSignature = base64.decode(signatureInBase64UrlFormat);

console.log(decodedHeader);
console.log(decodedPayload);
console.log(decodedSignature);
上述代码的运行结果为:
# Header
{
    "alg":"RS256",
    "typ":"JWT"
}

# Payload
{
    "sub":"1234567890",
    "name":"John Doe",
    "admin":true,
    "iat":1516239022
}

# Signature
Lots of gibberish like - ��e宿���(�$[����4\e�'
目前,请忽略 JWT 的签名部分。它无法解码成有意义的 JSON 对象,是因为它比头部和有效负载要复杂一些。我们稍后会对此进行更深入的研究。
让我们一起来了解一下头部和有效载荷。
头部同时包含 `and`alg和 ` typproperty` 属性。这两个属性都包含在 JWT 中,因为它们代表了用于解释该复杂签名的“指令”。
有效载荷是最简单的部分,它只是关于我们正在进行身份验证的用户的信息。
sub- “subject”的缩写,通常代表数据库中的用户IDname- 一些关于用户的任意元数据admin- 一些关于用户的更多任意元数据iat- “issued at”的缩写,表示此JWT的签发时间。
使用 JWT 时,您可能还会在有效负载中看到以下信息:
exp- “过期时间”的缩写,表示此 JWT 失效的时间。iss- “issuer”的缩写,通常用于中央登录服务器颁发大量JWT令牌的情况(也大量用于OAuth协议)。
您可以通过此链接查看 JWT 规范的所有“标准声明” 。
逐步创建签名
虽然我之前说过不用担心我们尝试解码signatureJWT时收到的那些乱码,但我知道它肯定还是挺让人困扰的。本节我们将学习它的工作原理,但首先,你需要阅读我写的这篇文章,它解释了公钥密码学的工作原理(根据你对这个主题的熟悉程度,阅读时间应该在10-20分钟之间)。即使你已经熟悉这个主题,也应该快速浏览一下这篇文章。如果你对公钥密码学没有扎实的理解,本节内容对你来说将毫无意义。
总之……
headerJWT 的签名实际上是 `<string>`和 `<string>`的组合payload。它的创建方式如下(以下为伪代码):
// NOTE: This is pseudocode!!

// Copied from the original JWT we are using as an example above
const base64UrlHeader = "eyJhbGciOiJSUzI1NiIsInR5cCI6IkpXVCJ9";
const base64UrlPayload =
  "eyJzdWIiOiIxMjM0NTY3ODkwIiwibmFtZSI6IkpvaG4gRG9lIiwiYWRtaW4iOnRydWUsImlhdCI6MTUxNjIzOTAyMn0";

// We take a one-way hash of the header and payload using the SHA256 hashing
// algorithm.  We know to use this algorithm because it was specified in the
// JWT header
const hashedData = sha256hashFunction(base64UrlHeader + "." + base64UrlPayload);

// The issuer (in our case, it will be the Express server) will sign the hashed
// data with its private key
const encryptedData = encryptFunction(issuer_priv_key, hashedData);

const finalSignature = convertToBase64UrlFunction(encryptedData);
尽管sha256hashFunction、encryptFunction和convertToBase64UrlFunction都是伪代码,但希望以上示例能够充分解释创建签名的过程。
现在,让我们使用 NodeJScrypto库来实际实现上面的伪代码。下面是我用来生成这个示例 JWT 的公钥和私钥(我们需要用它们来创建和解码 JWT 的签名)。
-----BEGIN PUBLIC KEY-----
MIIBIjANBgkqhkiG9w0BAQEFAAOCAQ8AMIIBCgKCAQEAnzyis1ZjfNB0bBgKFMSv
vkTtwlvBsaJq7S5wA+kzeVOVpVWwkWdVha4s38XM/pa/yr47av7+z3VTmvDRyAHc
aT92whREFpLv9cj5lTeJSibyr/Mrm/YtjCZVWgaOYIhwrXwKLqPr/11inWsAkfIy
tvHWTxZYEcXLgAXFuUuaS3uF9gEiNQwzGTU1v0FqkqTBr4B8nW3HCN47XUu0t8Y0
e+lf4s4OxQawWD79J9/5d3Ry0vbV3Am1FtGJiJvOwRsIfVChDpYStTcHTCMqtvWb
V6L11BWkpzGXSW4Hv43qa+GSYOD2QU68Mb59oSk2OB+BtOLpJofmbGEGgvmwyCI9
MwIDAQAB
-----END PUBLIC KEY-----
-----BEGIN RSA PRIVATE KEY-----
MIIEogIBAAKCAQEAnzyis1ZjfNB0bBgKFMSvvkTtwlvBsaJq7S5wA+kzeVOVpVWw
kWdVha4s38XM/pa/yr47av7+z3VTmvDRyAHcaT92whREFpLv9cj5lTeJSibyr/Mr
m/YtjCZVWgaOYIhwrXwKLqPr/11inWsAkfIytvHWTxZYEcXLgAXFuUuaS3uF9gEi
NQwzGTU1v0FqkqTBr4B8nW3HCN47XUu0t8Y0e+lf4s4OxQawWD79J9/5d3Ry0vbV
3Am1FtGJiJvOwRsIfVChDpYStTcHTCMqtvWbV6L11BWkpzGXSW4Hv43qa+GSYOD2
QU68Mb59oSk2OB+BtOLpJofmbGEGgvmwyCI9MwIDAQABAoIBACiARq2wkltjtcjs
kFvZ7w1JAORHbEufEO1Eu27zOIlqbgyAcAl7q+/1bip4Z/x1IVES84/yTaM8p0go
amMhvgry/mS8vNi1BN2SAZEnb/7xSxbflb70bX9RHLJqKnp5GZe2jexw+wyXlwaM
+bclUCrh9e1ltH7IvUrRrQnFJfh+is1fRon9Co9Li0GwoN0x0byrrngU8Ak3Y6D9
D8GjQA4Elm94ST3izJv8iCOLSDBmzsPsXfcCUZfmTfZ5DbUDMbMxRnSo3nQeoKGC
0Lj9FkWcfmLcpGlSXTO+Ww1L7EGq+PT3NtRae1FZPwjddQ1/4V905kyQFLamAA5Y
lSpE2wkCgYEAy1OPLQcZt4NQnQzPz2SBJqQN2P5u3vXl+zNVKP8w4eBv0vWuJJF+
hkGNnSxXQrTkvDOIUddSKOzHHgSg4nY6K02ecyT0PPm/UZvtRpWrnBjcEVtHEJNp
bU9pLD5iZ0J9sbzPU/LxPmuAP2Bs8JmTn6aFRspFrP7W0s1Nmk2jsm0CgYEAyH0X
+jpoqxj4efZfkUrg5GbSEhf+dZglf0tTOA5bVg8IYwtmNk/pniLG/zI7c+GlTc9B
BwfMr59EzBq/eFMI7+LgXaVUsM/sS4Ry+yeK6SJx/otIMWtDfqxsLD8CPMCRvecC
2Pip4uSgrl0MOebl9XKp57GoaUWRWRHqwV4Y6h8CgYAZhI4mh4qZtnhKjY4TKDjx
QYufXSdLAi9v3FxmvchDwOgn4L+PRVdMwDNms2bsL0m5uPn104EzM6w1vzz1zwKz
5pTpPI0OjgWN13Tq8+PKvm/4Ga2MjgOgPWQkslulO/oMcXbPwWC3hcRdr9tcQtn9
Imf9n2spL/6EDFId+Hp/7QKBgAqlWdiXsWckdE1Fn91/NGHsc8syKvjjk1onDcw0
NvVi5vcba9oGdElJX3e9mxqUKMrw7msJJv1MX8LWyMQC5L6YNYHDfbPF1q5L4i8j
8mRex97UVokJQRRA452V2vCO6S5ETgpnad36de3MUxHgCOX3qL382Qx9/THVmbma
3YfRAoGAUxL/Eu5yvMK8SAt/dJK6FedngcM3JEFNplmtLYVLWhkIlNRGDwkg3I5K
y18Ae9n7dHVueyslrb6weq7dTkYDi3iOYRW8HRkIQh06wEdbxt0shTzAJvvCQfrB
jg/3747WSsf/zBTcHihTRBdAv6OmdhV4/dD5YBfLAkLrd+mX7iE=
-----END RSA PRIVATE KEY-----
首先,我们来创建请求头和请求体。我会用到base64url相关的库,所以请确保你已经安装了它。
const base64 = require("base64url");

const headerObj = {
  alg: "RS256",
  typ: "JWT",
};

const payloadObj = {
  sub: "1234567890",
  name: "John Doe",
  admin: true,
  iat: 1516239022,
};

const headerObjString = JSON.stringify(headerObj);
const payloadObjString = JSON.stringify(payloadObj);

const base64UrlHeader = base64(headerObjString);
const base64UrlPayload = base64(payloadObjString);

console.log(base64UrlHeader); // eyJhbGciOiJSUzI1NiIsInR5cCI6IkpXVCJ9
console.log(base64UrlPayload); // eyJzdWIiOiIxMjM0NTY3ODkwIiwibmFtZSI6IkpvaG4gRG9lIiwiYWRtaW4iOnRydWUsImlhdCI6MTUxNjIzOTAyMn0
搞定!你已经创建了 JWT 的前两个部分。现在,让我们把签名部分的创建添加到这个脚本中。我们需要用到 NodeJS 内置crypto库和私钥。
const base64 = require("base64url");
const crypto = require("crypto");
const signatureFunction = crypto.createSign("RSA-SHA256");
const fs = require("fs");

const headerObj = {
  alg: "RS256",
  typ: "JWT",
};

const payloadObj = {
  sub: "1234567890",
  name: "John Doe",
  admin: true,
  iat: 1516239022,
};

const headerObjString = JSON.stringify(headerObj);
const payloadObjString = JSON.stringify(payloadObj);

const base64UrlHeader = base64(headerObjString);
const base64UrlPayload = base64(payloadObjString);

signatureFunction.write(base64UrlHeader + "." + base64UrlPayload);
signatureFunction.end();

// The private key without line breaks
const PRIV_KEY = fs.readFileSync(__dirname + "/id_rsa_priv.pem", "utf8");

// Will sign our data and return Base64 signature (not the same as Base64Url!)
const signatureBase64 = signatureFunction.sign(PRIV_KEY, "base64");

const signatureBase64Url = base64.fromBase64(signatureBase64);

console.log(signatureBase64Url); // POstGetfAytaZS82wHcjoTyoqhMyxXiWdR7Nn7A29DNSl0EiXLdwJ6xC6AfgZWF1bOsS_TuYI3OG85AmiExREkrS6tDfTQ2B3WXlrr-wp5AokiRbz3_oB4OxG-W9KcEEbDRcZc0nH3L7LzYptiy1PtAylQGxHTWZXtGz4ht0bAecBgmpdgXMguEIcoqPJ1n3pIWk_dUZegpqx0Lka21H6XxUTxiy8OcaarA8zdnPUnV6AmNP3ecFawIFYdvJB_cm-GvpCSbr8G8y_Mllj8f4x9nBH8pQux89_6gUY618iYv7tuPWBFfEbLxtF2pZS6YC1aSfLQxeNe8djT9YjpvRZA
上面的代码重复了我们之前运行的脚本,并附加了创建签名的逻辑。在这段代码中,我们首先使用 `.` 将头部和有效负载(base64url 编码)连接在一起.。然后,我们将这些内容写入签名函数,该函数是 NodeJS 内置加密库的RSA-SHA256签名类。虽然听起来很复杂,但这一切告诉我们的是……
- 使用 RSA 标准 4096 位公钥/私钥对
- 要对数据进行哈希处理
base64Url(header) + '.' + base64Url(payload),请使用SHA256哈希算法。
在 JWT 标头中,你会注意到这是用 表示的RS256,这只是 的缩写形式RSA-SHA256。
将内容写入此函数后,我们需要从文件中读取用于签名的私钥。我已将本文前面提到的私钥存储在一个名为 `<privatekey_name>` 的文件中id_rsa_priv.pem,该文件位于当前工作目录中,并以.pem标准格式存储。
接下来,我将对数据进行“签名”,首先使用SHA256哈希函数对数据进行哈希处理,然后使用私钥对结果进行加密。
最后,由于 NodeJS crypto 库以 Base64Base64格式返回我们的值,我们需要使用该base64Url库将其从 Base64 转换为 Base64Url。
完成之后,您将拥有一个与我们的原始 JWT 完全匹配的 JWT 标头、有效负载和签名!
逐步验证签名
上一节我们学习了如何创建 JWT 签名。在用户身份验证中,流程如下:
- 服务器接收登录凭据(用户名、密码)
- 服务器执行一些逻辑来验证这些凭据是否有效。
- 如果凭证有效,服务器将颁发并签署JWT,然后将其返回给用户。
- 用户使用颁发的 JWT 对浏览器中的后续请求进行身份验证。
但是,如果用户向您应用程序的受保护路由或受保护的 API 端点发出另一个请求,会发生什么情况?
用户向服务器提供 JWT 令牌,但服务器如何解析该令牌并判断用户身份是否有效?以下是基本步骤。
- 服务器收到 JWT 令牌
- 服务器首先检查 JWT 令牌是否过期,以及是否已过过期日期。如果已过期,服务器将拒绝访问。
- 如果 JWT 未过期,服务器将首先将
header其payload从 Base64Url 转换为 JSON 格式。 - 服务器会查看
headerJWT 以找到解密签名所需的哈希函数和加密算法(在本例中,我们假设 JWT 使用RSA-SHA256作为算法)。 - 服务器使用
SHA256哈希函数进行哈希处理base64Url(header) + '.' + base64Url(payload),从而得到一个哈希值。 - 服务器使用
Public Key存储在其文件系统中的密钥来解密base64Url(signature)(记住,私钥用于加密,公钥用于解密)。由于服务器既负责创建签名也负责验证签名,因此其文件系统中应该同时存储公钥和私钥。对于规模较大的应用场景,通常会将这些任务分配给完全不同的机器。 - 服务器比较步骤 5 和步骤 6 中的值。如果它们匹配,则此 JWT 有效。
- 如果 JWT 有效,服务器将使用该
payload数据获取有关用户的更多信息并验证该用户的身份。
使用本文中一直使用的同一个 JWT ,以下是该过程的代码示例:
const base64 = require("base64url");
const crypto = require("crypto");
const verifyFunction = crypto.createVerify("RSA-SHA256");
const fs = require("fs");

const JWT =
  "eyJhbGciOiJSUzI1NiIsInR5cCI6IkpXVCJ9.eyJzdWIiOiIxMjM0NTY3ODkwIiwibmFtZSI6IkpvaG4gRG9lIiwiYWRtaW4iOnRydWUsImlhdCI6MTUxNjIzOTAyMn0.POstGetfAytaZS82wHcjoTyoqhMyxXiWdR7Nn7A29DNSl0EiXLdwJ6xC6AfgZWF1bOsS_TuYI3OG85AmiExREkrS6tDfTQ2B3WXlrr-wp5AokiRbz3_oB4OxG-W9KcEEbDRcZc0nH3L7LzYptiy1PtAylQGxHTWZXtGz4ht0bAecBgmpdgXMguEIcoqPJ1n3pIWk_dUZegpqx0Lka21H6XxUTxiy8OcaarA8zdnPUnV6AmNP3ecFawIFYdvJB_cm-GvpCSbr8G8y_Mllj8f4x9nBH8pQux89_6gUY618iYv7tuPWBFfEbLxtF2pZS6YC1aSfLQxeNe8djT9YjpvRZA";
const PUB_KEY = fs.readFileSync(__dirname + "/id_rsa_pub.pem", "utf8");

const jwtHeader = JWT.split(".")[0];
const jwtPayload = JWT.split(".")[1];
const jwtSignature = JWT.split(".")[2];

verifyFunction.write(jwtHeader + "." + jwtPayload);
verifyFunction.end();

const jwtSignatureBase64 = base64.toBase64(jwtSignature);

const signatureIsValid = verifyFunction.verify(
  PUB_KEY,
  jwtSignatureBase64,
  "base64"
);

console.log(signatureIsValid); // true
这段代码中有几点值得注意。首先,我们将 Base64Url 编码的 JWT 分割成三个部分。然后,我们使用 NodeJS 内置createVerify函数创建一个新Verify类。与创建签名的过程类似,我们需要将分割后的 JWT 数据传递base64url(header) + '.' + base64url(payload)给加密类使用的流Verify。
下一步至关重要——你需要将jwtSignature默认编码 Base64Url 转换为 Base64。然后,你需要传递公钥、签名的 Base64 版本,并告知 NodeJS 你使用的是 Base64 编码。如果你不指定编码,它将默认使用 Buffer 类型,并且始终返回 false 值。
如果一切顺利,您应该会得到一个真正的返回值,这意味着此签名有效!
缩小视角:JWT签名的真正价值
如果你阅读了以上两节,你就会知道如何使用 JWTRSA-SHA256算法创建和验证 JWT 签名(其他算法的工作方式非常相似,但该算法被认为是更安全、更“可用于生产环境”的算法之一)。
但这究竟意味着什么?
I know we have gone in all sorts of directions in this post about user authentication, but all of this knowledge comes together here. If you think about authenticating a user with Cookies and Sessions, you know that in order to do so, your application server must have a database keeping track of the sessions, and this database must be called each time a user wants to visit a protected resource on the server.
With JWT authentication, the only thing needed to verify that a user is authenticated is a public key!!
Once a JWT token has been issued (by either your application server, an authentication server, or even a 3rd party authentication server), that JWT can be stored in the browser securely and can be used to verify any request without using a database at all. The application server just needs the public key of the issuer!
If you extrapolate this concept and think about the wider implications of JWT, it becomes clear how powerful it is. You no longer need a local database. You can transport authentication all over the web!
Let's say I log in to a popular service like Google and I receive a JWT token from Google's authentication server. The only thing that is needed to verify the JWT that I am browsing with is the public key that matches the private key Google signed with. Usually, this public key is publicly available, which means that anyone on the internet can verify my JWT! If they trust Google and they trust that Google is providing the correct public key, then there is no reason that I cannot just use the JWT issued by Google to authenticate users into my application.
I know I said that we wouldn't be getting into all the OAuth stuff in this post, but this is the essence of delegated authentication (i.e. the OAuth2.0 protocol)!
How do I use the passport-jwt Strategy??
Before we get into the implementation of the passport-jwt strategy, I wanted to make a few notes about implementing JWTs in an authentication strategy.
Unfortunately and fortunately, there are many ways that you can successfully implement JWTs into your application. Because of this, if you search Google for "how to implement JWT in an Express App", you'll get a variety of implementations. Let's take a look at our options from most complex to least complex.
Most Complex: If we wanted to make this process as complicated (but also as transparent) as possible, we could use the signing and verifying process that we used earlier in this post using the built-in Node crypto library. This would require us to write a lot of Express middleware, a lot of custom logic, and a lot of error handling, but it could certainly be done.
Somewhat Complex: If we wanted to simplify things a little bit, we could do everything on our own, but instead of using the built-in Node crypto library, we could abstract away a lot of complexity and use the popular package jsonwebtoken. This is not a terrible idea, and there are actually many tutorials online that show you how to implement JWT authentication using just this library.
Simple (if used correctly): Last but not least, we could abstract away even more complexity and use the passport-jwt strategy. Or wait... Don't we need the passport-local strategy too since we are authenticating with usernames and passwords? And how do we generate a JWT in the first place? Clearly, we will need the jsonwebtoken library to do this...
And here lies the problem.
The passport-jwt strategy does not have much documentation, and I personally believe that because of this, the questions I just raised create a world of confusion in the development community. This results in thousands of different implementations of passport-jwt combined with external libraries, custom middlewares, and much more. This could be considered a good thing, but for someone looking to implement passport-jwt the "correct way", it can be frustrating.
Like any software package, if you use it correctly, it will add value to your development. If you use it incorrectly, it could introduce more complexity to your project than if you never used it in the first place.
In this section, I will do my best to explain what the passport-jwt strategy aims to achieve and how we can use it in a way that actually adds value to our codebase rather than complexity.
So let me start by conveying one very important fact about passport-jwt.
The Passport JWT strategy uses the jsonwebtoken library.
Why is this important??
Remember--JWTs need to first be signed and then verified. Passport takes care of the verification for us, so we just need to sign our JWTs and send them off to the passport-jwt middleware to be verified. Since passport-jwt uses the jsonwebtoken library to verify tokens, then we should probably be using the same library to generate the tokens!
In other words, we need to get familiar with the jsonwebtoken library, which begs the question... Why do we even need Passport in the first place??
With the passport-local strategy, Passport was useful to us because it connected seamlessly with express-session and helped manage our user session. If we wanted to authenticate a user, we use the passport.authenticate() method on the /login POST route.
router.post("/login", passport.authenticate("local", {}), (req, res, next) => {
  // If we make it here, our user has been authenticate and has been attached
  // to the current session
});
If we wanted to authenticate a route (after the user had logged in), all we needed to do was this:
router.get("/protected", (req, res, next) => {
  if (req.isAuthenticated()) {
    // Send the route data
    res.status(200).send("Web page data");
  } else {
    // Not authorized
    res.status(401).send("You are not authorized to view this");
  }
});
We were able to do this (after the user had logged in) because the passport-local middleware stored our user in the Express Session. To me, this is a bit odd, because you are only using the passport.authenticate() method one time (for login).
Now that we are using JWTs, we need to authenticate every single request, and thus, we will be using the passport.authenticate() method a lot more.
The basic flow looks like this:
- User logs in with username and password
- Express server validates the username and password, signs a JWT, and sends that JWT back to the user.
- The user will store the JWT in the browser (this is where our Angular app comes in) via
localStorage. - For every request, Angular will add the JWT stored in
localStorageto theAuthorizationHTTP Header (similar to how we stored our session in theCookieheader) - For every request, the Express app will run the
passport.authenticate()middleware, which will extract the JWT from theAuthorizationheader, verify it with a Public Key, and based on the result, either allow or disallow a user from visiting a route or making an API call.
In summary, to authenticate using the passport-jwt strategy, our routes will look like so:
/**
 * Session is set to false because we are using JWTs, and don't need a session! * If you do not set this to false, the Passport framework will try and
 * implement a session
 */
router.get(
  "/protected",
  passport.authenticate("jwt", { session: false }),
  (req, res, next) => {
    res
      .status(200)
      .send("If you get this data, you have been authenticated via JWT!");
  }
);
All we need to do is configure Passport with our public/private keys, desired JWT algorithm (RSA256 in our case), and a verify function.
Yes, we could implement our own passport.authenticate() middleware, but if we did, we would need to write functions (and error handling... ughhh) to do the following:
- Parse the HTTP header
- Extract the JWT from the HTTP header
- Verify the JWT with
jsonwebtoken
I would much rather delegate that work (and error handling) to a trusted framework like Passport!
Intro to jsonwebtoken and passport-jwt configuration
This section will highlight the basic methods and setup of both the jsonwebtoken and passport-jwt modules irrespective of our Express app. The next section will show how these integrate into the Express and Angular applications.
First, let's see how we could use jsonwebtoken to sign and verify a JWT. For this, we will use the same JWT that we used to demonstrate how JWTs worked (below).
eyJhbGciOiJSUzI1NiIsInR5cCI6IkpXVCJ9.eyJzdWIiOiIxMjM0NTY3ODkwIiwibmFtZSI6IkpvaG4gRG9lIiwiYWRtaW4iOnRydWUsImlhdCI6MTUxNjIzOTAyMn0.POstGetfAytaZS82wHcjoTyoqhMyxXiWdR7Nn7A29DNSl0EiXLdwJ6xC6AfgZWF1bOsS_TuYI3OG85AmiExREkrS6tDfTQ2B3WXlrr-wp5AokiRbz3_oB4OxG-W9KcEEbDRcZc0nH3L7LzYptiy1PtAylQGxHTWZXtGz4ht0bAecBgmpdgXMguEIcoqPJ1n3pIWk_dUZegpqx0Lka21H6XxUTxiy8OcaarA8zdnPUnV6AmNP3ecFawIFYdvJB_cm-GvpCSbr8G8y_Mllj8f4x9nBH8pQux89_6gUY618iYv7tuPWBFfEbLxtF2pZS6YC1aSfLQxeNe8djT9YjpvRZA
And here is a basic script that demonstrates how we would sign this JWT and verify it.
const jwt = require("jsonwebtoken");
const fs = require("fs");

const PUB_KEY = fs.readFileSync(__dirname + "/id_rsa_pub.pem", "utf8");
const PRIV_KEY = fs.readFileSync(__dirname + "/id_rsa_priv.pem", "utf8");

// ============================================================
// -------------------  SIGN ----------------------------------
// ============================================================

const payloadObj = {
  sub: "1234567890",
  name: "John Doe",
  admin: true,
  iat: 1516239022,
};

/**
 * Couple things here:
 *
 * First, we do not need to pass in the `header` to the function, because the
 * jsonwebtoken module will automatically generate the header based on the algorithm specified
 *
 * Second, we can pass in a plain Javascript object because the jsonwebtoken library will automatically
 * pass it into JSON.stringify()
 */
const signedJWT = jwt.sign(payloadObj, PRIV_KEY, { algorithm: "RS256" });

console.log(signedJWT); // Should get the same exact token that we had in our example

// ============================================================
// -------------------  VERIFY --------------------------------
// ============================================================

// Verify the token we just signed using the public key.  Also validates our algorithm RS256
jwt.verify(signedJWT, PUB_KEY, { algorithms: ["RS256"] }, (err, payload) => {
  if (err.name === "TokenExpiredError") {
    console.log("Whoops, your token has expired!");
  }

  if (err.name === "JsonWebTokenError") {
    console.log("That JWT is malformed!");
  }

  if (err === null) {
    console.log("Your JWT was successfully validated!");
  }

  // Both should be the same
  console.log(payload);
  console.log(payloadObj);
});
So how does jsonwebtoken and passport-jwt work together? Let's take a look at the configuration for Passport below.
const JwtStrategy = require("passport-jwt").Strategy;
const ExtractJwt = require("passport-jwt").ExtractJwt;

const PUB_KEY = fs.readFileSync(__dirname + "/id_rsa_pub.pem", "utf8");

// At a minimum, you must pass these options (see note after this code snippet for more)
const options = {
  jwtFromRequest: ExtractJwt.fromAuthHeaderAsBearerToken(),
  secretOrKey: PUB_KEY,
};

// The JWT payload is passed into the verify callback
passport.use(
  new JwtStrategy(options, function (jwt_payload, done) {
    // We will assign the `sub` property on the JWT to the database ID of user
    User.findOne({ id: jwt_payload.sub }, function (err, user) {
      // This flow look familiar?  It is the same as when we implemented
      // the `passport-local` strategy
      if (err) {
        return done(err, false);
      }
      if (user) {
        return done(null, user);
      } else {
        return done(null, false);
      }
    });
  })
);
Note on options: The way that options are assigned in the passport-jwt library can be a bit confusing. You can pass jsonwebtoken options, but they must be passed in a specific way. Below is an object with ALL possible options you can use for your passport-jwt object. I left out the secretOrKeyProvider option because it is the alternative to the secretOrKey option, which is more common. The secretOrKeyProvider is a callback function used to retrieve a asymmetric key from a jwks key provider. For explanation of any of these options, you can see the passport-jwt docs, this rfc and the jsonwebtoken documentation.
const passportJWTOptions = {
    jwtFromRequest: ExtractJwt.fromAuthHeaderAsBearerToken(),
    secretOrKey: PUB_KEY || secret phrase,
    issuer: 'enter issuer here',
    audience: 'enter audience here',
    algorithms: ['RS256'],
    ignoreExpiration: false,
    passReqToCallback: false,
    jsonWebTokenOptions: {
        complete: false,
        clockTolerance: '',
        maxAge: '2d', // 2 days
        clockTimestamp: '100',
        nonce: 'string here for OpenID'
    }
}
The above code (before the options) does the following:
- When a user visits a protected route, they will attach their JWT to the HTTP
Authorizationheader passport-jwtwill grab that value and parse it using theExtractJwt.fromAuthHeaderAsBearerToken()method.passport-jwtwill take the extracted JWT along with the options we set and call thejsonwebtokenlibrary'sverify()method.- If the verification is successful,
passport-jwtwill find the user in the database, attach it to thereqobject, and allow the user to visit the given resource.
What about Angular? How does that handle JWTs?
If you remember from part 1 of this post, HTTP Cookies are automatically sent with every HTTP request (until they expire) after the Set-Cookie HTTP header has set the value of them. With JWTs, this is not the case!
We have two options:
- We can "intercept" each HTTP request from our Angular application and append the
AuthorizationHTTP Header with our JWT token - We can manually add our JWT token to each request
Yes, the first option is a little bit of up-front work, but I think we can manage it.
In addition to the problem of the JWT not being added to each request automatically, we also have the problem of Angular routing. Since Angular runs in the browser and is a Single Page Application, it is not making an HTTP request every time it loads a new view/route. Unlike a standard Express application where you actually get the HTML from the Express app itself, Angular delivers the HTML all at once, and then the client-side logic determines how the routing works.
Because of this, we are going to need to build an Authentication Service in our Angular application that will keep track of our user's authentication state. We will then allow the user to visit protected Angular routes based on this state.
So if we back up for a second, there are really two layers of authentication going on right now. On one hand, we have the authentication that happens on the Express server, which determines what HTTP requests our user can make. Since we are using Angular as a front-end, all of the HTTP requests that we make to our Express app will be data retrieval. On the other hand, we have authentication within our Angular app. We could just ignore this authentication completely, but what if we had an Angular component view that loaded data from the database?
If the user is logged out on the Express side of things, this component view will try to load data to display, but since the user is not authenticated on the backend, the data request will fail, and our view will look weird since there is no data to display.
A better way to handle this is by synchronizing the two authentication states. If the user is not authorized to make a particular GET request for data, then we should probably not let them visit the Angular route that displays that data. They won't be able to see the data no matter what, but this behavior creates a much more seamless and friendly user experience.
Below is the code that we will use for our AuthService and Interceptor. I found this code in a blog post at Angular University and thought it was extremely simple and clean, so we will use it here. For now, don't worry about how this integrates into the Angular application as I will show that later in the implementation section.
// https://momentjs.com/
import * as moment from "moment";

@Injectable()
export class AuthService {

    /**
     * Gives us access to the Angular HTTP client so we can make requests to
     * our Express app
     */
    constructor(private http: HttpClient) {}

    /**
     * Passes the username and password that the user typed into the application
     * and sends a POST request to our Express server login route, which will
     * authenticate the credentials and return a JWT token if they are valid
     *
     * The `res` object (has our JWT in it) is passed to the setLocalStorage
     * method below
     *
     * shareReplay() documentation - https://www.learnrxjs.io/operators/multicasting/sharereplay.html
     */
    login(email:string, password:string ) {
        return this.http.post<User>('/users/login', {email, password})
            .do(res => this.setLocalStorage)
            .shareReplay();
    }

    /**
     *
     */
    private setLocalStorage(authResult) {

        // Takes the JWT expiresIn value and add that number of seconds
        // to the current "moment" in time to get an expiry date
        const expiresAt = moment().add(authResult.expiresIn,'second');

        // Stores our JWT token and its expiry date in localStorage
        localStorage.setItem('id_token', authResult.idToken);
        localStorage.setItem("expires_at", JSON.stringify(expiresAt.valueOf()) );
    }

    // By removing the token from localStorage, we have essentially "lost" our
    // JWT in space and will need to re-authenticate with the Express app to get
    // another one.
    logout() {
        localStorage.removeItem("id_token");
        localStorage.removeItem("expires_at");
    }

    // Returns true as long as the current time is less than the expiry date
    public isLoggedIn() {
        return moment().isBefore(this.getExpiration());
    }

    isLoggedOut() {
        return !this.isLoggedIn();
    }

    getExpiration() {
        const expiration = localStorage.getItem("expires_at");
        const expiresAt = JSON.parse(expiration);
        return moment(expiresAt);
    }
}
// Note: We will eventually incorporate this into our app.module.ts so that it
// automatically works on all HTTP requests

@Injectable()
export class AuthInterceptor implements HttpInterceptor {
  intercept(
    req: HttpRequest<any>,
    next: HttpHandler
  ): Observable<HttpEvent<any>> {
    const idToken = localStorage.getItem("id_token");

    if (idToken) {
      const cloned = req.clone({
        headers: req.headers.set("Authorization", "Bearer " + idToken),
      });

      return next.handle(cloned);
    } else {
      return next.handle(req);
    }
  }
}
I suggest reading through all the comments to better understand how each service is working.
You can think of the HTTP Interceptor as "middleware" for Angular. It will take the existing HTTP request, add the Authorization HTTP header with the JWT stored in localStorage, and call the next() "middleware" in the chain.
And that's it. We are ready to build this thing.
JWT Based Authentication Implementation
It is finally time to jump into the actual implementation of JWT Authentication with an Express/Angular application. Since we have already covered a lot of the ExpressJS basics (middleware, cookies, sessions, etc.), I will not be devoting sections here to them, but I will briefly walk through some of the Angular concepts. If anything in this application doesn't make sense, be sure to read the first half of this post.
All of the code below can be found in this example repository on Github.
Initial Setup (skim this section)
Let's first take a very quick glance at the starting code (file names commented at top of each code snippet):
// File: app.js

const express = require("express");
const cors = require("cors");
const path = require("path");

/**
 * -------------- GENERAL SETUP ----------------
 */

// Gives us access to variables set in the .env file via `process.env.VARIABLE_NAME` syntax
require("dotenv").config();

// Create the Express application
var app = express();

// Configures the database and opens a global connection that can be used in any module with `mongoose.connection`
require("./config/database");

// Must first load the models
require("./models/user");

// Instead of using body-parser middleware, use the new Express implementation of the same thing
app.use(express.json());
app.use(express.urlencoded({ extended: true }));

// Allows our Angular application to make HTTP requests to Express application
app.use(cors());

// Where Angular builds to - In the ./angular/angular.json file, you will find this configuration
// at the property: projects.angular.architect.build.options.outputPath
// When you run `ng build`, the output will go to the ./public directory
app.use(express.static(path.join(__dirname, "public")));

/**
 * -------------- ROUTES ----------------
 */

// Imports all of the routes from ./routes/index.js
app.use(require("./routes"));

/**
 * -------------- SERVER ----------------
 */

// Server listens on http://localhost:3000
app.listen(3000);
The only slightly irregular thing above is the database connection. Many times, you will see the connection being made from within app.js, but I did this to highlight that the mongoose.connection object is global. You can configure it in one module and use it freely in another. By calling require('./config/database');, we are creating that global object. The file that defines the User model for the database is ./models/user.js.
// File: ./models/user.js

const mongoose = require("mongoose");

const UserSchema = new mongoose.Schema({
  username: String,
  hash: String,
  salt: String,
});

mongoose.model("User", UserSchema);
Next, we have the routes.
// File: ./routes/index.js

const router = require("express").Router();

// Use the routes defined in `./users.js` for all activity to http://localhost:3000/users/
router.use("/users", require("./users"));

module.exports = router;
// File: ./routes/users.js

const mongoose = require("mongoose");
const router = require("express").Router();
const User = mongoose.model("User");

// http://localhost:3000/users/login
router.post("/login", function (req, res, next) {});

// http://localhost:3000/users/register
router.post("/register", function (req, res, next) {});

module.exports = router;
Finally, we have an entire Angular app in the angular/ directory. I generated this using the ng new command. The only tweaks made to this so far are in ./angular/angular.json.
// File: ./angular/angular.json
...

"outputPath": "../public", // Line 16

...
In the first file, we need to set the output directory so that the ng build command builds our Angular application to the ./public/ directory that our Express app serves static content from.
API Routes
Our first step is to write the logic around password validation. To keep things consistent, I will be using the exact same logic as I did with the Session Based Authentication example in the first half of this post.
Let's make a folder ./lib and place a utils.js file in it.
// File: ./lib/util.js

const crypto = require("crypto");

/**
 * -------------- HELPER FUNCTIONS ----------------
 */

/**
 *
 * @param {*} password - The plain text password
 * @param {*} hash - The hash stored in the database
 * @param {*} salt - The salt stored in the database
 *
 * This function uses the crypto library to decrypt the hash using the salt and then compares
 * the decrypted hash/salt with the password that the user provided at login
 */
function validPassword(password, hash, salt) {
  var hashVerify = crypto
    .pbkdf2Sync(password, salt, 10000, 64, "sha512")
    .toString("hex");
  return hash === hashVerify;
}

/**
 *
 * @param {*} password - The password string that the user inputs to the password field in the register form
 *
 * This function takes a plain text password and creates a salt and hash out of it.  Instead of storing the plaintext
 * password in the database, the salt and hash are stored for security
 *
 * ALTERNATIVE: It would also be acceptable to just use a hashing algorithm to make a hash of the plain text password.
 * You would then store the hashed password in the database and then re-hash it to verify later (similar to what we do here)
 */
function genPassword(password) {
  var salt = crypto.randomBytes(32).toString("hex");
  var genHash = crypto
    .pbkdf2Sync(password, salt, 10000, 64, "sha512")
    .toString("hex");

  return {
    salt: salt,
    hash: genHash,
  };
}

module.exports.validPassword = validPassword;
module.exports.genPassword = genPassword;
The above is the same exact module that we used before. Now, let's create routes that will allow us to register a user and login.
// File: ./routes/users.js

const mongoose = require("mongoose");
const router = require("express").Router();
const User = mongoose.model("User");
const utils = require("../lib/utils");

// http://localhost:3000/users/login
router.post("/login", function (req, res, next) {});

router.post("/register", function (req, res, next) {
  const saltHash = utils.genPassword(req.body.password);

  const salt = saltHash.salt;
  const hash = saltHash.hash;

  const newUser = new User({
    username: req.body.username,
    hash: hash,
    salt: salt,
  });

  try {
    newUser.save().then((user) => {
      res.json({ success: true, user: user });
    });
  } catch (err) {
    res.json({ success: false, msg: err });
  }
});

module.exports = router;
Using Postman (or another HTTP request utility), test the route and create a user. Here is my post request and results:
{
    "username": "zach",
    "password": "123"
}
{
    "success": true,
    "user": {
        "_id": "5def83773d50a20d27887032",
        "username": "zach",
        "hash": "9aa8c8999e4c25880aa0f3b1b1ae6fbcfdfdedb9fd96295e370a4ecb4e9d30f83d5d91e86d840cc5323e7c4ed15097db5c2262ac95c0c11268d9a90a7755c281",
        "salt": "d63bb43fc411a55f0ac6ff8c145c58f70c8c10e18915b5c6d9578b997d637143",
        "__v": 0
    }
}
We now have a user in the database that we can test our authentication on, but we currently do not have any logic to use for the /login route. This is where Passport comes in.
Add passport.js to the ./config/ directory and put the following in it.
// File: ./config/passport

const JwtStrategy = require("passport-jwt").Strategy;
const ExtractJwt = require("passport-jwt").ExtractJwt;
const fs = require("fs");
const path = require("path");
const User = require("mongoose").model("User");

// Go up one directory, then look for file name
const pathToKey = path.join(__dirname, "..", "id_rsa_pub.pem");

// The verifying public key
const PUB_KEY = fs.readFileSync(pathToKey, "utf8");

// At a minimum, you must pass the `jwtFromRequest` and `secretOrKey` properties
const options = {
  jwtFromRequest: ExtractJwt.fromAuthHeaderAsBearerToken(),
  secretOrKey: PUB_KEY,
  algorithms: ["RS256"],
};

// app.js will pass the global passport object here, and this function will configure it
module.exports = (passport) => {
  // The JWT payload is passed into the verify callback
  passport.use(
    new JwtStrategy(options, function (jwt_payload, done) {
      // Since we are here, the JWT is valid!

      // We will assign the `sub` property on the JWT to the database ID of user
      User.findOne({ _id: jwt_payload.sub }, function (err, user) {
        // This flow look familiar?  It is the same as when we implemented
        // the `passport-local` strategy
        if (err) {
          return done(err, false);
        }
        if (user) {
          // Since we are here, the JWT is valid and our user is valid, so we are authorized!
          return done(null, user);
        } else {
          return done(null, false);
        }
      });
    })
  );
};
This is the function that will run on every route that we use the passport.authenticate() middleware. Internally, Passport will verify the supplied JWT with the jsonwebtoken verify method.
Next, let's create a utility function that will generate a JWT for our user, and put it in the utils.js file.
// File: ./lib/utils.js

const jsonwebtoken = require("jsonwebtoken");

/**
 * @param {*} user - The user object.  We need this to set the JWT `sub` payload property to the MongoDB user ID
 */
function issueJWT(user) {
  const _id = user._id;

  const expiresIn = "1d";

  const payload = {
    sub: _id,
    iat: Date.now(),
  };

  const signedToken = jsonwebtoken.sign(payload, PRIV_KEY, {
    expiresIn: expiresIn,
    algorithm: "RS256",
  });

  return {
    token: "Bearer " + signedToken,
    expires: expiresIn,
  };
}
Finally, let's implement the /users/login/ route so that if the user logs in successfully, they will receive a JWT token in the response.
// File: ./routes/users.js
const mongoose = require("mongoose");
const router = require("express").Router();
const User = mongoose.model("User");
const passport = require("passport");
const utils = require("../lib/utils");

// Validate an existing user and issue a JWT
router.post("/login", function (req, res, next) {
  User.findOne({ username: req.body.username })
    .then((user) => {
      if (!user) {
        res.status(401).json({ success: false, msg: "could not find user" });
      }

      // Function defined at bottom of app.js
      const isValid = utils.validPassword(
        req.body.password,
        user.hash,
        user.salt
      );

      if (isValid) {
        const tokenObject = utils.issueJWT(user);

        res.status(200).json({
          success: true,
          token: tokenObject.token,
          expiresIn: tokenObject.expires,
        });
      } else {
        res
          .status(401)
          .json({ success: false, msg: "you entered the wrong password" });
      }
    })
    .catch((err) => {
      next(err);
    });
});
Time to try it out! In Postman, make send a POST request to /users/login/ with the following data (remember, we already created a user):
{
    "username": "zach",
    "password": "123"
}
When you send that request, you should get the following result (your JWT will be different because you are using a different private key to sign it):
{
    "success": true,
    "token": "Bearer eyJhbGciOiJSUzI1NiIsInR5cCI6IkpXVCJ9.eyJzdWIiOiI1ZGVmODM3NzNkNTBhMjBkMjc4ODcwMzIiLCJpYXQiOjE1NzYxMTc4NDAxNzIsImV4cCI6MTU3NjExNzkyNjU3Mn0.NAIbpeukGmDOCMG5uuoFBn4GFjT6tQOpztxw7c1qiWHBSG8LQ0Sf1deKoLDOqS5Dk2N9JzXFmdni0-wt7etD94qH_C_rxL745reGMOrtJNy2SffAlAmhcphs4xlbGRjtBoABxHfiL0Hhht2fbGCwf79s5gDlTC9WqWMq8gcXZkLYXnRQZcHCOvgx-yar_c6cNVxFJBU6ah2sK1mUPTR6ReXUWt_A1lu2aOtgUG-9wXVp9h3Lh3LrdHuTqF4oV2vbTSMGCzAs33C1wwjdCGqCj3dkqfMSE43f7SSAy2-m6TgPAPm0QEUV8PiEpS1GlUCsBKVeVYC5hbUyUDS3PaJYQxklIHVNGNqlyj_1IdNaCuquGvyQDDyflZpJKnUPg1WZVgkDa5hVZerrb8hfG_MLC3vzy-rt3cWUlVItmJsT30sUInDRsfAevDX83gEtD2QR4ZkZA8ppb9s7Yi6V2_L7JUz5aBPUYT4YQo0iNj4_jpaZByqdp03GFGbfv4tmk-oeYnJHwgntoBWk_hfE3h5GbCmtfmlTO5A4CWAMu5W5pNanjNsVzogXrUZCfNaY42HC24blpO507-Vo-GwdIpFCMnrgCLa6DAW3XH-ePlRL-cbIv0-QFiSCge2RerWx5d3qlD9yintqmXf1TyzB3X7IM_JbVYqVB0sGAPrFBZqk0q0",
    "expiresIn": "1d"
}
We will now try this out using a brand new route. In the ./routes/users.js file, add the following route:
router.get(
  "/protected",
  passport.authenticate("jwt", { session: false }),
  (req, res, next) => {
    res.status(200).json({
      success: true,
      msg: "You are successfully authenticated to this route!",
    });
  }
);
Now in Postman, copy the JWT token you received into the Authorization HTTP header.

When you send this request, you should get the expected response of "Your JWT is valid". If you don't get this request, check your files with mine stored at this Github repo.
Now that your backend is working correctly, it is time to implement the Angular side of things. First, generate the following components:
ng generate component register
ng generate component login
ng generate component protected-component
Let's get these components and the Angular router setup. Below are the files you will need to update with comments in them explaining some of the logic.
// File: ./angular/src/app/app.module.ts

import { BrowserModule } from "@angular/platform-browser";

// These two modules will help us with Angular forms and submitting data to
// our Express backend
import { NgModule } from "@angular/core";
import { FormsModule } from "@angular/forms";

// This will allow us to navigate between our components
import { Routes, RouterModule } from "@angular/router";

// These are the four components in our app so far
import { AppComponent } from "./app.component";
import { LoginComponent } from "./login/login.component";
import { RegisterComponent } from "./register/register.component";
import { ProtectedComponentComponent } from "./protected-component/protected-component.component";

// Define which route will load which component
const appRoutes: Routes = [
  { path: "login", component: LoginComponent },
  { path: "register", component: RegisterComponent },
  { path: "protected", component: ProtectedComponentComponent },
];

// Your standard Angular setup
@NgModule({
  declarations: [
    AppComponent,
    LoginComponent,
    RegisterComponent,
    ProtectedComponentComponent,
  ],
  imports: [
    BrowserModule,
    FormsModule,
    RouterModule.forRoot(appRoutes, { useHash: true }),
  ],
  providers: [],
  bootstrap: [AppComponent],
})
export class AppModule {}
<!-- File: ./angular/src/app/app.component.html -->

<h1>JWT Authentication</h1>

<!-- By clicking these, the component assigned to each route will load below -->
<p><a routerLink="/login">Login</a></p>
<p><a routerLink="/register">Register</a></p>
<p><a routerLink="/protected">Visit Protected Route</a></p>

<hr />
<p>Selected route displays below:</p>
<hr />

<!-- This will load the current route -->
<router-outlet></router-outlet>
And now for each component:
<!-- File: ./angular/src/app/login/login.component.html -->

<h2>Login</h2>

<form (ngSubmit)="onLoginSubmit()" #loginform="ngForm">
  <div>
    <p>Enter a username</p>
    <input type="text" name="username" ngModel />
    <p>Enter a password</p>
    <input type="password" name="password" ngModel />
  </div>
  <button style="margin-top: 20px;" type="submit">Register</button>
</form>
// File: ./angular/src/app/login/login.component.ts

import { Component, OnInit, ViewChild } from "@angular/core";
import { NgForm } from "@angular/forms";

@Component({
  selector: "app-login",
  templateUrl: "./login.component.html",
  styleUrls: ["./login.component.css"],
})
export class LoginComponent implements OnInit {
  // This will give us access to the form
  @ViewChild("loginform", { static: false }) loginForm: NgForm;

  constructor() {}

  // When you submit the form, the username and password values will print to the screen (we will replace this later with an HTTP request)
  onLoginSubmit() {
    console.log(this.loginForm.value.username);
    console.log(this.loginForm.value.password);
  }

  ngOnInit() {}
}
<!-- File: ./angular/src/app/register/register.component.html -->

<h2>Register</h2>

<form (ngSubmit)="onRegisterSubmit()" #registerform="ngForm">
  <div>
    <p>Enter a username</p>
    <input type="text" name="username" ngModel />
    <p>Enter a password</p>
    <input type="password" name="password" ngModel />
  </div>
  <button style="margin-top: 20px;" type="submit">Register</button>
</form>
// File: ./angular/src/app/register/register.component.ts

import { Component, OnInit, ViewChild } from "@angular/core";
import { NgForm } from "@angular/forms";

@Component({
  selector: "app-register",
  templateUrl: "./register.component.html",
  styleUrls: ["./register.component.css"],
})
export class RegisterComponent implements OnInit {
  @ViewChild("registerform", { static: false }) registerForm: NgForm;

  constructor() {}

  ngOnInit() {}

  onRegisterSubmit() {
    console.log(this.registerForm.value.username);
    console.log(this.registerForm.value.password);
  }
}
If all goes well, your app should look something like this:

Now comes the part where we actually implement our JWT authentication. The first thing we need to wire up is the ability to send POST requests from our login and register routes.
First, we need to add the HttpClientModule to our app. In ./angular/src/app/app.module.ts, add the following import.
import { HttpClientModule } from '@angular/common/http';

...

imports: [
    BrowserModule,
    FormsModule,
    RouterModule.forRoot(appRoutes, {useHash: true}),
    HttpClientModule
],

...
Now, we can use this in our other components. Update ./angular/src/app/register/register.component.ts with the following:
// File: ./angular/src/app/register/register.component.ts

import { Component, OnInit, ViewChild } from '@angular/core';
import { NgForm } from '@angular/forms';
import { HttpClient, HttpHeaders } from '@angular/common/http';

@Component({
  selector: 'app-register',
  templateUrl: './register.component.html',
  styleUrls: ['./register.component.css']
})
export class RegisterComponent implements OnInit {

  @ViewChild('registerform', { static: false }) registerForm: NgForm;

  constructor(private http: HttpClient) { }

  ngOnInit() {
  }

  // Submits a post request to the /users/register route of our Express app
  onRegisterSubmit() {
    const username = this.registerForm.value.username;
    const password = this.registerForm.value.password;

    const headers = new HttpHeaders({'Content-type': 'application/json'});

    const reqObject = {
      username: username,
      password: password
    };

    this.http.post('http://localhost:3000/users/register', reqObject, { headers: headers }).subscribe(

      // The response data
      (response) => {
        console.log(response);
      },

      // If there is an error
      (error) => {
        console.log(error);
      },

      // When observable completes
      () => {
        console.log('done!');
      }

    );
  }

}
You can now visit the register component and register yourself on the Express application. Add the same logic to the login component.
import { Component, OnInit, ViewChild } from '@angular/core';
import { NgForm } from '@angular/forms';
import { HttpClient, HttpHeaders } from '@angular/common/http';

@Component({
  selector: 'app-login',
  templateUrl: './login.component.html',
  styleUrls: ['./login.component.css']
})
export class LoginComponent implements OnInit {

  @ViewChild('loginform', { static: false }) loginForm: NgForm;

  constructor(private http: HttpClient) { }

  onLoginSubmit() {
    const username = this.loginForm.value.username;
    const password = this.loginForm.value.password;

    const headers = new HttpHeaders({'Content-type': 'application/json'});

    const reqObject = {
      username: username,
      password: password
    };

    this.http.post('http://localhost:3000/users/login', reqObject, { headers: headers }).subscribe(

      // The response data
      (response) => {
        console.log(response);
      },

      // If there is an error
      (error) => {
        console.log(error);
      },

      // When observable completes
      () => {
        console.log('done!');
      }

    );
  }

  ngOnInit() {
  }

}
Finally, let's add some logic to the protected route. In this route, we will make a GET request to our /users/protected route, which should return a 401 Unauthorized error if our JWT is not valid. Since we haven't written the logic to attach the JWT to each request yet, we should get the error.
In the HTML file of the component, add this one line.
<!-- ./angular/src/app/protected-component/protected-component.html -->

<!-- This will print the value of the `message` variable in protected-component.component.ts -->
<p>Message: {{ message }}</p>
And in ./angular/src/app/protected-component.component.ts, add the logic to handle the HTTP request.
// File: ./angular/src/app/protected-component.component.ts

import { Component, OnInit } from '@angular/core';
import { HttpClient, HttpHeaders } from '@angular/common/http';

@Component({
  selector: 'app-protected-component',
  templateUrl: './protected-component.component.html',
  styleUrls: ['./protected-component.component.css']
})
export class ProtectedComponentComponent implements OnInit {

  constructor(private http: HttpClient) { }

  message: String

  // Execute this HTTP request when the route loads
  ngOnInit() {
    this.http.get('http://localhost:3000/users/protected').subscribe(
      (response) => {
        if (response) {
          this.message = 'You are authenticated!';
        }
      },

      (error) => {
        if (error.status === 401) {
          this.message = 'You are not authorized to visit this route.  No data is displayed.';
        }
      },

      () => {
        console.log('HTTP request done');
      }
    );
  }

}
If you visit the protected route right now, you should get an unauthorized error. But wouldn't it be nice if we were able to successfully get data from this GET request? Let's set up our AuthService. Create the following folder and file, and install the moment module:
mkdir ./angular/src/app/services
touch ./angular/src/app/services/auth.service.ts
npm install --save moment
Now add the following code to your service.
// File: ./angular/src/app/services/auth.service.ts

import { Injectable } from '@angular/core';
import * as moment from "moment";

@Injectable()
export class AuthService {

    constructor() {}

    setLocalStorage(responseObj) {
        const expiresAt = moment().add(responseObj.expiresIn);

        localStorage.setItem('id_token', responseObj.token);
        localStorage.setItem("expires_at", JSON.stringify(expiresAt.valueOf()) );
    }

    logout() {
        localStorage.removeItem("id_token");
        localStorage.removeItem("expires_at");
    }

    public isLoggedIn() {
        return moment().isBefore(this.getExpiration());
    }

    isLoggedOut() {
        return !this.isLoggedIn();
    }

    getExpiration() {
        const expiration = localStorage.getItem("expires_at");
        const expiresAt = JSON.parse(expiration);
        return moment(expiresAt);
    }
}
In this service, we have methods that will create, read, update, and destroy JWT information stored in the browser's localStorage module. The last thing you need to do is add this service to app.module.ts.
// File: ./angular/src/app/app.module.ts

import { AuthService } from './services/auth.service';

...

providers: [
    AuthService
],

...
We now need to add some functionality to the login.component.ts to set the JWT that we receive after logging in to localStorage.
// File: ./angular/src/app/login/login.component.ts

// Import auth service
import { AuthService } from '../services/auth.service';

...

// Add service to module
constructor(private http: HttpClient, private authService: AuthService) { }

...

// In post request, when you receive the JWT, use the service to add it to storage
this.http.post('http://localhost:3000/users/login', reqObject, { headers: headers }).subscribe(

  // The response data
  (response) => {

    // If the user authenticates successfully, we need to store the JWT returned in localStorage
    this.authService.setLocalStorage(response);

  },

...
After adding this, you should be able to login and have the JWT saved to localStorage.
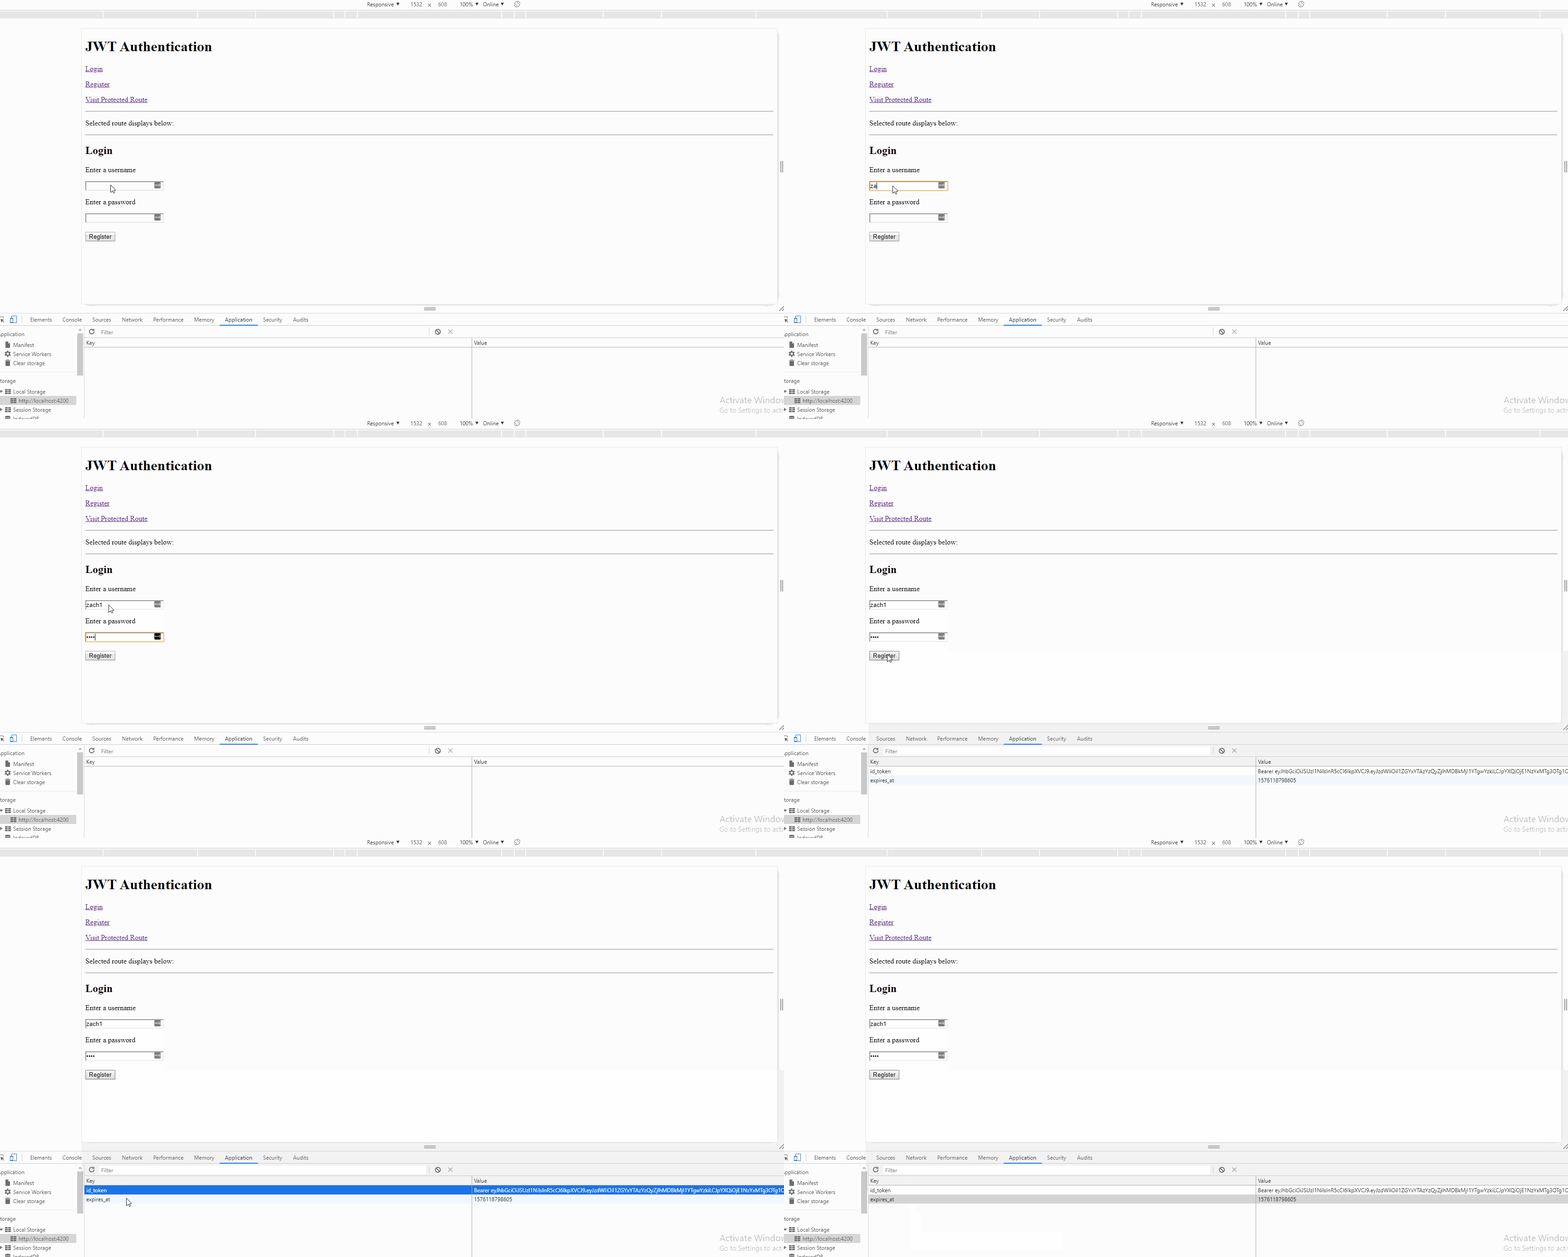
Now that we are saving the JWT to localStorage after logging in, the only step left is to implement our HTTP interceptor that will retrieve the JWT sitting in localStorage and attach it to the HTTP Authorization header on every request!
Make the following folder and file.
mkdir ./angular/src/app/interceptors
touch ./angular/src/app/interceptors/auth-interceptor.ts
Add the following to this file:
import { Injectable } from "@angular/core";
import {
  HttpRequest,
  HttpHandler,
  HttpEvent,
  HttpInterceptor,
} from "@angular/common/http";
import { Observable } from "rxjs";

@Injectable()
export class AuthInterceptor implements HttpInterceptor {
  intercept(
    req: HttpRequest<any>,
    next: HttpHandler
  ): Observable<HttpEvent<any>> {
    const idToken = localStorage.getItem("id_token");

    if (idToken) {
      const cloned = req.clone({
        headers: req.headers.set("Authorization", idToken),
      });

      return next.handle(cloned);
    } else {
      return next.handle(req);
    }
  }
}
And finally, you will need to import it to app.module.ts.
import { AuthInterceptor } from './interceptors/auth-interceptor';

...

providers: [
    AuthService,
    {
      provide: HTTP_INTERCEPTORS,
      useClass: AuthInterceptor,
      multi: true
    }
],
And with that, all of your HTTP requests should get the Authorization HTTP header populated with a JWT (if it exists in localStorage) on every request!

Conclusion
You now have a skeleton application to work with and implement in whatever way you like! I recommend adding additional features like an AuthGuard to handle route authentication even further, but what I have shown you here should get you more than started!
如果您对这篇长文有任何疑问或发现任何错误,请在下方评论区留言告知。
文章来源:https://dev.to/zachgoll/the-ultimate-guide-to-passport-js-k2l