使用自定义 Hook 和 Context API 在 React 中实现受保护路由
TLDR
自定义受保护路由组件 + 自定义 Hook + React Context API = 受保护路由 ❤️
GitHub 代码库:https://github.com/edmondso006/react-protected-routes
我们经常需要根据用户是否登录来限制其可见内容。例如,对于未登录用户,隐藏不包含任何数据的个人资料页面比显示该页面能提供更好的用户体验。虽然限制用户权限的大部分逻辑应该在服务器端实现,但我们仍然需要一种方法来隐藏前端页面。本教程假设您已经实现了相应的服务器端代码。

在 React 中,如何将已认证的页面/资源隐藏在受保护的路由之后?
受保护的路线来救援!
受保护的路由或私有路由是指只有经过授权(登录、拥有适当的帐户权限等)的用户才能访问的路由。
使用路由配置 React
我们将使用react-router-dom它来创建路由,这些路由会渲染不同的“页面”(React 创建的是单页应用,所以每个页面实际上只是一个渲染的组件)。请确保在您的项目中安装它。
npm i react-router-dom
在本教程中,我们将使用 3 个不同的页面:
Home - Public Page (Do not have to be authenticated to view it)
Profile - Protected Page (Have to be authenticated to view it)
About - Public Page (Do not have to be authenticated to view it)
我们需要将该BrowserRouter组件添加到应用程序的主入口文件中。
// index.tsx or index.js
import reportWebVitals from "./reportWebVitals";
import { BrowserRouter } from "react-router-dom";

ReactDOM.render(
   <React.StrictMode>
      <BrowserRouter>
            <App />
      </BrowserRouter>
   </React.StrictMode>,
   document.getElementById("root")
);
我们再创建一个Navbar组件,以便能够跳转到其他页面:
import React from "react";
import { Link } from "react-router-dom";

function Navbar() {
   return (
      <div>
         <Link to={"/"}>Home (Public)</Link>
         <Link to={"/about"}> About (Public) </Link>
         <Link to={"/profile"}>Profile (Protected)</Link>
      </div>
   );
}

export default Navbar;
之后,我们需要在App.tsx文件中设置路由。
// App.tsx or App.js
import React from "react";
import "./App.css";
import { Switch, Route } from "react-router-dom";

import Navbar from "./components/Navbar";
import Home from "./Pages/Home";
import Profile from "./Pages/Profile";
import About from "./Pages/About";

function App() {

   return (
      <div className="App">
                 <Navbar />

         <Switch>
            <Route path="/" exact component={Home} />
            <Route path="/about" exact component={About} />
            <Route path="/profile" exact component={Profile} />
         </Switch>
      </div>
   );
}

export default App;
现在运行我们的应用,可以看到导航功能正常!现在我们只需要知道用户是否已通过身份验证。
使用 React Context API 创建自定义身份验证钩子
为了跟踪用户是否已通过身份验证,我们可以结合 React 上下文 API 创建一个自定义钩子。这样,无论用户在应用程序的哪个位置,我们都能知道他们是否已通过身份验证。
让我们创建一个名为 `.txt` 的新文件useAuth.tsx,并添加以下代码:
// /src/hooks/useAuth.tsx
import React, { useState, createContext, useContext, useEffect } from "react";

// Create the context
const AuthContext = createContext(null);

export const AuthProvider = ({ children }) => {

     // Using the useState hook to keep track of the value authed (if a
   // user is logged in)
   const [authed, setAuthed] = useState<boolean>(false);

   const login = async (): Promise<void> => {
      const result = await fakeAsyncLogin();

      if (result) {
         console.log("user has logged in");

         setAuthed(true);
      }
   };

   const logout = async (): Promise<void> => {
      const result = await fakeAsyncLogout();

      if (result) {
         console.log("The User has logged out");
         setAuthed(false);
      }
   };

   /// Mock Async Login API call.
   // TODO: Replace with your actual login API Call code
   const fakeAsyncLogin = async (): Promise<string> => {
      return new Promise((resolve, reject) => {
         setTimeout(() => {
            resolve("Logged In");
         }, 300);
      });
   };

   // Mock Async Logout API call.
   // TODO: Replace with your actual logout API Call code
   const fakeAsyncLogout = async (): Promise<string> => {
      return new Promise((resolve, reject) => {
         setTimeout(() => {
            resolve("The user has successfully logged on the server");
         }, 300);
      });
   };

   return (
            // Using the provider so that ANY component in our application can
            // use the values that we are sending.
      <AuthContext.Provider value={{ authed, setAuthed, login, logout }}>
         {children}
      </AuthContext.Provider>
   );
};

// Finally creating the custom hook
export const useAuth = () => useContext(AuthContext);
现在我们需要确保将这个新AuthProvider组件添加到根入口点文件中,就像之前添加其他BrowserRoute组件一样。这样,树中的所有子组件才能看到我们之前指定的值。
// index.tsx or index.js
import { BrowserRouter } from "react-router-dom";

import { AuthProvider } from "./hooks/useAuth";

ReactDOM.render(
   <React.StrictMode>
      <BrowserRouter>
         <AuthProvider>
            <App />
         </AuthProvider>
      </BrowserRouter>
   </React.StrictMode>,
   document.getElementById("root")
);
让我们来试用一下这个新的钩子。我创建了一个非常基础Login的Logout组件,如下所示:
// Login.tsx
import React from "react";
import { useAuth } from "../hooks/useAuth";

function Login() {
   // Destructing our hook to get the `login` function
   const { login } = useAuth();

   return (
      <div>
         <button onClick={login}>Login</button>
      </div>
   );
}

export default Login;
// Logout.tsx
import React from "react";
import { useAuth } from "../hooks/useAuth";

function Logout() {
   // Destructing our hook to get the `logout` function
   const { logout } = useAuth();

   return <button onClick={logout}>Logout</button>;
}

export default Logout;
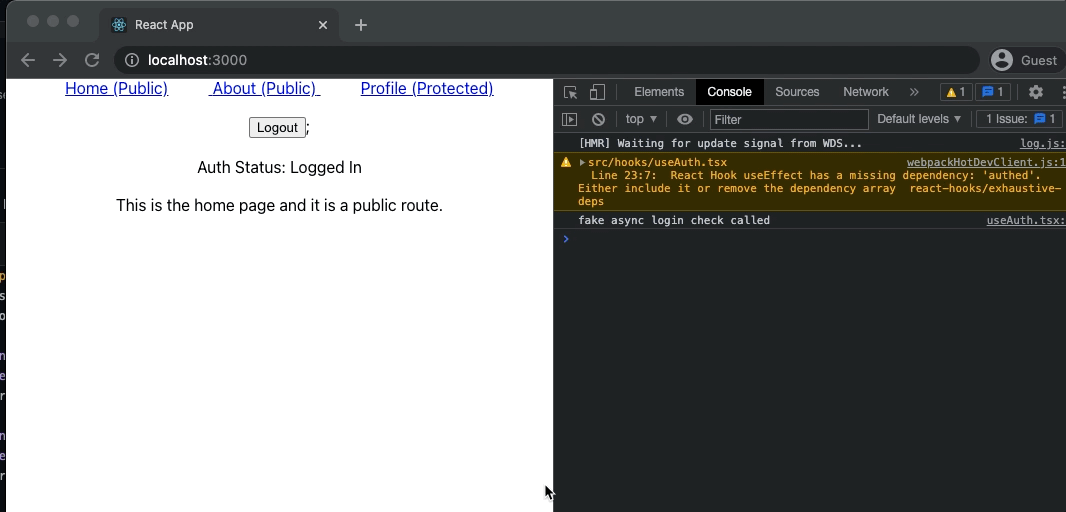
当我们点击该Login按钮时,我们会发起一个模拟登录 API 调用,并将登录按钮的状态设置authed为 true;而注销按钮的状态则相反。是不是很酷?

现在我们需要创建一个受保护的路由组件来使用我们新设计的钩子。
创建受保护的路由组件
遗憾的是,react-router-dom它没有提供现成的<ProtectedRoute>组件。但这并不会阻止我们自己创建一个。这个组件主要会检查钩子函数authed中的值useAuth。如果用户已通过身份验证,则渲染受保护的页面;如果用户未通过身份验证,则重定向回公共页面。
// ProtectedRoute.tsx
import React from "react";
import { Route, Redirect } from "react-router-dom";
import { useAuth } from "./../hooks/useAuth";

// We are taking in the component that should be rendered if the user is authed
// We are also passing the rest of the props to the <Route /> component such as
// exact & the path
const ProtectedRoute = ({ component: Component, ...rest }) => {
     // Getting the value from our cool custom hook
   const { authed } = useAuth();

   return (
      <Route
         {...rest}
         render={(props) => {
                        // If the user is authed render the component
            if (authed) {
               return <Component {...rest} {...props} />;
            } else {
                             // If they are not then we need to redirect to a public page
               return (
                  <Redirect
                     to={{
                        pathname: "/",
                        state: {
                           from: props.location,
                        },
                     }}
                  />
               );
            }
         }}
      />
   );
};

export default ProtectedRoute;
现在我们可以使用此受保护路由,并替换受保护页面的常规路由组件!
// App.tsx
import Login from "./components/Login";
import Logout from "./components/Logout";
import Navbar from "./components/Navbar";
import Home from "./Pages/Home";
import Profile from "./Pages/Profile";
import ProtectedRoute from "./components/ProtectedRoute";
import { useAuth } from "./hooks/useAuth";
import About from "./Pages/About";

function App() {
   const { authed } = useAuth();

   return (
      <div className="App">
         <Navbar />
         {authed ? <Logout /> : <Login />}

         <div style={{ margin: "20px" }}>
            <span>Auth Status: {authed ? "Logged In" : "Not Logged In"}</span>
         </div>

         <Switch>
            <Route path="/" exact component={Home} />
            <Route path="/about" exact component={About} />
            <ProtectedRoute path="/profile" exact component={Profile} />
         </Switch>
      </div>
   );
}
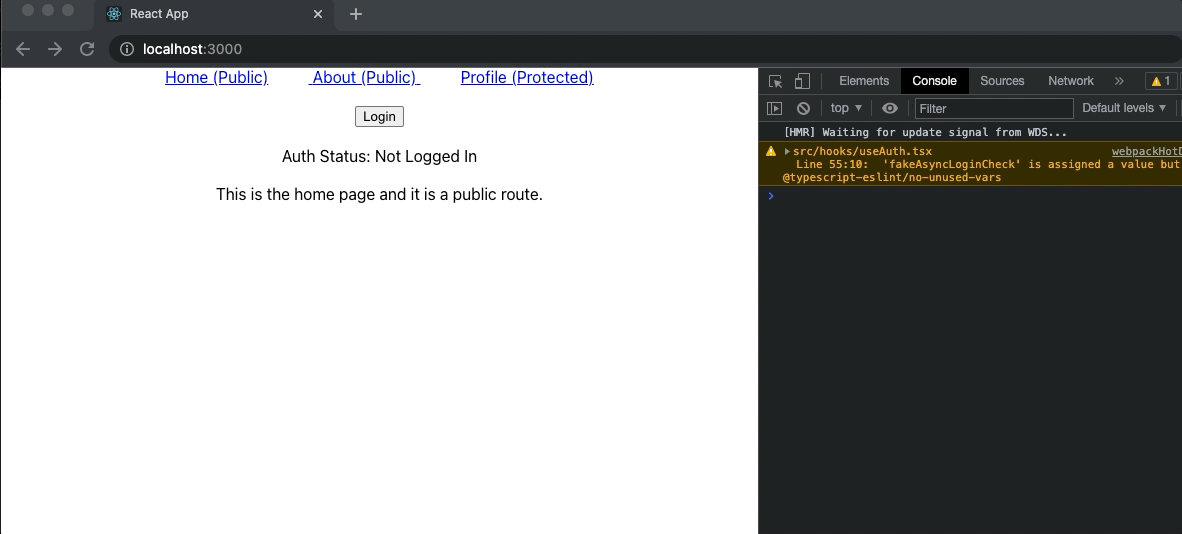
如上图所示,目前运行正常。但是存在一个bug。当用户在受保护的路由上刷新页面时,会被重定向回原/页面。我们该如何解决这个问题?
刷新错误 - 持久化身份验证状态
这个 bug 出现的原因是,authed当用户刷新页面时,我们丢失了一个值。由于这个值false在useAuth钩子函数中被设置为默认值,所以会触发重定向逻辑,将用户重定向回/页面。我们可以通过几种方式来解决这个问题。
曲奇饼
如果您的服务器在身份验证后向客户端发送 cookie,您可以使用该 cookie 来验证用户是否已登录。但是,如果您http only在 cookie 中使用了其他选项,则无法实现此目的,因为代码将无法与 cookie 交互。不过不用担心,还有其他两种方法可以实现此目的。
会话存储
我们可以将一个值保存到会话存储中,以便在页面刷新后保持该值不变。但是,精通技术的用户可以进入开发者工具并修改该值。根据您的实现方式,这可能会带来问题。以下是在useAuth钩子函数中实现此功能的方法。
//useAuth.tsx
...
export const AuthProvider = ({ children }) => {
   // Get the value from session sotrage.
   const sessionStorageValue = JSON.parse(sessionStorage.getItem("loggedIn"));
     // Use this value as the defalt value for the state
   const [authed, setAuthed] = useState<boolean>(sessionStorageValue);

     const login = async (): Promise<void> => {
      const result = await fakeAsyncLogin();

      if (result) {
         console.log("user has logged in");

         setAuthed(true);
         sessionStorage.setItem("loggedIn", "true");
      }
   };

   const logout = async (): Promise<void> => {
      const result = await fakeAsyncLogout();

      if (result) {
         console.log("The User has logged out");
         setAuthed(false);
         sessionStorage.setItem("loggedIn", "false");
      }
   };
  ...
身份验证端点检查
如果会话存储不适用于您的实现,您可以向服务器的身份验证端点发出 API 调用,以验证当前用户是否已登录。这是最安全的解决方案,但代价是需要额外发出一次 API 调用。以下是实现此解决方案的方法。
// useAuth.tsx
...
export const AuthProvider = ({ children }) => {
   const [authed, setAuthed] = useState<boolean>(false);
     // Store new value to indicate the call has not finished. Default to true
   const [loading, setLoading] = useState<boolean>(true);

   // Runs once when the component first mounts
   useEffect(() => {
         fakeAsyncLoginCheck().then((activeUser) => {
            if (activeUser) {
               console.log("fake async login check called");
               setAuthed(true);
               setLoading(false);
            } else {
                             setAuthed(false);
               setLoading(false);
            }
         });
      }
   }, []);

     // Mock call to an authentication endpoint
   const fakeAsyncLogin = async (): Promise<string> => {
      return new Promise((resolve, reject) => {
         setTimeout(() => {
            resolve("Logged In");
         }, 300);
      });
   };

return (
      // Expose the new `loading` value so we can consume it in `App.tsx`
      <AuthContext.Provider
         value={{ authed, setAuthed, login, logout, loading }}
      >
         {children}
      </AuthContext.Provider>
   );
...
我们还需要修改文件App.tsx。我们需要使用新值,并且仅当该值为 false 时才渲染路由。这样可以解决用户因值尚未更新而loading被重定向回首页的问题。由于我们在加载完成后才渲染组件,因此可以确保该值准确无误。authed<ProtectedRoute>authed
// App.tsx
function App() {
   const { authed, loading } = useAuth();

   return (
      <div className="App">
         <Navbar />
         {authed ? <Logout /> : <Login />}

         {loading ? (
            <div> Loading... </div>
         ) : (
            <>
               <div style={{ margin: "20px" }}>
                  <span>
                     Auth Status: {authed ? "Logged In" : "Not Logged In"}
                  </span>
               </div>

               <Switch>
                  <Route path="/" exact component={Home} />
                  <Route path="/about" exact component={About} />
                  <ProtectedRoute path="/profile" exact component={Profile} />
               </Switch>
            </>
         )}
      </div>
   );
}
参考
React Router DOM - https://reactrouter.com/web/guides/quick-start
React 自定义 Hooks - https://reactjs.org/docs/hooks-custom.html
React Context API - https://reactjs.org/docs/context.html
就这些了,各位。
如有任何问题或疑问,欢迎随时在推特上联系我@jeff_codes。感谢阅读!
GitHub 代码库:https://github.com/edmondso006/react-protected-routes
本文最初发表于:https://www.jeffedmondson.dev/blog/react-protected-routes/。前往该博客查看更多类似文章。
文章来源:https://dev.to/jeff_codes/protected-routes-in-react-with-custom-hook-context-api-363p