使用 React Hooks 和 RxJS 进行状态管理
作者:埃比尼泽·唐✏️
本文将介绍 RxJS 的基础知识,以及如何使用 React Hooks 将其集成到 React 应用程序中进行状态管理。我们将通过构建一个示例聊天应用程序来实现这一点。我们的聊天应用程序将包含三个组件,它们将通过 RxJS 相互通信。
我们最终的应用界面将如下所示:

我们先来解释一下RxJS。
RxJS(JavaScript响应式扩展库)是一个用于响应式编程的实用库。RxJS文档使用了以下定义:
RxJS 是一个使用 Observables 进行响应式编程的库,可以更轻松地编写异步或基于回调的代码。
响应式编程是一种基于事件的编程范式,它允许我们在数据推送给消费者后立即运行异步事件序列。
要在 React 中使用 RxJS 进行状态管理,理解以下关键术语至关重要:
可观测的
Observable 是一个数据流,它存储着可以在不同线程间传递的数据。在我们的演示应用中,我们将使用 Observable 向不同的组件提供数据。
观察者
观察者(Observer)会消费可观察对象(Observable)提供的数据。在我们的演示应用中,我们将使用setStateHook 来消费来自可观察对象的数据。
订阅
为了让观察者能够从可观察对象中获取数据,我们需要将其订阅到该可观察对象。在我们的演示应用中,我们将使用相应的subscribe()方法将setState观察者订阅到可观察对象。

设置我们的应用程序
理解 RxJS 的最佳方法就是使用它。
我们先来创建一个新的 React 应用。如果您还没有安装 create-react-app,请在终端中运行:
>npm i -g create-react-app
下一个:
create-react-app rxjs_react_chat
这将使用 create-react-app 创建一个新的 React 应用程序。
要启动我们的应用程序,让我们导航到新的应用程序目录并运行以下命令npm start:
cd rxjs_react_chat
npm start
在我们新生成的应用程序目录中,让我们导航到/src/。由于我们将使用多个组件,让我们设置BrowserRouter用于在不同路由之间导航。
让我们运行以下命令:
npm install --save react-router-dom
接下来,我们将/src/App.js文件编辑成如下所示:
// /src/App.js
import  React  from  'react';
import { BrowserRouter, Route, Switch } from  'react-router-dom';
import  './index.css';

const  App  = () => (
  <BrowserRouter />
);

export  default  App;
在我们的src文件夹中,我们创建一个商店目录src/store。我们将把我们的商店放在这里。
接下来,我们创建一个chat.js用于聊天操作的文件src/store/chat.js。在该chat.js文件中,我们将从Subject 类导入并创建一个新变量Subject:rxjs
import { Subject } from 'rxjs';

const subject = new Subject();
主题和订阅
RxJS Subject 可以同时充当 Observable 和 Observer。这样,就可以将值多播给多个 Observer,也就是说,当 Subject 接收到任何数据时,该数据都可以转发给所有订阅它的 Observer。
在我们的应用程序中,我们将把不同的 React HookssetState函数订阅到 RxJS Subject,以便当它收到任何数据时,它会将该数据转发到与我们的setState函数关联的每个状态。
我们subscribe为此目的创建一个方法:
import { Subject } from 'rxjs'

const subject = new Subject();

const chatStore = {
  subscribe: setState => subject.subscribe(setState)
}
接下来,我们将创建一个对象来表示初始聊天状态:
import { Subject } from 'rxjs'

const subject = new Subject();

const initialState = {
  data: [],
  newDataCount: 0,
};

let state = initialState;

const chatStore = {
  subscribe: setState => subject.subscribe(setState)
}
我们将使用该data键来保存消息对象数组。这些消息对象将包含值person(用于指定消息的发送者)和text(用于存储消息文本)。
这就是我们最终呈现的物体的样子:
{
  person: 'first-person',
  text: 'How are you?'
}
在我们的initialState对象中,它将newDataCount被我们的通知功能用于告知何时有新数据推送到我们的状态。
现在我们有了状态对象,接下来让我们创建一个init()方法,在组件挂载时初始化其状态:
...
const chatStore = {
  init: () => subject.next(state),
  subscribe: setState => subject.subscribe(setState)
}
该Subject.next()方法用于向 Subject 对象传递新值。当我们调用该next()方法并传入一个值作为参数时,该值会被多播给所有订阅了该 Subject 对象的 Observer。
在我们的应用程序中,每当组件挂载时,我们都会调用 `setState`subscribe()和 ` init()setState` 方法,以便将状态设置为聊天存储中的内容。
向商店添加数据
接下来,我们将创建一个sendMessage()方法。每当用户点击发送消息按钮时,我们都会调用这个方法。我们的sendMessage()方法会接收一个message参数,我们会将其添加到数组中。state.data请记住,我们的message参数是一个包含键的对象person。text
让我们用以下代码块创建对象:
...
const chatStore = {
  init: () => subject.next(state),
  subscribe: setState => subject.subscribe(setState),
  sendMessage: message => {
    state = {
      ...state,
      data: [...state.data, message],
      newDataCount: state.newDataCount + 1
     };
     subject.next(state);
  }
};
在新代码块中,我们将message对象添加到state.data数组中,然后递增了数组的元素newDataCount。
newDataCount现在,每当用户发送新消息时,我们的计数都会递增。接下来,我们将添加一个功能,在每次查看消息时重置新的数据计数,以便当person 1用户发送新消息并person 2阅读该消息时,数据计数会重置为 1 0。
为此,在我们的方法中,每当一个订阅我们服务的新组件被挂载时,init()我们都会将newDataCount状态中的键值赋给该键:0Subject
...
const chatStore = {
  init: () => {
    state = {...state, newDataCount: 0},
    subject.next(state)
  },
  subscribe: setState => subject.subscribe(setState),
  sendMessage: message => {
    state = {
      ...state,
      data: [...state.data, message],
      newDataCount: state.newDataCount + 1
    };
    subject.next(state);
  }
};
从存储中删除数据
接下来,我们将添加一个用于清除所有消息的方法。我们将其命名为clearChat():
...
const chatStore = {
  init: () => {
    <b>state = {...state, newDataCount: 0},</b>
    subject.next(state)
  },
  subscribe: setState => subject.subscribe(setState),
  sendMessage: message => {
    state = {
      ...state,
      data: [...state.data, message],
      newDataCount: state.newDataCount + 1
    };
    subject.next(state);
  },
  clearChat: () => {
    state = initialState;
    subject.next(state);
  },
  initialState
};
我们还向对象添加了初始状态。在用HookchatStore定义对象时,我们将使用此初始状态值。chatStateuseState()
最后,我们导出chatStore对象。src/store/chat.js现在我们的文件应该看起来像这样:
// src/store/chat.js

import { Subject } from 'rxjs';

const subject = new Subject();
const initialState = {
  status: '',
  data: [],
  newDataCount: 0,
  error: ''
};

let state = initialState;

const chatStore = {
  init: () => {
    state = {...state, newDataCount: 0}
    subject.next(state)
  },
  subscribe: setState => subject.subscribe(setState),
  sendMessage: message => {
    state = {
      ...state,
      data: [...state.data, message],
      newDataCount: state.newDataCount + 1
    };
    subject.next(state);
  },
  clearChat: () => {
    state = {...state, data: []};
    subject.next(state);
  },
  initialState
};

export default chatStore;
使用商店
现在我们已经搭建好了聊天商店,接下来我们将创建组件来利用该商店及其方法。
首先,让我们修改src/index.css文件,使其看起来像这样:
.container {
  font-family: Arial, Helvetica, sans-serif;
  padding: 1em;
}

.chat-box {
  background: #202020;
  margin: auto;
  padding: 2em;
  height: 35em;
  width: 95%;
  border-radius: 20px;
  overflow-y: scroll;
}

.first-person, .second-person {
  display: inline-block;
  color: #fff;
  height: 25px;
  min-width: 20%;
  max-width: 60%;
  padding: 20px;
  text-align: center;
  vertical-align: middle;
  border-radius: 30px;
}

.first-person {
  background: rgb(0, 173, 231);
}

.second-person {
  background: #06c406;
  float: right;
}

.clear{
  clear: both;
  display: block;
  content: "";
  width: 100%;
}

.switcher-div {
  padding-top: 1em;
  text-align: center;
}

#messageForm {
  text-align: center;
  margin-top: 1.5em;
}

#messageForm input {
  height: 2em;
  width: 23em;
  border-radius: 3em;
  padding: 1em;
}

#messageForm button {
  margin-left: 2em;
  height: 2.7em;
  width: 6.2em;
  border-radius: 25px;
  border: none;
  cursor: pointer;
}

.clear-button {
  background: #d40000;
  color: #fff;
  float: right;
  margin-right: 3em;
  text-align: center;
  height: 2.5em;
  width: 8em;
  cursor: pointer;
}

.switcher {
  background: #cecece;
  color: #141414;
  height: 2.5em;
  width: 6em;
  border-radius: 25px;
  border: 1 px solid black;
  margin-right: 1em;
  cursor: pointer;
}

.notify {
  position: absolute;
  background: #db0000;
  color: white;
  height: 1em;
  width: 1em;
  border-radius: 100%;
  padding: 0.15em;
  margin-left: 0.5em;
  margin-top: -0.5em;
}
在我们的src文件夹中,创建一个名为 components 的目录src/components。我们将把所有组件都放在这里。我们的应用程序需要三个组件:
- 第一人称组件
- 第二人称组件
- 用于在两个人员组件之间切换的组件
在我们的src/components目录中,我们创建一个新文件,FirstPerson.js作为第一人称组件。我们的新组件应该如下所示:
import  React, { useState } from  "react";

const FirstPerson = () => {
  const [chatState, setChatState] = useState({});
  return (
    <div className="container">
      <h2>Mycroft</h2>
      <div className="chat-box">
        {chatState.data.map(message => (
          <div>
            <p className={message.person}>{message.text}</p>
            <div className="clear"></div>
          </div>
        ))}
      </div>
      <form id="messageForm">
        <input
          type="text"
          id="messageInput"
          name="messageInput"
          placeholder="type here..."
          required
        />
        <button type="submit">Send</button> <br />
      </form>
    </div>
  );
}

export  default  FirstPerson;
订阅我们的商店并检索现有数据
在下一个代码块中,我们将导入我们的模块chatStore,并将其属性用作initialState默认chatState值。
然后,在我们的useLayoutEffect()Hook 中,我们将使用该方法订阅我们的setChatState函数到聊天存储chatStore.subscribe(),最后,使用该chatStore.init()方法初始化我们的组件chatState:
import React, { useState, useLayoutEffect } from "react";
<b>import chatStore from '../store/chat';</b>

const FirstPerson = () => {
  const [chatState, setChatState] = useState(chatStore.initialState);

  useLayoutEffect(()=> {
    chatStore.subscribe(setChatState);
    chatStore.init();
  },[]);

  return (...)
我们正在使用Hook 在组件渲染之前useLayoutEffect()向我们发送数据。chatState
为了预览目前为止代码的运行结果,让我们index.js在文件夹中创建一个文件,并从中src/components导出我们的组件:FirstPerson
// src/components/index.js
export {  default as FirstPerson } from './FirstPerson';
接下来,我们将把FirstPerson组件导入到文件中src/App.js,并将其添加到路由路径中:
// /src/App.js
import  React  from  'react';
import { BrowserRouter, Route, Switch } from  'react-router-dom';
import { FirstPerson } from './components';
import  './index.css';

const  App  = () => (
    <BrowserRouter>
      <>
        <Switch>
          <Route path="/" component={FirstPerson} exact />
          <Route path="/first-person" component={FirstPerson} exact />
        </Switch>
      </>
   </BrowserRouter>
);

export  default  App;
现在,当我们运行应用程序并导航到/or/first-person路由时,应该会看到:
回到我们的/src/components/FirstPerson.js文件。我们来添加一个onFormSubmit()方法。每当用户点击send按钮时,我们都会调用这个方法:
...

const FirstPerson = () => {
  const [chatState, setChatState] = useState(chatStore.initialState);

  useLayoutEffect(()=> {
    chatStore.subscribe(setChatState);
    chatStore.init();
  },[]);

  const onFormSubmit = e => {
    e.preventDefault();
    const messageObject = {
      person: 'first-person',
      text: e.target.elements.messageInput.value.trim(),
    };
    chatStore.sendMessage(messageObject);
    document.getElementById('messageForm').reset();
  };

  return (
    ...
      <form id="messageForm" onSubmit={onFormSubmit}>
        <input
          type="text"
          id="messageInput"
          name="messageInput"
          placeholder="type here..."
          required
        />
        <button type="submit">Send</button> <br />
      </form>
    </div>
  );
}

export default FirstPerson;
我们的onFormSubmit()函数创建一个包含 ` personand`text键的消息对象,然后使用我们的chatStore.sendMessage()方法将新消息添加到聊天存储中。
接下来,我们将添加一个按钮,用于调用我们的方法。每次点击chatStore.clearChat()该按钮时,我们将清除聊天记录存储。clear
让我们在结束标签之后添加以下代码块</form>:
<button className="clear-button" onClick={() => chatStore.clearChat()}>
  Clear Chat
</button>
我们的src/components/FirstPerson.js文件现在应该看起来像这样:
import React, { useState, useLayoutEffect } from "react";
import chatStore from '../store/chat';

const FirstPerson = () => {
  const [chatState, setChatState] = useState(chatStore.initialState);

  useLayoutEffect(()=> {
    chatStore.subscribe(setChatState);
    chatStore.init();
  },[]);

  const onFormSubmit = e => {
    e.preventDefault();
    const messageObject = {
      person: 'first-person',
      text: e.target.elements.messageInput.value.trim(),
    };
    chatStore.sendMessage(messageObject);
    document.getElementById('messageForm').reset();
  };

  return (
    <div className="container">
      <h2>Mycroft</h2>
      <div className="chat-box">
        {chatState.data.map(message => (
          <div>
            <p className={message.person}>{message.text}</p>
            <div className="clear"></div>
          </div>
        ))}
      </div>
      <form id="messageForm" onSubmit={onFormSubmit}>
        <input
          type="text"
          id="messageInput"
          name="messageInput"
          placeholder="type here..."
          required
        />
        <button type="submit">Send</button> <br />
      </form>
      <button className="clear-button" onClick={() => chatStore.clearChat()}>
        Clear Chat
      </button>
    </div>
  );
}

export default FirstPerson;
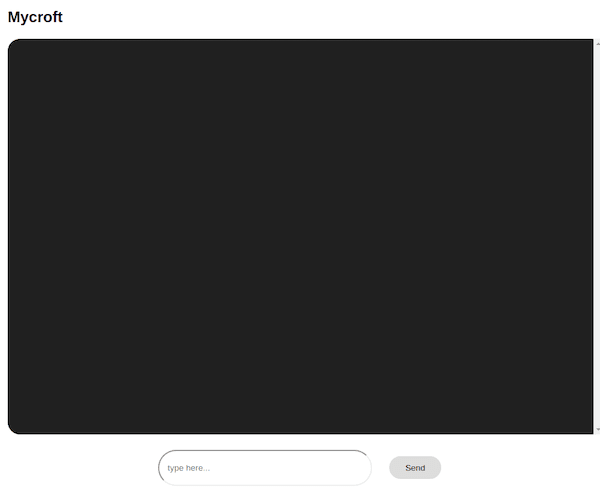
现在,当我们在浏览器中预览应用时,应该能够向应用商店发送消息并清除所有消息:
[图像]
组件间的数据共享
现在我们已经了解了如何从我们的存储中检索数据并向其中添加数据,接下来让我们创建SecondPerson组件来演示如何在不同的组件之间共享这些数据。
该SecondPerson组件的功能与另一个组件相同FirstPerson,因此我们只需将 div 标签内的值从 更改为,person并将messageObject用户second-person名称从Mycroft更改为 即可。Cortana<h2>container
为此,我们创建一个新文件,src/components/SecondPerson.js并将以下代码块粘贴到该文件中:
import React, { useState, useLayoutEffect } from "react";
import chatStore from '../store/chat';

const SecondPerson = () => {
  const [chatState, setChatState] = useState(chatStore.initialState);

  useLayoutEffect(()=> {
    chatStore.subscribe(setChatState);
    chatStore.init();
  },[]);

  const onFormSubmit = e => {
    e.preventDefault();
    const messageObject = {
      person: 'second-person',
      text: e.target.elements.messageInput.value.trim(),
    };
    chatStore.sendMessage(messageObject);
    document.getElementById('messageForm').reset();
  };

  return (
    <div className="container">
      <h2 style={{float: 'right'}}>Cortana</h2>
      <div className="chat-box">
        {chatState.data.map(message => (
          <div>
            <p className={message.person}>{message.text}</p>
            <div className="clear"></div>
          </div>
        ))}
      </div>
      <form id="messageForm" onSubmit={onFormSubmit}>
        <input
          type="text"
          id="messageInput"
          name="messageInput"
          required
        />
        <button type="submit">Send</button> <br />
      </form>
      <button className="clear-button" onClick={() => chatStore.clearChat()}>
        Clear Chat
      </button>
    </div>
  );
}

export default SecondPerson;
接下来,我们需要创建用于PersonSwitcher在两个组件之间切换的组件。在我们的src/components目录中,创建一个新文件,PersonSwitcher.js并将以下代码块粘贴到该文件中:
// src/components/PersonSwitcher.js
import React, {useState, useEffect} from 'react';
import { Link } from 'react-router-dom';
import chatStore from '../store/chat';

const PersonSwitcher = () => {
  const [chatState, setChatState] = useState(chatStore.initialState);
  const location = window.location.href.split('/')[3];

  useEffect(() => {
    chatStore.subscribe(setChatState);
    chatStore.init();
  }, [])

  const messageNotification = chatState.newDataCount > 0
    && (<span className="notify">{chatState.newDataCount}</span>);

  return (
    <div className="switcher-div">
      <Link to="/first-person"><button className="switcher">
        Person1
        {location !== 'first-person' && location.length > 1 && messageNotification}
      </button></Link>
      <Link to="/second-person"><button className="switcher">
        Person2
        {location !== 'second-person' && messageNotification}
      </button></Link>
    </div>
  );
}

export default PersonSwitcher;
请注意,我们还chatState为组件创建了一个事件监听器,并订阅了我们的chatStore事件监听器。我们需要它来通知组件何时有新消息添加到聊天存储中。请注意,我们添加了一个messageNotification变量,该变量使用了newDataCount聊天存储中的属性。
现在,我们可以从文件夹中导出这两个新组件src/components/index.js:
export { default as FirstPerson } from './FirstPerson';
export { default as SecondPerson } from './SecondPerson';
export { default as PersonSwitcher } from './PersonSwitcher';
最后,让我们将新组件导入到我们的项目中src/App.js,并将它们添加到我们的项目中BrowserRouter。App.js现在,我们的文件应该看起来像这样:
import React from 'react';
import { BrowserRouter as Router, Route, Switch } from 'react-router-dom';
import { FirstPerson, SecondPerson, PersonSwitcher } from './components';
import './App.css';

const App = () => (
  <Router>
    <>
      <PersonSwitcher />
      <Switch>
        <Route path="/" component={FirstPerson} exact />>
        <Route path="/first-person" component={FirstPerson} exact />>
        <Route path="/second-person" component={SecondPerson} exact />>
      </Switch>
    </>
  </Router>
);

export default App;
现在运行我们的应用程序后,我们将能够切换组件,在发送消息时接收新消息计数,并使用clear按钮清除所有消息:
结论
本文介绍了 RxJS 的基础知识,并通过构建一个基于组件的聊天应用程序,演示了如何在 React 中使用它进行状态管理。以下是我们的演示应用程序的GitHub 代码库链接。
与其他替代方案(例如 Redux)相比,我发现使用 RxJS 和 Hooks 是管理 React 应用程序中状态的一种非常有效且直接的方法。
要了解更多关于 RxJS 的信息,请查看以下文章:
祝你编程愉快!
编者按:发现本文有误?您可以在这里找到正确版本。
插件:LogRocket,一款用于 Web 应用的 DVR

LogRocket是一款前端日志工具,可让您重现问题,如同在您自己的浏览器中发生一样。无需猜测错误原因,也无需用户提供屏幕截图和日志转储,LogRocket 即可让您重现会话,快速了解问题所在。它与任何框架的应用程序完美兼容,并提供插件来记录来自 Redux、Vuex 和 @ngrx/store 的额外上下文信息。
除了记录 Redux 操作和状态之外,LogRocket 还会记录控制台日志、JavaScript 错误、堆栈跟踪、包含标头和正文的网络请求/响应、浏览器元数据以及自定义日志。它还会对 DOM 进行插桩,记录页面上的 HTML 和 CSS,即使是最复杂的单页应用程序,也能生成像素级精确的视频。
免费试用。
本文《使用 React Hooks 进行 RxJS 状态管理》最初发布于LogRocket 博客。
文章来源:https://dev.to/bnevilleoneill/rxjs-with-react-hooks-for-state-management-38d8