了解 React 构建工作流程和文件夹结构
为什么需要这种工作流程以及如何构建它?

React 是一个用于构建用户界面的开源 JavaScript 库。本文将探讨如何在本地计算机上构建 React 应用程序,并介绍 Create React App 工具包含的所有文件夹和文件。
无论是单页应用程序还是多页应用程序,在本地计算机上构建 React 项目都需要一个复杂的流程。因此,一个重要的问题是:
为什么需要这种工作流程以及如何构建它?
我们先来解答这个问题的“为什么” :
- 我们需要优化代码。对于 React 应用,我们需要生成优化的精简代码,以提高应用的性能。
- 另一个重要原因是能够利用下一代 JavaScript 特性。JavaScript 语言不断发展,不时会推出一些并非所有浏览器都立即支持的新功能。借助 Babel 这样的工具,我们可以立即使用这些特性,因为它负责将我们的代码转换为目标浏览器支持的代码。
- 第三个原因与效率有关。下一代 JavaScript 特性中的 CSS 自动前缀功能使我们能够最大限度地利用浏览器对 CSS 特性的支持。如果我们尝试手动添加这些特性,将会非常麻烦。
- 提高生产力的另一个重要因素是代码检查工具(linter)。在代码集成开发环境(IDE)中集成代码检查工具可以节省我们在代码执行前查找错误的时间。以下代码演示了代码检查工具的工作原理。
以上是我们需要工作流程的主要原因。
现在让我们看看如何实现它:
- 首先,我们需要一个依赖管理工具。依赖项指的是第三方库。React、React DOM 以及我们最终会用到的所有构建工具都是依赖项。NPM(Node 的包管理器)是一个推荐使用的构建工具,因为它能够管理包及其依赖项。
- 除了依赖管理工具之外,还需要使用打包工具来生成模块化代码。所谓模块化,是指代码会被拆分成多个文件,每个文件都有其自身的功能和特性。
Webpack就是一个打包器的例子,它在最终将分割后的文件发送到浏览器时具有很大的优势,因为有些浏览器可能不支持分割后的文件,即使支持,我们也不能将所有请求都发送到这些专门的文件。
- 最后,我们需要一个服务器来在本地机器上测试我们的项目。
 这看起来确实很复杂。幸运的是,React 团队开发了一个工具,无需我们进行任何配置即可创建一个支持上述所有功能的应用程序。它由 Facebook 及其社区维护。这个工具就是Create React App。您可以在这里找到安装说明。> 重要提示:安装完成后,请保持 NPM start 进程运行。这样,无论我们对代码进行何种更改,它都会自动反映出来。项目设置完成后,我们都会创建相同数量的文件夹和文件。# 现在让我们来讨论最重要的文件夹和文件。
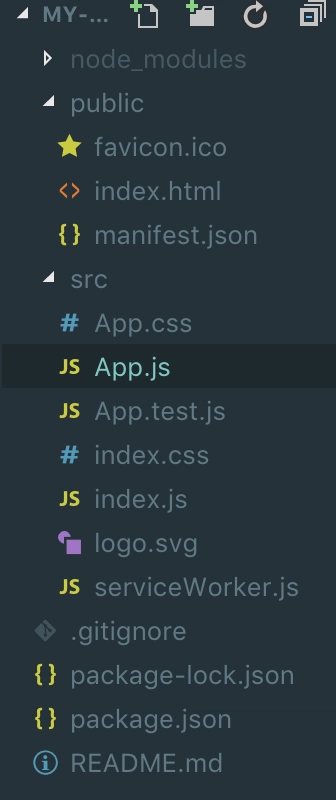 首先是package.json文件,其中包含我们项目的通用依赖项。
{
  "name": "my-app",
  "version": "0.1.0",
  "private": true,
  "dependencies": {
    "react": "^16.8.6",
    "react-dom": "^16.8.6",
    "react-scripts": "3.0.1"
  },
  "scripts": {
    "start": "react-scripts start",
    "build": "react-scripts build",
    "test": "react-scripts test",
    "eject": "react-scripts eject"
  },
  "eslintConfig": {
    "extends": "react-app"
  },
  "browserslist": {
    "production": [
      ">0.2%",
      "not dead",
      "not op_mini all"
    ],
    "development": [
      "last 1 chrome version",
      "last 1 firefox version",
      "last 1 safari version"
    ]
  }
}
如您所见,这个通过 create-react-app 创建的项目中有三个依赖项。
您还可以看到我们显然导入了 React。这里我们使用的是:
撰写本文时 React 的最新版本。ReactDOM
:提供 DOM 相关的方法。我们将仅在 index.js 中使用该模块的“render”方法来在 DOM 中渲染我们的应用程序。
- 本文撰写时 React 的最新版本。
- ReactDOM:提供 DOM 相关的方法。我们将仅在 index.js 中使用该模块的“render”方法来渲染 DOM 中的应用程序。React Scripts:一个包含脚本和配置的包,用于提供我们之前提到的所有构建工作流程,包括开发服务器和我们在项目中使用的下一代 JavaScript 特性支持。
node_modules文件夹: 它包含了我们项目的所有依赖项和子依赖项。 在package.json文件中,我们只讨论了三个依赖项:React、React DOM 和 React Scripts。更具体地说,React Scripts 还有很多其他依赖项,包括编译代码所需的所有构建工具等等。您不应该修改 node_modules 文件夹中的任何内容。public 文件夹: 这是一个很有意思的文件夹,它是最终由 Web 服务器处理的根文件夹。在这个文件夹中,我们有一个重要的文件,即index.html文件。该文件包含一个普通的 HTML 页面,也是我们项目中唯一的 HTML 页面。

<!DOCTYPE html>
<html lang="en">
  <head>
    <meta charset="utf-8" />
    <link rel="shortcut icon" href="%PUBLIC_URL%/favicon.ico" />
    <meta name="viewport" content="width=device-width, initial-scale=1" />
    <meta name="theme-color" content="#000000" />
    <!--
      manifest.json provides metadata used when your web app is installed on a
      user's mobile device or desktop. See https://developers.google.com/web/fundamentals/web-app-manifest/
    -->
    <link rel="manifest" href="%PUBLIC_URL%/manifest.json" />
    <!--
      Notice the use of %PUBLIC_URL% in the tags above.
      It will be replaced with the URL of the `public` folder during the build.
      Only files inside the `public` folder can be referenced from the HTML.
Unlike "/favicon.ico" or "favicon.ico", "%PUBLIC_URL%/favicon.ico" will
      work correctly both with client-side routing and a non-root public URL.
      Learn how to configure a non-root public URL by running `npm run build`.
    -->
    <title>React App</title>
  </head>
  <body>
    <noscript>You need to enable JavaScript to run this app.</noscript>
    <div id="root"></div>
    <!--
      This HTML file is a template.
      If you open it directly in the browser, you will see an empty page.
You can add webfonts, meta tags, or analytics to this file.
      The build step will place the bundled scripts into the <body> tag.
To begin the development, run `npm start` or `yarn start`.
      To create a production bundle, use `npm run build` or `yarn build`.
    -->
  </body>
</html>
所以这是单个页面,最终我们的脚本文件将通过构建工作流程注入到这里。我们可以修改这个文件,但这里不会添加任何 HTML 代码。
我想重点介绍一下 ID 为 root 的 div 元素: <div id="root"></div>
它很重要,因为稍后我们将把 React 应用放在这里。
在 HTML 文件中,您可以导入 CSS 库等库并添加 meta 标签。
接下来是manifest.json文件:
{
  "short_name": "React App",
  "name": "Create React App Sample",
  "icons": [
    {
      "src": "favicon.ico",
      "sizes": "64x64 32x32 24x24 16x16",
      "type": "image/x-icon"
    }
  ],
  "start_url": ".",
  "display": "standalone",
  "theme_color": "#000000",
  "background_color": "#ffffff"
}
这些信息会向浏览器提供有关您应用程序的信息。例如,移动浏览器需要这些信息才能为您的 Web 应用程序添加快捷方式。
另一个值得关注的文件夹是src 文件夹: 它包含我们将要使用的文件,也就是实际的 React 应用程序。 其中包含index.js文件:
import React from 'react';
import ReactDOM from 'react-dom';
import './index.css';
import App from './App';
import * as serviceWorker from './serviceWorker';
ReactDOM.render(<App />, document.getElementById('root'));
// If you want your app to work offline and load faster, you can change
// unregister() to register() below. Note this comes with some pitfalls.
// Learn more about service workers: https://bit.ly/CRA-PWA
serviceWorker.unregister();
该文件访问我们 DOM 中的根元素,即我们 HTML 文件中 id 为 root 的元素。
ReactDOM.render(<App />, document.getElementById('root'));
如您所见,它使用 render 方法渲染了我们的 React 应用程序。此外,还引用了我们从 App 文件导入的 App 对象。import App from './App';
由于我们的构建流程会自动处理 .js 文件,因此省略了 .js 扩展名(App.js)。
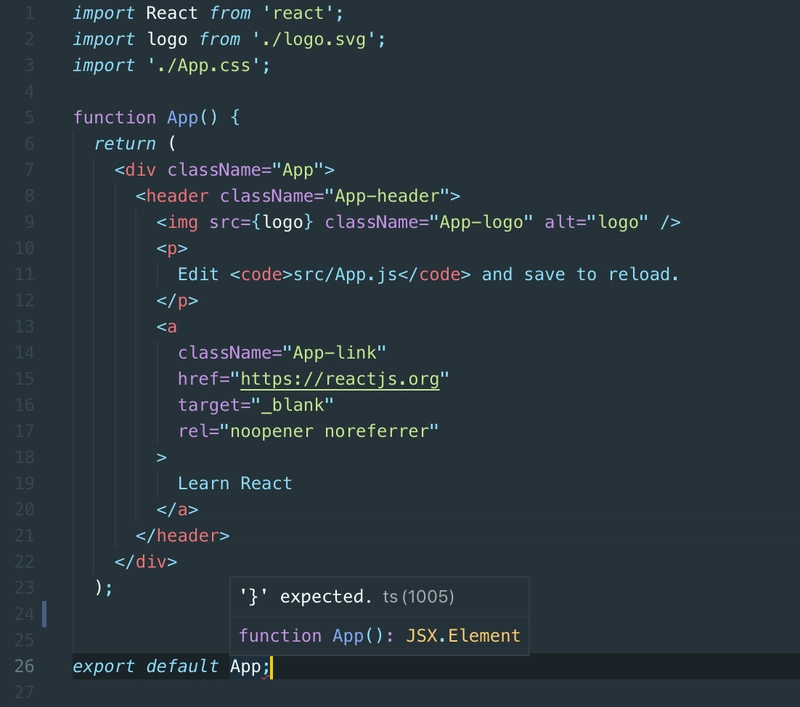
让我们来看一下 App.js 文件:
import React from "react";
import logo from "./logo.svg";
import "./App.css";
function App() {
  return (
    <div className="App">
      <header className="App-header">
        <img src={logo} className="App-logo" alt="logo" />
        <p>
          Edit <code>src/App.js</code> and save to reload.
        </p>
        <a
          className="App-link"
          href="https://reactjs.org"
          target="_blank"
          rel="noopener noreferrer"
        >
          Learn React
        </a>
      </header>
    </div>
  );
}
export default App;
这里我们可以看到初始项目中第一个也是唯一一个 React 组件。
另一个需要提及的文件是App.css:
.App {
  text-align: center;
}
.App-logo {
  animation: App-logo-spin infinite 20s linear;
  height: 40vmin;
  pointer-events: none;
}
.App-header {
  background-color: #282c34;
  min-height: 100vh;
  display: flex;
  flex-direction: column;
  align-items: center;
  justify-content: center;
  font-size: calc(10px + 2vmin);
  color: white;
}
.App-link {
  color: #61dafb;
}
@keyframes App-logo-spin {
  from {
    transform: rotate(0deg);
  }
  to {
    transform: rotate(360deg);
  }
}
这个文件决定了我们在 App.js 中使用的一些样式。但是,CSS 样式并非仅限于 App.js 文件,它是全局样式。
我们还有一个index.css 文件:
body {
  margin: 0;
  font-family: -apple-system, BlinkMacSystemFont, "Segoe UI", "Roboto", "Oxygen",
    "Ubuntu", "Cantarell", "Fira Sans", "Droid Sans", "Helvetica Neue",
    sans-serif;
  -webkit-font-smoothing: antialiased;
  -moz-osx-font-smoothing: grayscale;
}
code {
  font-family: source-code-pro, Menlo, Monaco, Consolas, "Courier New",
    monospace;
}
这个文件实现了全局样式以及一些常规设置,正如我们在应用程序主体部分看到的那样。registerServiceWorker.js
文件对于注册 Service Worker 至关重要。它会预先缓存我们的脚本文件,因此无需进行任何配置。如果您不了解或不关心 Service Worker,也可以安全地删除此文件。 最后是App.test.js文件:
import React from 'react';
import logo from './logo.svg';
import './App.css';
function App() {
  return (
    <div className="App">
      <header className="App-header">
        <img src={logo} className="App-logo" alt="logo" />
        <p>
          Edit <code>src/App.js</code> and save to reload.
        </p>
        <a
          className="App-link"
          href="https://reactjs.org"
          target="_blank"
          rel="noopener noreferrer"
        >
          Learn React
        </a>
      </header>
    </div>
  );
}
export default App;
从本质上讲,它允许我们为应用程序中的不同组件创建单元测试。
总之,任何程序员都希望以高效的方式编写代码,避免手动干预,从而创造一个便捷的编码环境。构建工作流程对于构建大型 React 项目至关重要。你能想象在开始 React 开发之前,必须学习所有这些工具吗?
幸运的是,Create React App 工具让这一切变得更加轻松。
这篇文章是否帮助你理解了 create-react-app 自带的文件和文件夹?请在评论区告诉我。
祝您 React 编码愉快!
文章来源:https://dev.to/amirmoh10/understanding-the-react-build-workflow-and-the-folder-struct-3hlc