我打造了一个自动化出行即服务 (MaaS) 企业,你也可以!
AWS 安全直播!
过去两年,我一直跟朋友和前同事开玩笑说要围绕一个简单的想法——出行即服务(MaaS)——打造一家公司!过去六个月,我一直在各种会议上跟参会者说,我真的、真的、真的在开发一款MaaS产品,希望这样能督促我真正行动起来。虽然历经波折,但我终于完成了,而且它真的有效!
哦——MaaS是什么意思?它指的是“表情包即服务”(Memes as a Service)!当获取一个表情包就像买菜一样简单时,你真的就生活在21世纪了。
我的项目叫做 Memeogram,你现在就可以用啦!你只需要选一个朋友,决定要发多少个表情包,再选一下表情包的“劲爆”程度。大概两周后,他们就会收到邮件啦。
是的,我说的是通过邮件。确切地说是明信片:你绝对想不到表情包会以这种方式送到你手上。
Memeogram 的工作原理如下:发送者填写Typeform表单,我们会收集所有必要的邮寄信息。发送者点击“提交”后,Typeform 的 webhook会将提交内容发送到Firebase 云函数。云函数解析订单,找到最合适的表情包,并向Lob发送打印和邮寄请求,同时通过Mailgun发送电子邮件,让发送者随时了解订单状态。
我知道,它太高级了!
四步打造你的专属出行即服务 (MaaS) 项目
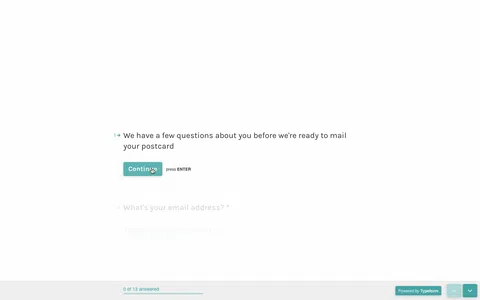
步骤 1:创建 Typeform 表单
如果你想开发类似Memeogram 的应用,首先要创建一个像这样的Typeform 表单:
要使用Lob发送明信片,您需要收集一些信息;主要是寄件人和收件人的姓名,以及他们的邮寄地址,并细分为以下几个字段:
- 街道地址
- 城市
- 状态
- 邮政编码
如果能提供寄件人的电子邮件地址或要在明信片上附上的留言等额外信息就更好了,但使用 Lob 并不需要这些信息。
步骤 2:使用 Firebase 处理 Webhook
创建表单后,下一步是处理提交。此Firebase 云函数可用于处理提交,并将作为 Typeform 在表单提交时发送 POST 请求的端点。
import * as express from 'express';
import * as admin from 'firebase-admin';

// Our endpoint for handling the Typeform Webhook.
export const webhook = async (request: express.Request, response: express.Response) => {
  const submission = request.body;

  // This is our initial postcard, we will fill it out as we continue...
  const postcard = {
    sender: {},
    recipient: {}
  };

  // Here we parse out details from the form submission. By using an answers `ref` we map the response to in our postcard object.
  submission.form_response.answers.forEach((answer: any) => {
    const ref = answer['field']['ref'];
    switch (ref) {
      case 'sender-name':
        order['sender']['name'] = answer.text;
      case 'sender-email':
        order['sender']['email'] = answer.email;
      case 'recipient-name':
        order['recipient']['name'] = answer.text;
        break;
      default:
        break;
    }
  });

  // We will now save the postcard into a collection for our reference
  return admin.firestore().collection('orders').add(postcard)
    // We also will create a status document to keep a sender up to date on their order
    .then((ref) => admin.firestore().collection('status').doc(ref.id).set({
      lastUpdated: new Date(),
      message: 'Order to be sent to Lob',
      email: order.sender.email,
    }))
    .then(() => response.status(200).send({ success: true }));
}
这里发生了两件重要的事情:您将明信片存储在所有集合中orders(这将触发向 Lob 提交),并将明信片订单的状态存储在status集合中(这将用于触发向发件人发送Mailgun状态电子邮件)。
步骤 3. 寄送明信片
Firebase 允许您在 Firestore 集合写入数据时触发函数。例如,当一张新的明信片保存到 Firestore 集合时,您可以触发Lob来打印这张明信片。
import * as admin from 'firebase-admin';
import * as functions from 'firebase-functions';
import { readFileSync } from 'fs';
import { join } from 'path';

const Lob = require('lob')('<YOUR-LOB-API-KEY-HERE>');

// The front and the back of postcards being sent can be stored/created as HTML files, with variables swapped in by Lob
const POSTCARD_FRONT: string = readFileSync(join(__dirname, 'templates', 'front.html'), 'utf8');
const POSTCARD_BACK: string = readFileSync(join(__dirname, 'templates', 'back.html'), 'utf8');

// This function will be triggered whenever a new document is created in the `order` collection. So when the above `webhook` function resolves, this function is automatically triggered.
export const ordersOnCreate = functions.firestore.document('orders/{id}').onCreate((snapshot, context) => {
  const id = context.params.id;
  const postcard = snapshot.data();

  // Let's send the order to Lob for printing!
  return Lob.postcards.create({
    description: `Typeform 💌 Lob - ${id}`,
    to: {
      name: postcard.recipient.name,
      address_line1: postcard.recipient.address,
      address_line2: '',
      address_city: postcard.recipient.city,
      address_state: postcard.recipient.state,
      address_zip: postcard.recipient.zip
    },
    from: {
      name: postcard.sender.name,
      address_line1: postcard.sender.address,
      address_line2: '',
      address_city: postcard.sender.city,
      address_state: postcard.sender.state,
      address_zip: postcard.sender.zip
    },
    front: POSTCARD_FRONT,
    back: POSTCARD_BACK,
    merge_variables: {
      // This is a variable that will be swapped into out postcard HTML templates
      message: postcard.message
    }
  }, (error: any, success: any) => {
    if (error) {
      // If we are unable to send the order to Lob we will update our status with an error
      admin.firestore().collection('status').doc(id).update({
        error: true,
        message: 'Your order could not be sent to Lob',
        lastUpdated: new Date()
      });
    } else {
      // If successful we will update the order status accordingly
      admin.firestore().collection('status').doc(id).update({
        error: false,
        message: 'Your order has been successfully sent to Lob',
        completed: true,
        lastUpdated: new Date(),
        sent: success
      });
    }
  });
});
步骤 4. 使用 Mailgun 通知发件人
您可能已经注意到,前两节中的代码会向status集合中写入数据。这是因为您需要让发件人及时了解其订单状态。就像订单创建时触发的云函数一样,当订单状态创建或更新时,您将触发此函数来发送Mailgun状态邮件。
import * as functions from 'firebase-functions';
import * as Mailgun from 'mailgun-js';

const mailgun = Mailgun({
  apiKey: '<YOUR-MAILGUN-API-KEY-HERE>',
  domain: '<YOUR-MAILGUN-DOMAIN-HERE>'
});

// This function will be triggered whenever a status is created
export const statusOnCreate = functions.firestore.document('status/{statusId}').onCreate((snapshot, context) => {
  // First we parse out the ID of the status document (it should match the order's ID)
  const id = context.params.statusId;
  // Then we parse out the status document
  const status = snapshot.data();
  // We then send the status and id to our `sendEmail` function that will handle sending the email
  return sendEmail(status, id);
});

// This function will be triggered whenever a status is changed (updated)
export const statusOnUpdate = functions.firestore.document('status/{statusId}').onUpdate((change, context) => {
  // Here we just ensure it's an update and not a delete
  if (!change.after) { return Promise.resolve(); }
  const id = context.params.statusId;
  const status = change.after.data();
  return sendEmail(status, id);
});

// All we do here is send the email via Mailgun
function sendEmail(status: any, id: string): Promise<any> {
  return mailgun.messages().send({
    from: 'support@typeform.com',
    to: status.email,
    subject: `Typeform 💌 Lob - Order ${id} Update`,
    text: `${status.message} \n View order at https://typeform-lob.firebaseapp.com/order?id=${id}`
  });
}
最终产品
在 Firebase 上部署项目后,您可以填写表单并观察流程运行情况,直到收到确认电子邮件,您可以使用该电子邮件跟踪订单。

自己动手试试吧!本指南将引导您完成上述应用程序的设置和部署的整个过程:
git clone https://github.com/MichaelSolati/typeform-lob.git
cd typeform-lob
npm i
npm run start
或者您可以直接在这里尝试已部署的演示应用程序版本。
虽然表情包很有趣,但它还有其他一些实际用途,例如,你想自动向购买你产品的客户发送感谢卡,或者需要一个平台通过邮件联系当地的国会议员。
想了解我的最新动态,请在Twitter上关注我。如果你想看代码,可以在GitHub上找到我。
文章来源:https://dev.to/michaelsolati/i-made-an-automated-maas-business-and-so-can-you-1e