React 中的转发 Ref
本文将探讨 Refs 的另一个概念:转发 Refs。但在理解转发 Refs 之前,我们首先需要了解什么是 Refs,为什么要使用它以及如何创建它。我在之前的文章中已经详细讲解了 Refs 的概念以及在 React 中创建 Refs 的不同方法。如果您还不了解 Refs,可以点击此处阅读我的文章。

在编写 React 应用时,有时我们需要将父组件的 ref 传递给子组件,以便访问子组件的 DOM 元素。我们知道,在 React 中,数据通过 props 从上到下流动。因此,如果我们需要改变子组件的行为,就可以将 props 从父组件传递给子组件。
根据 React文档:
引用转发是一种将引用自动从一个组件传递给其子组件的技术。对于应用程序中的大多数组件来说,这通常不是必需的。但是,对于某些类型的组件,尤其是在可重用组件库中,它非常有用。
太长不看
使用 React.forwardRef() 转发 Ref
就像使用 props 向子组件传递数据一样,我们也可以使用 ref 传递数据。首先,我们将创建如下所示的两个组件:
import React, { Component } from "react";
import Input from "./Input";

export default function CreateRefApiExample() {
  return (
    <div style={{ border: "1px solid red", width: "400px" }}>
      <b>Parent Component</b>
      <br />
      <br />
      <Input />
      <button style={{ margin: "8px" }}>Click!</button>
    </div>
  );
}
CreateRefApiExample 是我们的父组件。
import React from "react";

export default function Input() {
  return (
    <div style={{ border: "1px solid green", width:"300px", margin:"16px" }}>
      Child Component
      <br />
      Name: <input type="text" style={{ margin: "32px 0 32px 0" }} />
    </div>
  );
}
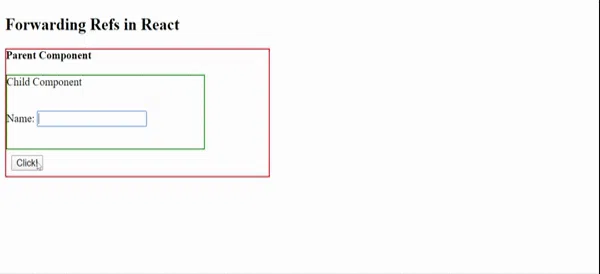
输入组件是子组件。因此,运行代码后,结果如下所示:

您可以看到,Input 组件是 CreateRefApiExample 的子组件。所以现在我们想要实现的是,当我们点击CreateRefApiExample(即父组件)中的点击按钮时,Input 组件中的输入字段应该获得焦点。
因此,为了实现这一点,我们必须在父组件中创建一个引用并将其传递给子组件,当用户点击按钮时,我们必须使输入框获得焦点。
我们先使用React.createRef()API 在父组件中创建一个 ref。
let inputRef = React.createRef();
并将其传递给子组件。
import React, { Component } from "react";
import Input from "./Input";

export default function CreateRefApiExample() {
  let inputRef = React.createRef();

  return (
    <div style={{ border: "1px solid red", width: "400px" }}>
      <b>Parent Component</b>
      <br />
      <br />
      <Input ref={inputRef} />
      <button style={{ margin: "8px" }}>Click!</button>
    </div>
  );
}
下一步是如何在 Input 组件中接收这个 ref 并将其赋值给input标签。这可以通过React.forwardRef() API 来实现。首先,用 React.forwardRef 函数包裹 Input 组件,这样我们就能访问传递给该组件的 ref 了。
import React from "react";

export default React.forwardRef(function Input(props, ref) {
  return (
    <div style={{ border: "1px solid green", width:"300px", }}>
      Child Component
      <br />
      Name: <input
              type="text"
              ref={ref}
              style={{ margin: "32px 0 32px 0" }} />
    </div>
  );
})
观察到 ref 不是 props 的一部分,由于 React.forwardRef() API 的原因,它将作为单独的参数与 props 一起传递。
此时,我们已经创建了一个新的引用(ref ie)inputRef并将其传递给输入组件。下一步是我们需要在父组件中访问该引用,并在用户点击按钮时触发其焦点事件。
创建onClick如下所示的处理函数
 const handleClick = () => {
    inputRef.current.focus();
  };
并将其绑定到按钮onClick事件。
import React, { Component } from "react";
import Input from "./Input";

export default function CreateRefApiExample() {
  let inputRef = React.createRef();

  const handleClick = () => {
    inputRef.current.focus();
  };

  return (
    <div style={{ border: "1px solid red", width: "400px" }}>
      <b>Parent Component</b>
      <br />
      <br />
      <Input ref={inputRef} />
      <button style={{ margin: "8px" }} onClick={handleClick}>
        Click!
      </button>
    </div>
  );
}
运行应用程序并查看输出结果:
你也可以使用 Hook 来实现同样的功能useRef()。如果你想尝试使用 Hook,只需创建 `using` 语句ref而useRef()不是React.createRef()API,其他代码保持不变即可。
import React, { useRef } from "react";
import Input from "./Input";

export default function CreateRefApiExample() {
  //let inputRef = React.createRef();

  let inputRef = useRef(null);

  const handleClick = () => {
    inputRef.current.focus();
  };

  return (
    <div style={{ border: "1px solid red", width: "400px" }}>
      <b>Parent Component</b>
      <br />
      <br />
      <Input ref={inputRef} />
      <button style={{ margin: "8px" }} onClick={handleClick}>
        Click!
      </button>
    </div>
  );
}
结论
在本文中,我解释了 React JS 中的转发 Ref,并创建了使用 ref 的简单示例。
我真心希望您喜欢这篇文章,如果您有任何想法或建议,请随时告诉我,我有哪些地方可以做得更好。
你可以在推特上关注我@sumitkharche01
祝您编程愉快!
文章来源:https://dev.to/sumitkharche/forwarding-refs-in-react-1p0b