使用 Next.js 和 React-Notion-X 构建受电子邮件保护的 Notion 页面
由 Mux 赞助的 DEV 全球展示挑战赛:展示你的项目!
本文将介绍哪些内容?
在信息共享时代,保护敏感内容至关重要。Notion 已成为一款流行的内容管理工具,但如果您需要限制访问权限该怎么办?
电子邮件保护是一种简单而有效的控制内容访问权限的方法。通过要求访客输入电子邮件地址,您不仅可以限制访问权限,还可以收集潜在客户信息或反馈。
在本教程中,我们将逐步讲解如何使用 Next.js 构建一个受电子邮件保护的 Notion 页面react-notion-x。

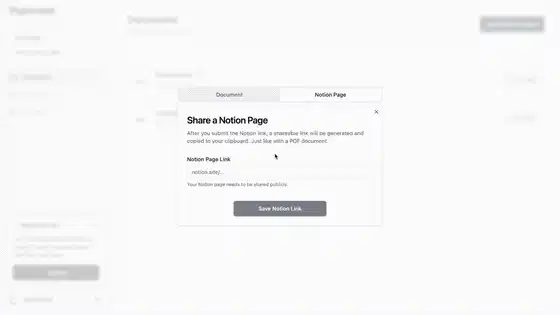
Papermark——DocSend的开源替代方案。
在正式开始之前,让我先向大家介绍一下 Papermark。它是 DocSend 的一个开源替代方案,可以帮助您安全地将 PDF 文档共享到 Notion 页面,并获取查看者的实时逐页分析。它是完全开源的!
如果您能给我们点个赞,我们将不胜感激!别忘了在评论区分享您的想法哦❤️
https://github.com/mfts/papermark
设置项目
接下来,我们将为 Notion Lead Generator 应用搭建项目环境。我们将创建一个 Next.js 应用、react-notion-x 和 Tailwind CSS。
使用 TypeScript 和 Tailwind CSS 配置 Next.js
我们将使用它create-next-app来创建一个新的 Next.js 项目。我们还会使用 TypeScript 和 Tailwind CSS,所以请确保在提示时选择这些选项。
npx create-next-app

# ---
# you'll be asked the following prompts
What is your project named?  my-app
Would you like to add TypeScript with this project?  Y/N
# select `Y` for typescript
Would you like to use ESLint with this project?  Y/N
# select `Y` for ESLint
Would you like to use Tailwind CSS with this project? Y/N
# select `Y` for Tailwind CSS
Would you like to use the `src/ directory` with this project? Y/N
# select `N` for `src/` directory
What import alias would you like configured? `@/*`
# enter `@/*` for import alias
正在设置 react-notion-x
接下来,我们将安装react-notion-x用于获取 Notion 页面数据的组件。notion-client、notion-utils和notion-types是同级依赖项,并且包含的辅助方法react-notion-x,因此我们也需要安装它们。
npm install react-notion-x notion-client notion-utils notion-types
构建应用程序
现在我们已经完成了所有设置,可以开始构建应用程序了。我们将介绍的主要功能包括:
- 使用 React 渲染 Notion 页面内容
- 在页面上添加电子邮件收集表单
#1 使用 React 渲染 Notion 页面内容
让我们创建一个包含 Notion 页面内容的组件。我们将创建一个新组件components/notion-page.tsx,并将以下代码添加到其中。
// components/notion-page.tsx
import { ExtendedRecordMap } from "notion-types";
import { NotionRenderer } from "react-notion-x";
// core styles shared by all of react-notion-x (required)
import "react-notion-x/src/styles.css";

export const NotionPage = ({ recordMap }: { recordMap: ExtendedRecordMap }) => {
  if (!recordMap) {
    return null;
  }

  return (
    <div className="bg-white">
      <NotionRenderer
        recordMap={recordMap}
        fullPage={true}
        darkMode={false}
        disableHeader={true}
      />
    </div>
  );
};
// pages/index.tsx
import { NotionAPI } from "notion-client";
import { type ExtendedRecordMap } from "notion-types";
import { parsePageId } from "notion-utils";
import { type GetStaticPropsContext } from "next";

const notion = new NotionAPI();

export const getStaticProps = async (context: GetStaticPropsContext) => {
  const notionUrl = "https://www.notion.so/..."; // enter your Notion page URL here

  let pageId = null;
  let recordMap = null;

  const notionPageId = parsePageId(file, { uuid: false });
  if (!notionPageId) {
    return {
      notFound: true,
    };
  }

  pageId = notionPageId;
  recordMap = await notion.getPage(pageId);

  return {
    props: {
      notionData: {
        recordMap,
      },
    },
  };
};

export async function getStaticPaths() {
  return {
    paths: [],
    fallback: true,
  };
}

export default function Page({
  notionData,
}: {
  notionData: {
    recordMap: ExtendedRecordMap | null;
  };
}) {
  return <NotionPage notionData={notionData} />;
}

#2 向页面添加电子邮件收集表单
现在我们已经有了 Notion 页面的内容,接下来可以向页面添加一个邮箱地址收集表单。我们将创建一个新组件components/email-capture.tsx,并将以下代码添加到其中。
// components/email-capture.tsx
import { useEffect } from "react";
import { Button } from "@/components/ui/button";

export default function EmailCapture({
  email,
  setEmail,
  onSubmitHandler,
  isLoading,
}: {
  email: string;
  setEmail: React.Dispatch<React.SetStateAction<string>>;
  onSubmitHandler: React.FormEventHandler<HTMLFormElement>;
  isLoading: boolean;
}) {
  return (
    <>
      <div className="flex h-screen flex-1 flex-col  px-6 py-12 lg:px-8 bg-black">
        <div className="sm:mx-auto sm:w-full sm:max-w-md">
          <h2 className="mt-10 text-2xl font-bold leading-9 tracking-tight text-white">
            Your action is requested to continue
          </h2>
        </div>

        <div className="mt-10 sm:mx-auto sm:w-full sm:max-w-md">
          <form className="space-y-4" onSubmit={onSubmitHandler}>
            <div className="pb-5">
              <div className="relative rounded-md shadow-sm space-y-2">
                <label
                  htmlFor="email"
                  className="block text-sm font-medium leading-6 text-white">
                  Email address
                </label>
                <input
                  name="email"
                  id="email"
                  type="email"
                  autoComplete="email"
                  className="flex w-full rounded-md border-0 py-1.5 text-white bg-black shadow-sm ring-1 ring-inset ring-gray-600 placeholder:text-gray-400 focus:ring-2 focus:ring-inset focus:ring-gray-300 sm:text-sm sm:leading-6"
                  placeholder="Enter email"
                  onChange={(e) => {
                    setEmail(e.target.value);
                  }}
                  aria-invalid="true"
                />
                <p className="text-sm text-gray-600">
                  This data will be shared with the owner of this Notion page.
                </p>
              </div>
            </div>

            <div className="flex justify-center">
              <Button type="submit" className="w-1/3" loading={isLoading}>
                Continue
              </Button>
            </div>
          </form>
        </div>
      </div>
    </>
  );
}
// pages/index.tsx
// ...

export default function Page({
  notionData,
}: {
  notionData: {
    recordMap: ExtendedRecordMap | null;
  };
}) {
  const [email, setEmail] = useState<string>("");
  const [submitted, setSubmitted] = useState<boolean>(false);
  const [isLoading, setIsLoading] = useState<boolean>(false);

  const handleSubmit = async (e: React.FormEvent<HTMLFormElement>) => {
    e.preventDefault();
    setIsLoading(true);
    const res = await fetch(`< API_ENDPOINT >`, {
      method: "POST",
      body: JSON.stringify({ email }),
    });
    setSubmitted(true);
    setIsLoading(false);
  };

  // If email is not submitted, show the access form
  if (!submitted) {
    return (
      <EmailCapture
        email={email}
        setEmail={setEmail}
        onSubmitHandler={handleSubmit}
        isLoading={isLoading}
      />
    );
  }

  return (
    <div className="bg-gray-950">
      {submitted && notionData?.recordMap ? (
        <NotionPage recordMap={notionData.recordMap} />
      ) : null}
    </div>
  );
}

注意:react-notion-x此功能仅适用于可公开访问的 Notion 页面。不过不用担心,因为 Notion 页面内容是在服务器端进行服务端渲染 (SSR) 的,所以它不是公开可访问的,客户端也不会暴露公开的 Notion ID。
结论
太棒了!现在您可以使用 Next.js 创建受电子邮件保护的 Notion 页面了react-notion-x。开始与世界分享您的内容,并收集来自真实用户的潜在客户信息和反馈吧!
感谢您的阅读。我是Marc,一位开源倡导者。我正在开发papermark.com ——DocSend的开源替代方案。
尽情享受搭建的乐趣吧!
帮帮我!
如果您觉得这篇文章对您有所帮助,并且让您了解了 react-notion-x、Next.js 和 SSR,如果您能给我们点个赞,我将不胜感激!也别忘了在评论区分享您的想法哦❤️
https://github.com/mfts/papermark