Prisma 2 简介
作者:Akshay Kadam ✏️
Prisma 2 提供了一个抽象层,允许我们使用 JavaScript 方法和对象编写数据库查询。
这样对我们来说就方便多了,因为我们不必用数据库语言本身来编写查询。
Prisma 2 将我们用所选语言编写的查询映射到我们选择的数据库中。目前,它仅支持 MySQL、SQLite 和 PostgreSQL。
Prisma 2 预览版于 2019 年 6 月 18 日发布。截至撰写本文时,Prisma 2 已面向早期用户开放测试,并已基本准备好投入生产环境使用。

您可以在isprisma2ready.com上查看 Prisma 2 正式版发布的最新状态。

Prisma 2是什么?
Prisma 2 是一个数据库框架,它由 3 个主要工具组成:
- Prisma Client JS:类型安全且自动生成的数据库客户端(“ORM 替代品”)
- Prisma Migrate:具有自定义工作流的声明式迁移系统
- Prisma Studio:一个支持各种数据库工作流程的管理用户界面
1. Prisma 客户端 JS
Prisma Client JS 是一个类型安全的数据库客户端,可以替代传统的 ORM,如 Sequelize、Bookshelf 和 Mongoose。
它允许我们通过纯 JavaScript 方法和对象访问数据库,而无需用数据库语言本身编写查询。
简而言之,它充当数据库前面的抽象层,因此更容易编写 CRUD(创建、读取、更新和删除)应用程序。
2. Prisma Migrate
Prisma Migrate 是一款功能强大的数据库模式迁移工具。它使用声明式数据建模语法来描述数据库模式。
Prisma Migrate 还会存储我们所有的迁移历史记录,并让我们轻松地还原和重放迁移。
它还允许我们在迁移过程中运行前置和后置钩子来执行脚本,以便我们可以在迁移期间用所需的值填充数据库。
目前,它还处于试验阶段。
3. Prisma Studio
Prisma Studio 允许我们通过管理界面可视化数据。
在这里,我们可以对数据执行 CRUD(创建、读取、更新和删除)操作。这是可视化和操作数据库中数据的最简便方法。
先决条件
要学习本教程,你需要具备 Node.js 的基础知识,了解如何从npm安装软件包以及如何运行 npm 脚本。
为了确保我们理解一致,以下是本教程中使用的版本:
- 节点 v13.7.0
- npm 版本 6.13.6
- npx 版本 6.13.6
- prisma2 v2.0.0-preview020.3
入门
首先,我们需要进行prisma2全局安装。为此,请在终端中输入以下命令:
$ npm install --global prisma2
上述命令将进行prisma2全局安装,因此现在我们可以prisma2从任何地方通过终端访问它。
请在终端中输入以下命令来启动一个新prisma2项目:
$ prisma2 init hello-world
现在终端应该会输出以下内容:
✔ Your Prisma schema was created at hello-world/prisma/schema.prisma. You can now open it in your favorite editor.

Next steps
1. Run cd hello-world to go to the newly created folder.
2. Set your DB connection string as the `url` of the `datasource` block.
3. Run prisma2 introspect to test the connection and obtain your data model.
4. Run prisma2 generate to generate Prisma Client.

You can then start using Prisma Client in your application:

import { PrismaClient } from '@prisma/client'
// or const { PrismaClient } = require('@prisma/client')

const prisma = new PrismaClient()

More information in our documentation:
https://pris.ly/getting-started
通过输入命令prisma2 init,我们启动了一个新的 Prisma 2 项目并将其命名为hello-world。现在我们可以按照命令输出中的说明进行操作prisma2 init。
hello-world首先,在终端中输入以下命令进入文件夹:
$ cd hello-world
用你最喜欢的文本编辑器或集成开发环境(IDE)打开文件夹。对我来说,我用的是Visual Studio Code(VSCode)。
hello-world我可以在终端中输入以下命令,在新 VSCode 窗口中打开它:
$ code .
如果你使用其他文本编辑器,例如 Sublime 或 Brackets,它也会有类似的命令。
Prisma模式文件
现在你应该看到prisma/里面有一个名为 的文件夹,其中包含一个名为 的文件schema.prisma。
请打开它。里面应该包含以下内容:
// This is your Prisma schema file,
// learn more about it in the docs: https://pris.ly/d/prisma-schema

// The `datasource` block is used to specify the connection to your DB.
// Set the `provider` field to match your DB type: "postgresql", "mysql" or "sqlite".
// The `url` field must contain the connection string to your DB.
// Learn more about connection strings for your DB: https://pris.ly/connection-strings
datasource db {
  provider = "postgresql" // other options are: "mysql" and "sqlite"
  url      = "postgresql://johndoe:johndoe@localhost:5432/mydb?schema=public"
}
// Other examples for connection strings are:
// SQLite: url = "sqlite:./dev.db"
// MySQL:  url = "mysql://johndoe:johndoe@localhost:3306/mydb"
// You can also use environment variables to specify the connection string: https://pris.ly/prisma-schema#using-environment-variables

// By adding the `generator` block, you specify that you want to generate Prisma's DB client.
// The client is generated by runnning the `prisma generate` command and will be located in `node_modules/@prisma` and can be imported in your code as:
// import { Prisma Client } from '@prisma/client'
generator client {
  provider = "prisma-client-js"
}

// Next steps:
// 1. Add your DB connection string as the `url` of the `datasource` block
// 2. Run `prisma2 introspect` to get your data model into the schema (this will override this file and delete all comments!)
// 3. Run `prisma2 generate` to generate Prisma Client JS
// 4. Start using Prisma Client JS in your application
现在请删除所有注释,并将文件内容更改schema.prisma为以下内容:
// 1
datasource db {
  provider = "sqlite"
  url      = "sqlite:./dev.db"
}

// 2
generator client {
  provider = "prisma-client-js"
}

// 3
model User {
  id    String @default(cuid()) @id
  name  String
  todos Todo[]
}

// 4
model Todo {
  id        String  @default(cuid()) @id
  text      String
  completed Boolean @default(false)
}
该schema.prisma文件包含数据模型以及配置选项。让我们来详细分析一下。
- 该
datasource代码块用于指定与数据库的连接。我们将该provider字段设置为sqlite.
SQLite 是一款嵌入式数据库软件,可以安装在从低功耗设备到内存较小的设备的任何位置。
它允许我们在无需安装任何软件的情况下创建本地数据库。
该url字段包含数据库的连接字符串。接下来输入的内容sqlite:将用于创建数据库。
在我们的例子中,数据库将在prisma/名为 的文件夹中创建dev.db。
- 通过添加该
generator代码块,我们指定要生成 Prisma 的数据库客户端。
客户端是通过运行prisma generate命令生成的,它将位于[此处] 。node_modules/@prisma.它可以作为[此处]导入到我们的代码中import { PrismaClient } from '@prisma/client'。
User然后,我们使用代码块定义数据模型model。模型代表我们应用程序领域的实体。
从技术层面来说,模型映射到数据源的底层结构。
例如,在关系型数据库(如 SQL Server SQL、SQLiteSQL Server 和 SQL Server )中PostgreSQL,模型映射到表;而在非关系型数据库(如 SQL Server)中MongoDB,模型则映射到集合。我们的User模型包含三个属性,分别是:模型名称、模型类型id和name模型参数todos。
该id字段是类型为 的主键,String默认值为cuid()。要确定模型中的哪个字段是 ID 字段,我们可以使用该@id属性对其进行注释。
在关系型数据库(如 B SQL、SQLiteC 和PostgreSQLD)中,唯一 ID 对应于具有主键约束的列。
该字段name的类型为列表,我们稍后会定义它。它包含一个类型修饰符,使该字段成为一个列表。因此,我们可以在数据模型中存储待办事项列表。StringtodosTodo[]User
- 最后,我们定义
Todo数据模型。Todo数据模型包含 3 个字段:即id,,text和completed。同样,id字段是类型的主键String,默认值为cuid()。
该text字段类型为String。最后,该completed字段类型Boolean为,默认值为false。
生成空package.json
我们来生成一个package.json文件。
在终端中输入以下命令:
$ npm init -y
上述命令package.json通过告诉生成器使用默认值来生成文件,而无需经过询问问题的交互式过程。
安装 Prisma Client JS
@prisma/client现在,请按如下方式将 Prisma Client 添加到项目中npm:
$ npm install @prisma/client
请输入以下命令生成 Prisma 客户端:
$ prisma2 generate
生成的客户端将位于node_modules/@prisma,因此我们可以将 Prisma Client 导入到我们的代码中import { PrismaClient } from '@prisma/client'。
使用 Prisma Migrate 迁移数据库
现在让我们迁移数据库以创建空表。
数据库迁移是一个两步过程:
- 保存新的迁移(迁移在文件系统中以目录的形式表示)
- 运行迁移(以迁移底层数据库的架构)
在 CLI 命令中,可以按如下方式执行这些步骤(CLI 步骤正在更新以与之匹配):
$ prisma2 migrate save --name 'Init' --experimental
$ prisma2 migrate up --experimental
如果出现如下提示,请选择“是”:
You are trying to apply a migration for Sqlite database /dev.db.
A database with that name doesn't exist at sqlite:./dev.db.
Do you want to create the database?

┌─ Database options ────────────────────────────────────────────────────────────────────┐
│                                                                                       │
│ ❯ Yes            Create new Sqlite database /dev.db                                   │
│   No             Don't create the database                                            │
│
由于 Prisma Migrate 仍处于实验阶段,我们需要添加相应--experimental的标志。上述命令将创建一个dev.db包含空表的文件。
包含初始值的种子数据库
请在文件夹seed.js内创建一个名为“……”的文件prisma/。
$ touch prisma/seed.js
现在,打开一个seed.js文件,首先导入 Prisma Client:
const { PrismaClient } = require("@prisma/client")

const prisma = new PrismaClient()

const main = async () => {

}

main()
  .catch(e => console.error(e))
  .finally(async () => {
    await prisma.disconnect()
  })
首先,我们PrismaClient从包中导入了内容,该包是在我们运行命令时@prisma/client根据模式文件生成的。接下来,我们创建了一个名为 的常量,它是 的一个实例。schema.prismaprisma2 generateprismaPrismaClient
稍后,我们将有一个async名为“—”的函数main,目前它是空的,但我们稍后会填充它。
最后,我们调用一个main()函数。如果它有任何错误,我们会catch()捕获并显示它们console.error。无论是否捕获到错误,我们都会运行该finally()函数。
该finally()函数本身包含一个async回调函数,用于断开与 Prisma 数据库的连接,以免数据库持续运行,因为我们只是在初始化数据库。
现在打开main()函数并粘贴以下内容:
const sasha = await prisma.users.create({
  data: {
    name: "Sasha"
  }
})

console.log(sasha)
如果您输入以上代码,将会发现 TypeScript 提供了自动补全功能。以上代码将创建一个名为 . 的用户Sasha。
我们可以通过生成的实例上的相应模型属性访问每个函数PrismaClient,例如,users对于User模型:
注意:名称是使用pluralize
users包自动生成的。因此,建议将模型命名为单数形式,而不是复数形式。UserUsers
这是创建用户的最简单方法,只需为其添加一个name字段即可。
请seed.js在终端中输入以下命令来运行该文件:
$ node prisma/seed
控制台应该输出以下内容:
{ id: 'ck60v6k5c000044v5a0eqc0yg', name: 'Sasha' }
现在,在下面,我们创建另一个用户,johnny同时设置todos:
const johnny = await prisma.users.create({
  data: {
    name: "Johnny",
    todos: {
      create: [
        {
          text: "Do dishes"
        },
        {
          text: "Walk the dog"
        }
      ]
    }
  }
})

console.log(johnny)
这里,我们创建一个用户,用户名Johnny与上面相同。不同之处在于,我们还创建了一个待办事项列表。
该todos字段是一个对象,它接受一个对象数组create。create
这些对象是包含数据模型中todo字段的实际项id,,text和。completedTodo
注意:Prisma 拥有强大的自动补全功能,因此我们无需记住数据模型或
create对象。相关信息会显示在自动补全建议列表中,帮助我们快速编写代码,同时获得卓越的开发者体验 (DX)。
这是一个使用 . 创建示例user。todos同样,运行该seed.js文件,您应该会在控制台中看到以下输出:
{ id: 'ck60v6k5o000144v5jgn4t583', name: 'Johnny' }
注意:虽然不会返回结果
todos,但它确实会将它们添加到数据库中。查询数据库时我们就能看到这些结果。
让我们创建一个无需用户的待办事项,只需在下方输入以下内容:
const run = await prisma.todos.create({
  data: {
    text: "Run a full marathon"
  }
})

console.log(run)
上述代码只会创建一个待办事项,而不会为其分配任何用户。运行该seed.js文件即可查看如下输出:
{
  id: 'ck60v6k5t000444v5gc1vv3cs',
  text: 'Run a full marathon',
  completed: false
}
让我们通过在下方输入以下内容来创建一个包含用户的待办事项:
const grocery = await prisma.todos.create({
  data: {
    text: "Buy groceries for the week",
    user: {
      create: {
        name: "Amelia"
      }
    }
  }
})

console.log(grocery)
上述代码将创建一个待办事项,并将其分配给名为 的用户Amelia。运行该seed.js文件,即可在控制台中看到以下输出:
{
  id: 'ck60v6k5x000544v5y5oig1qq',
  text: 'Buy groceries for the week',
  completed: false
}
注意:它不会返回结果
user,但肯定会将它们添加到数据库中。查询数据库时我们就能看到这些结果。
整个seed.js文件现在应该看起来像这样:
const { PrismaClient } = require("@prisma/client")

const prisma = new PrismaClient()

const main = async () => {
  const sasha = await prisma.users.create({
    data: {
      name: "Sasha"
    }
  })

  console.log(sasha)

  const johnny = await prisma.users.create({
    data: {
      name: "Johnny",
      todos: {
        create: [
          {
            text: "Do dishes"
          },
          {
            text: "Walk the dog"
          }
        ]
      }
    }
  })

  console.log(johnny)

  const run = await prisma.todos.create({
    data: {
      text: "Run a full marathon"
    }
  })

  console.log(run)

  const grocery = await prisma.todos.create({
    data: {
      text: "Buy groceries for the week",
      user: {
        create: {
          name: "Amelia"
        }
      }
    }
  })

  console.log(grocery)
}

main()
  .catch(e => console.error(e))
  .finally(async () => {
    await prisma.disconnect()
  })
请index.js使用以下命令在根文件夹中创建一个文件:
$ touch index.js
我们先来导入 Prisma 客户端:
const { PrismaClient } = require("@prisma/client")

const prisma = new PrismaClient()

const main = async () => {

}

main()
  .catch(e => console.error(e))
  .finally(async () => {
    await prisma.disconnect()
  })
注意:这是一个演示项目,所以我们关闭了与数据库的连接。在实际应用中,服务器会持续运行,因此理论上我们只会调用
main()函数,而不会使用代码finally()块。
首先,我们在main()函数内部添加以下代码:
const users = await prisma.users.findMany()

console.log(users)
上述代码会查找所有用户,因为其中没有指定任何条件findMany()。要运行该index.js文件,请在终端中输入以下命令:
$ node index
输出结果应如下所示:
[
  { id: 'ck60v6k5c000044v5a0eqc0yg', name: 'Sasha' },
  { id: 'ck60v6k5o000144v5jgn4t583', name: 'Johnny' },
  { id: 'ck60v6k5x000644v5f4opbbv5', name: 'Amelia' }
]
在下方添加以下代码块:
const usersWithTodos = await prisma.users.findMany({
    include: {
      todos: true
    }
  })

console.log(JSON.stringify(usersWithTodos, null, 2))
上面的代码返回所有users,但也包括已创建todos的user。
上述方法JSON.stringify()允许我们以适当的间距格式化输出 JSON 数据2。运行该index.js文件即可查看如下输出:
[
  {
    "id": "ck60v6k5c000044v5a0eqc0yg",
    "name": "Sasha",
    "todos": []
  },
  {
    "id": "ck60v6k5o000144v5jgn4t583",
    "name": "Johnny",
    "todos": [
      {
        "id": "ck60v6k5o000244v5kzryzqgx",
        "text": "Do dishes",
        "completed": false
      },
      {
        "id": "ck60v6k5o000344v5ngbt91qd",
        "text": "Walk the dog",
        "completed": false
      }
    ]
  },
  {
    "id": "ck60v6k5x000644v5f4opbbv5",
    "name": "Amelia",
    "todos": [
      {
        "id": "ck60v6k5x000544v5y5oig1qq",
        "text": "Buy groceries for the week",
        "completed": false
      }
    ]
  }
]
现在,请在其下方添加以下代码段:
const todos = await prisma.todos.findMany()

console.log(todos)
与第一个users查询类似,它会在数据库中查找所有待办事项。运行该index.js文件即可查看输出结果:
[
  {
    id: 'ck60v6k5o000244v5kzryzqgx',
    text: 'Do dishes',
    completed: false
  },
  {
    id: 'ck60v6k5o000344v5ngbt91qd',
    text: 'Walk the dog',
    completed: false
  },
  {
    id: 'ck60v6k5t000444v5gc1vv3cs',
    text: 'Run a full marathon',
    completed: false
  },
  {
    id: 'ck60v6k5x000544v5y5oig1qq',
    text: 'Buy groceries for the week',
    completed: false
  }
]
在下方添加以下代码:
const todosWithUsers = await prisma.todos.findMany({
  include: {
    user: true
  }
})

console.log(JSON.stringify(todosWithUsers, null, 2))
与第二个users查询类似,它将找到所有todos与user该查询相关的结果todo。
再次运行该index.js文件,即可查看以美观格式打印的输出结果,内容如下:
[
  {
    "id": "ck60v6k5o000244v5kzryzqgx",
    "text": "Do dishes",
    "completed": false,
    "user": {
      "id": "ck60v6k5o000144v5jgn4t583",
      "name": "Johnny"
    }
  },
  {
    "id": "ck60v6k5o000344v5ngbt91qd",
    "text": "Walk the dog",
    "completed": false,
    "user": {
      "id": "ck60v6k5o000144v5jgn4t583",
      "name": "Johnny"
    }
  },
  {
    "id": "ck60v6k5t000444v5gc1vv3cs",
    "text": "Run a full marathon",
    "completed": false,
    "user": null
  },
  {
    "id": "ck60v6k5x000544v5y5oig1qq",
    "text": "Buy groceries for the week",
    "completed": false,
    "user": {
      "id": "ck60v6k5x000644v5f4opbbv5",
      "name": "Amelia"
    }
  }
]
请注意,当我们创建待办事项时Run a full marathon,我们没有指定用户,这就是它存在的原因null。
整个index.js文件现在应该看起来像这样:
const { PrismaClient } = require("@prisma/client")

const prisma = new PrismaClient()

async function main() {
  const users = await prisma.users.findMany()

  console.log(users)

  const usersWithTodos = await prisma.users.findMany({
    include: {
      todos: true
    }
  })

  console.log(JSON.stringify(usersWithTodos, null, 2))

  const todos = await prisma.todos.findMany()

  console.log(todos)

  const todosWithUsers = await prisma.todos.findMany({
    include: {
      user: true
    }
  })

  console.log(JSON.stringify(todosWithUsers, null, 2))
}

main()
  .catch(e => console.error(e))
  .finally(async () => {
    await prisma.disconnect()
  })
Prisma Studio – 使用管理界面可视化数据
Prisma Studio 允许我们使用美观的管理界面来可视化数据。它还允许我们对数据执行 CRUD(创建、读取、更新、删除)操作。
要打开 Prisma Studio,请在终端中输入以下命令:
$ prisma2 studio --experimental
由于 Prisma Studio 仍处于实验阶段,我们需要添加相应--experimental的标志。现在打开http://localhost:5555查看管理界面。
使用管理界面,我们可以快速对数据进行排序、筛选,甚至执行查询,而无需在脚本文件中编写查询语句。
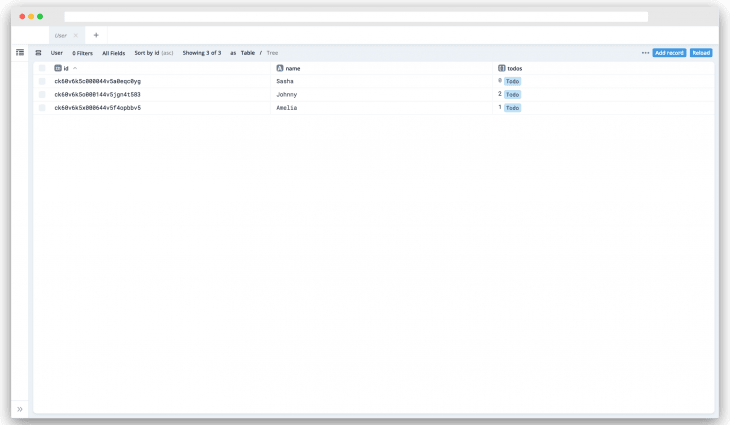
以下是管理员界面的一些截图:
1. 用户表
2.待办事项表

3. 运行查询

您可以在Github上找到本教程中使用的所有源代码。
结论
总而言之,我们学习了 Prisma 2 的基础知识。它有 3 个主要工具,分别是:Prisma Client、Prisma Migrate 和 Prisma Studio。
我们使用 Prisma Client 将值初始化到数据库中,并从数据库中查询数据。
之后,我们使用 Prisma Migrate 创建了初始迁移。最后,我们使用 Prisma Studio 通过美观的管理界面可视化了数据。
Prisma 2 目前仍处于早期阶段,潜力巨大。Prisma 团队在开发者体验方面做得非常出色。
虽然它还没有完全准备好,但你可以成为早期用户。
不妨一试,你不会失望的。
插件:LogRocket,一款用于 Web 应用的 DVR

LogRocket是一款前端日志工具,可让您重现问题,如同在您自己的浏览器中发生一样。无需猜测错误原因,也无需用户提供屏幕截图和日志转储,LogRocket 即可让您重现会话,快速了解问题所在。它与任何框架的应用程序完美兼容,并提供插件来记录来自 Redux、Vuex 和 @ngrx/store 的额外上下文信息。
除了记录 Redux 操作和状态之外,LogRocket 还会记录控制台日志、JavaScript 错误、堆栈跟踪、包含标头和正文的网络请求/响应、浏览器元数据以及自定义日志。它还会对 DOM 进行插桩,记录页面上的 HTML 和 CSS,即使是最复杂的单页应用程序,也能生成像素级精确的视频。
免费试用。
本文《Prisma 2 简介》最初发表于LogRocket 博客。
文章来源:https://dev.to/bnevilleoneill/an-introduction-to-prisma-2-430b